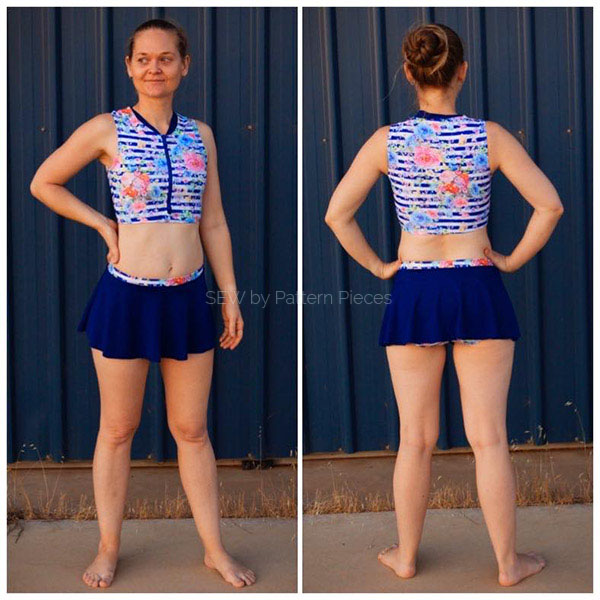
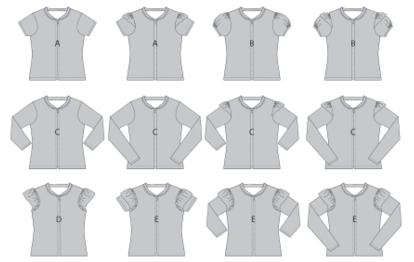
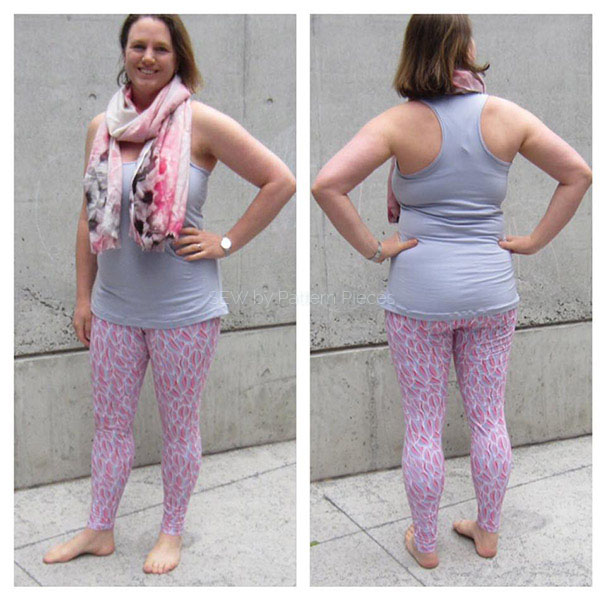
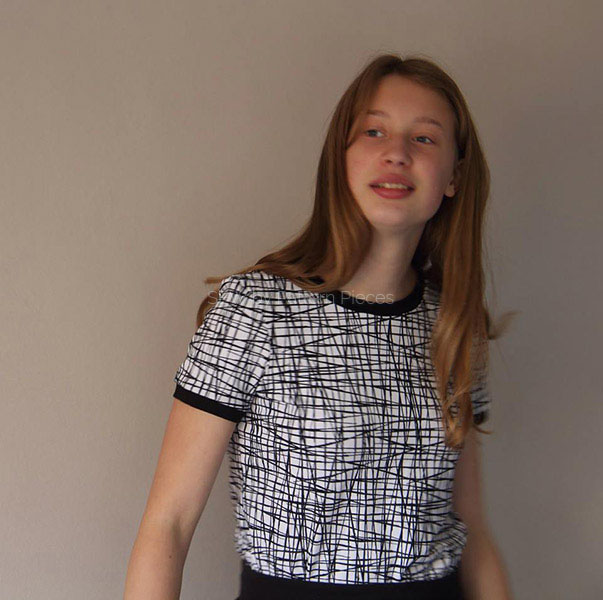
The latest pattern by Sew by Pattern Pieces is a special one. I decided early on when I made ladies’ patterns I wanted them to fit well and I wanted ladies of a wide range of sizes to be able to wear them.
I decided after time after the first release, that the armhole and sleeve could be made to feel a bit more comfortable, and therefore I decided that an update to the pattern was required.
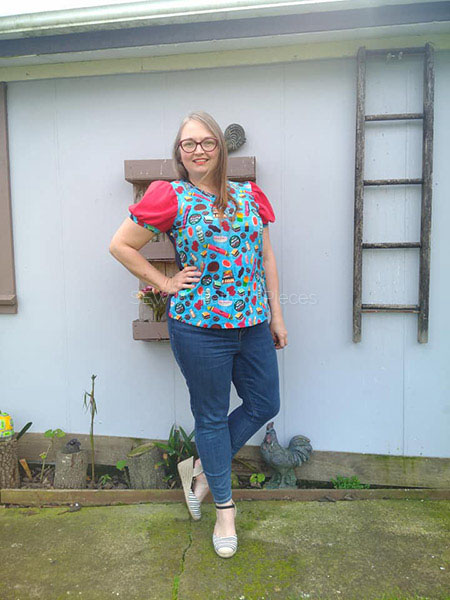
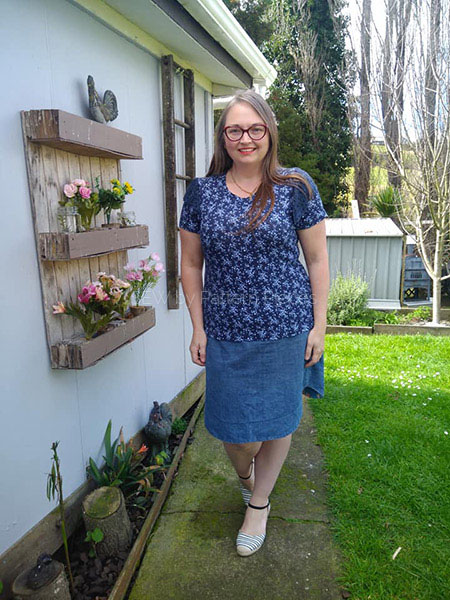
This pattern comes with both fitted or flared bases. Fitted to mold to the body and wearable with all the fitted skirts and pants available at the moment. Flared for that little bit of swing over garments.
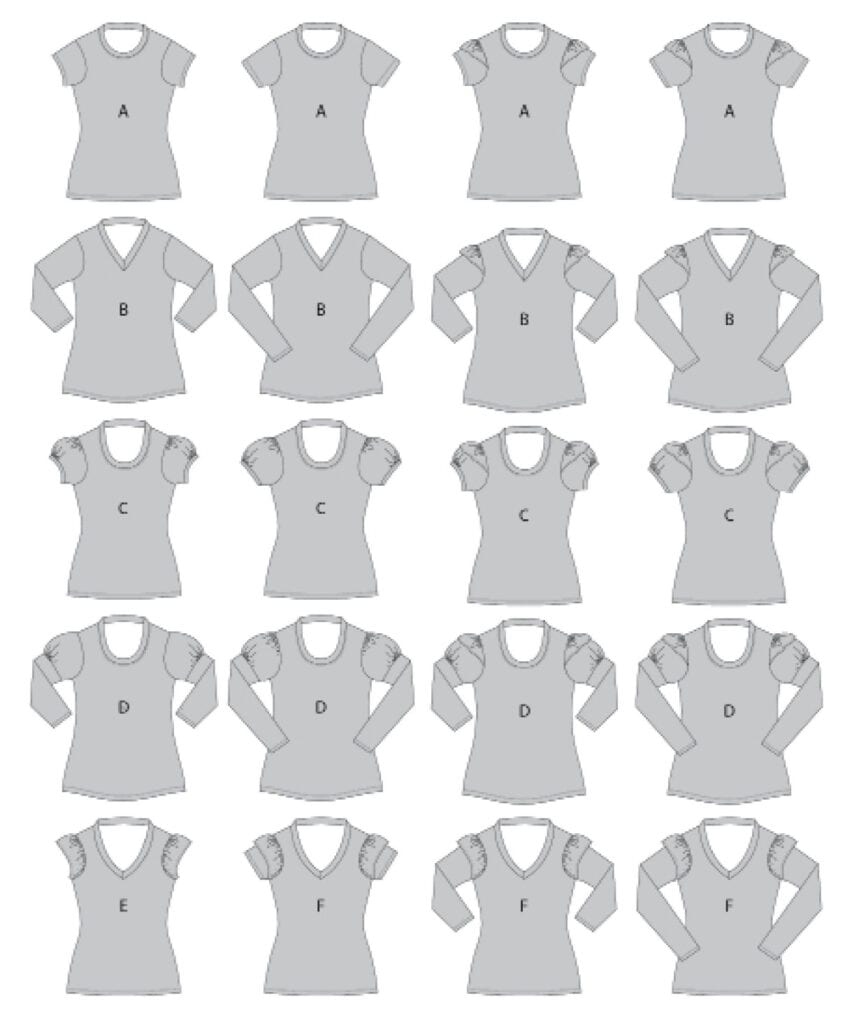
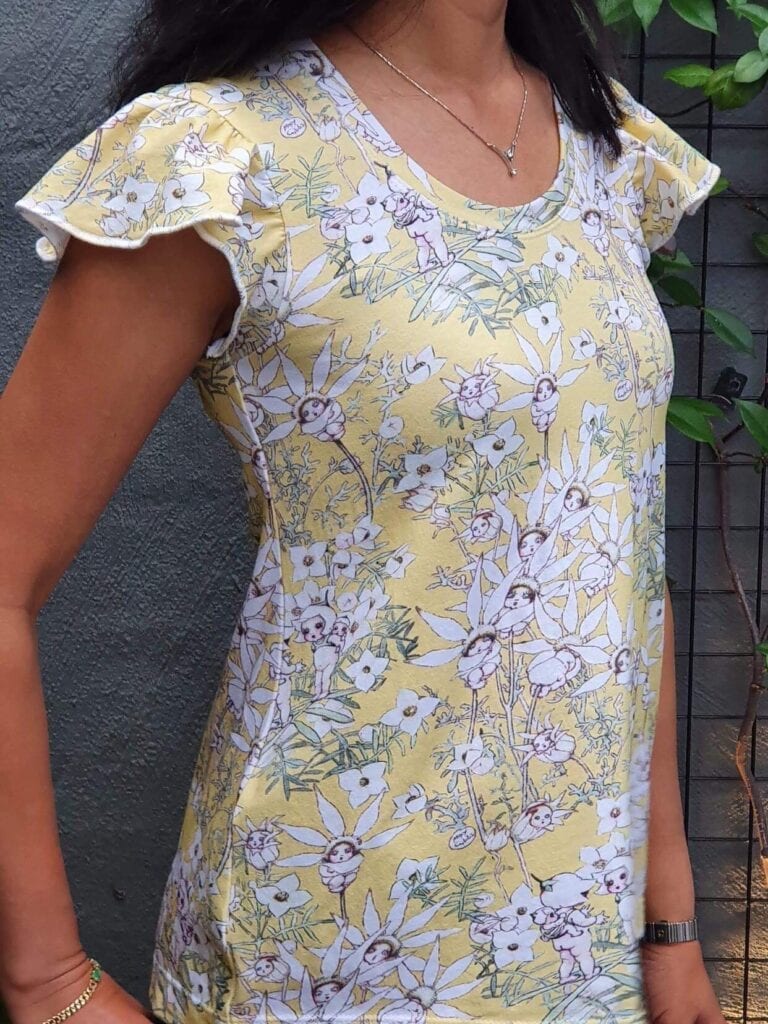
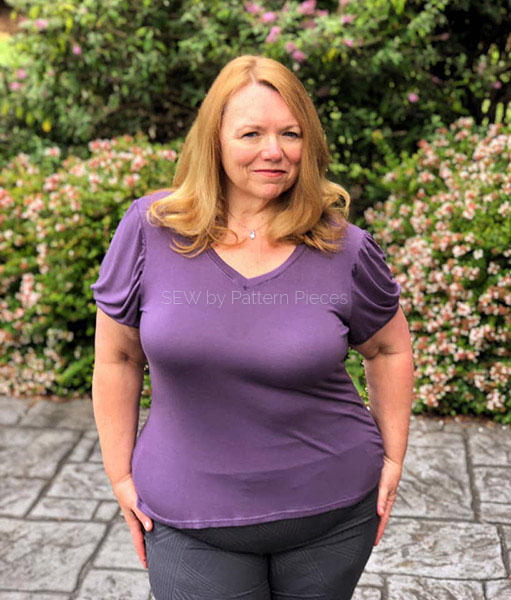
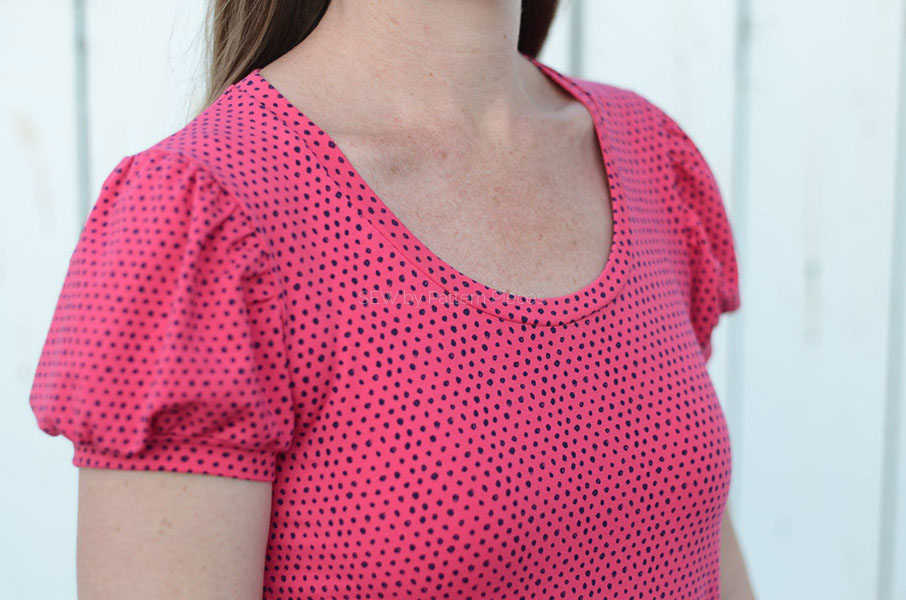
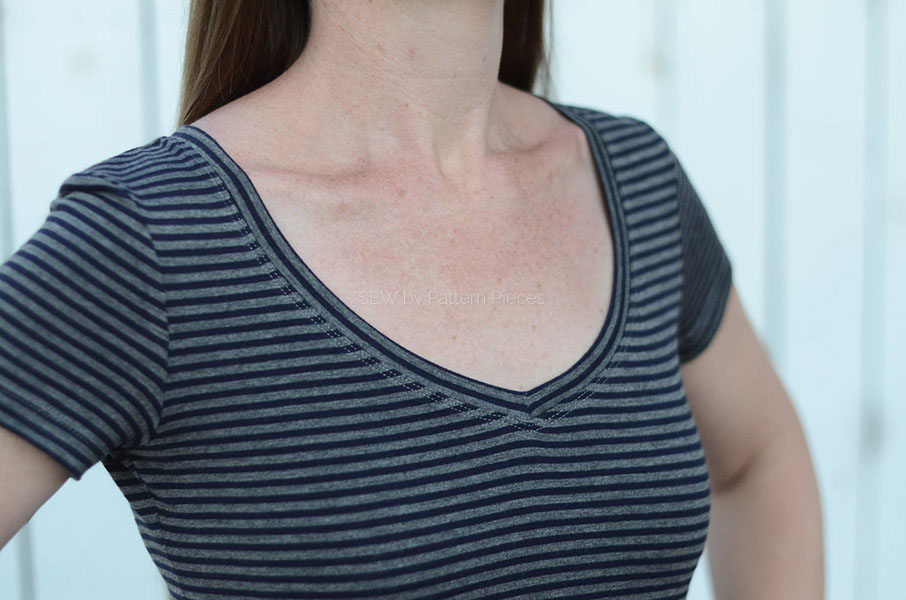
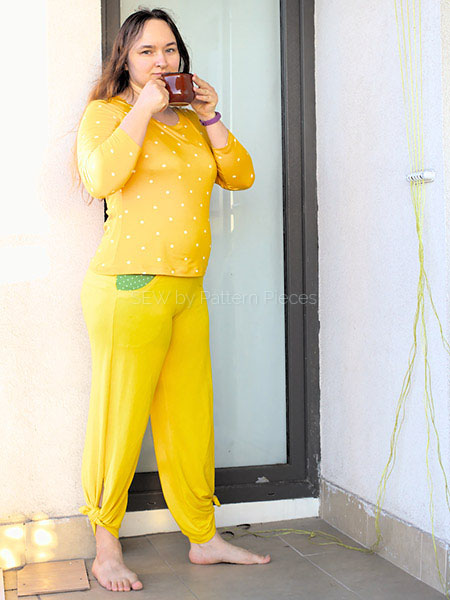
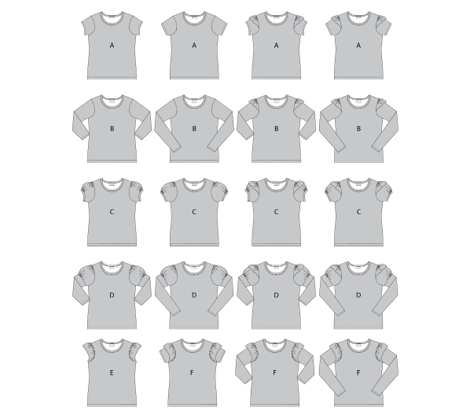
In this new release, you have the option of making your sleeves plain short or long and gathered short or long with the addition of mini flutter or full flutters on their own. There are 3 neckline options including; Round, Scoop, or High or Low V Neck.
Some testers added 1″ to the length of all their short-sleeve tees as they feel more comfortable with that length. That is easy to do by just added 1″ to the cut line provided on the long sleeve. You can choose any length that you wanted.
A wide range of sizes have been made and are included in this pattern are as follows:
AU 6-26, US 2-22, EU 32-52 and cup sizes A through G.
Below are the final photographs sent to me from the lovely testers of this pattern. They were so gorgeous I just had to share them in one location for all to see. I have been very fortunate to have many testers come back a second, third, and fourth time to test my patterns. I feel very thankful for that and for the friendships formed through this process.
Thank you to all the lovely testers that helped work on this pattern. Without you, the revised version would not have been possible.
Ladies Fun Tee Tester Round-Up is as follows.
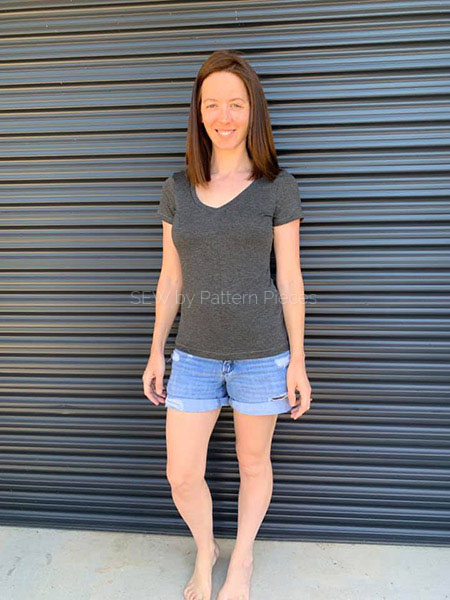
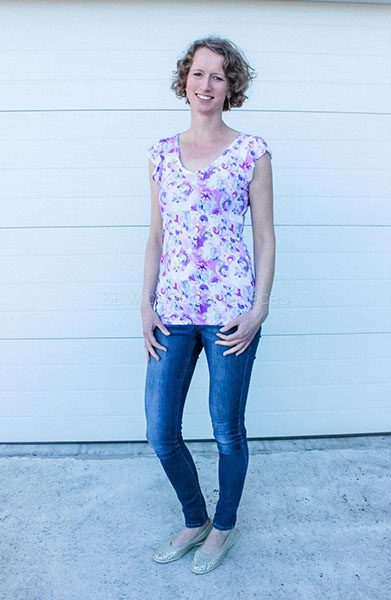
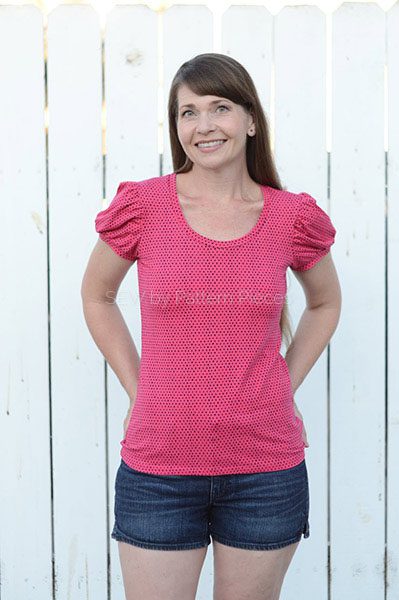
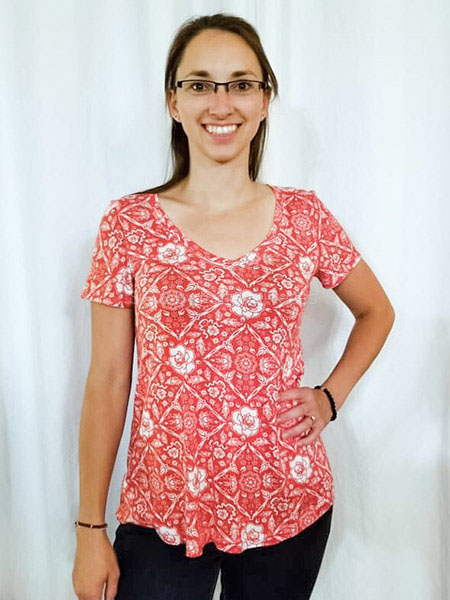
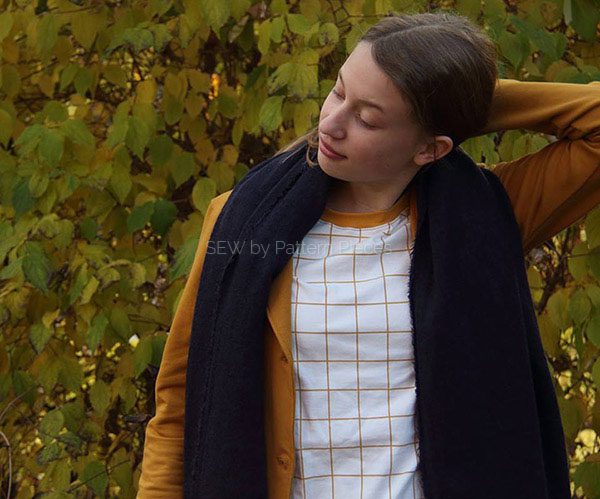
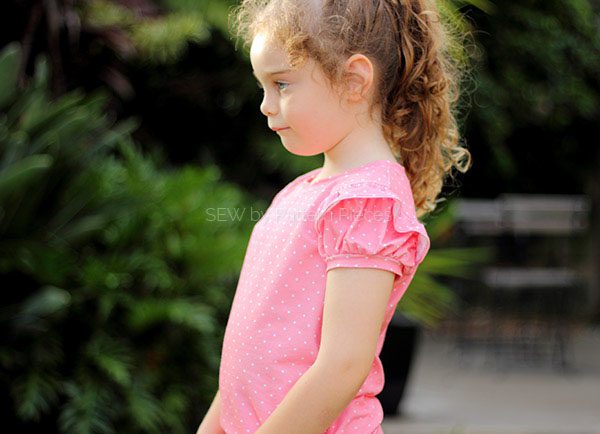
Low V Neck_Fitted Tee_Ali Gadsby
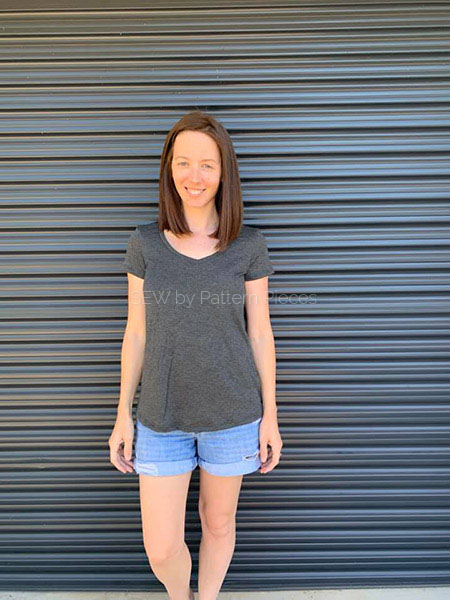
Low V Neck_Flared Tee_Ali Gadsby
Scoop Neck_Flared Tee_Full Flutter_Amy Hodge
Scoop Neck_Flared Tee_Full Flutter_Amy Hodge
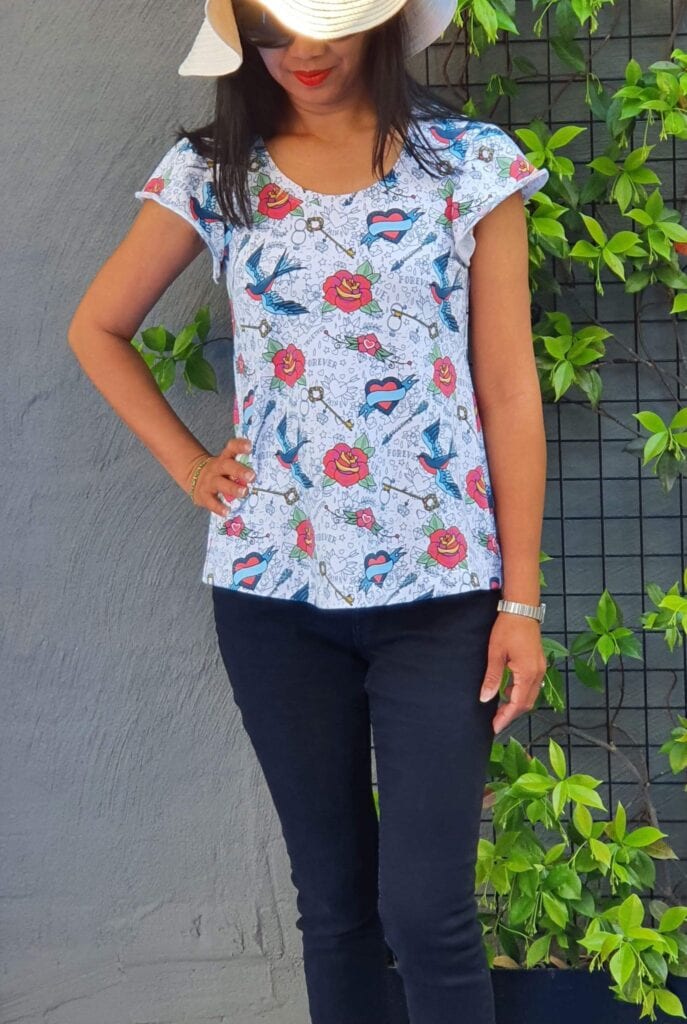
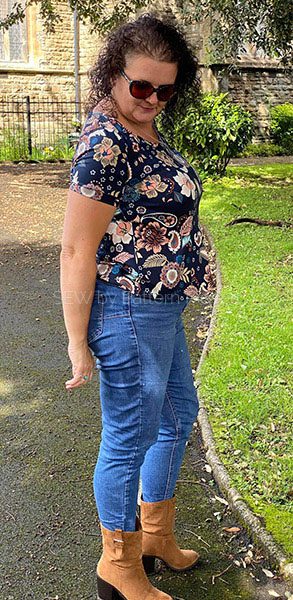
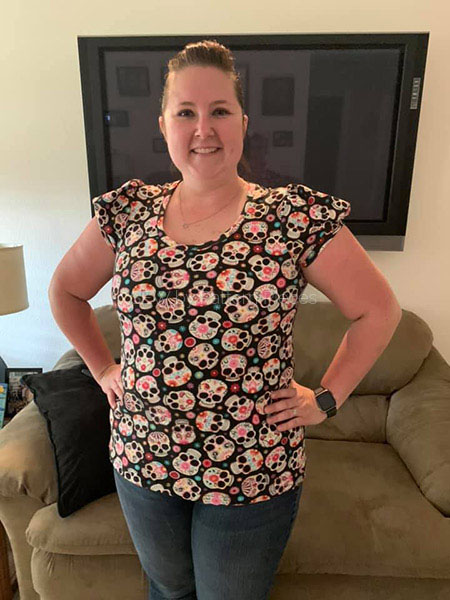
Scoop Neck_Fitted Tee_Angie Kyp
Gathered Sleeve with added 1″ to length_Carmen West
Full Flutter over plain sleeve_Carmen West
Gathered Sleeve with added 1″ to length_Chris Shapiro
Full Flutters – Dagmar Odengarm
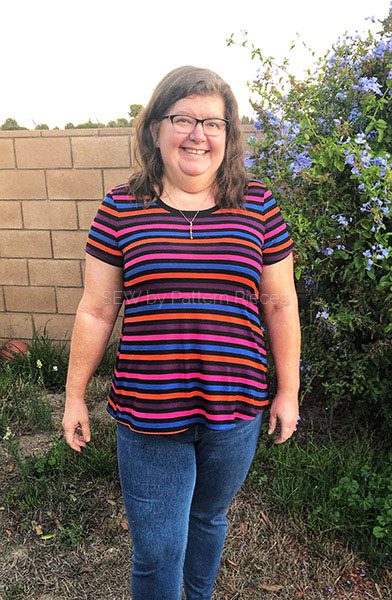
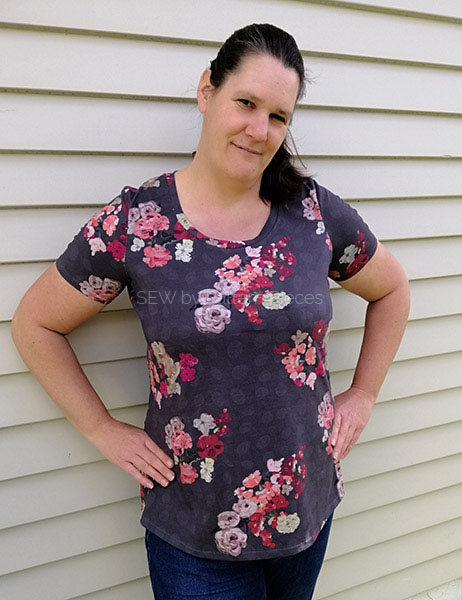
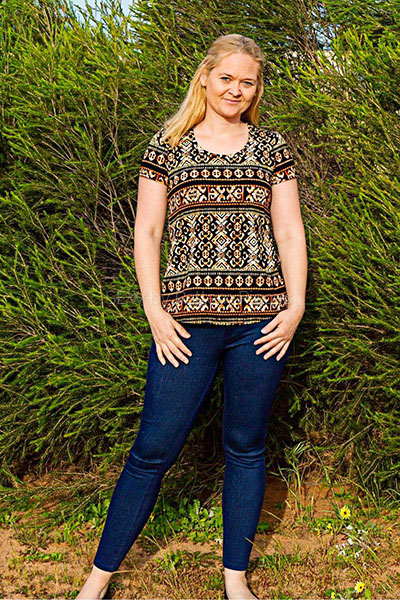
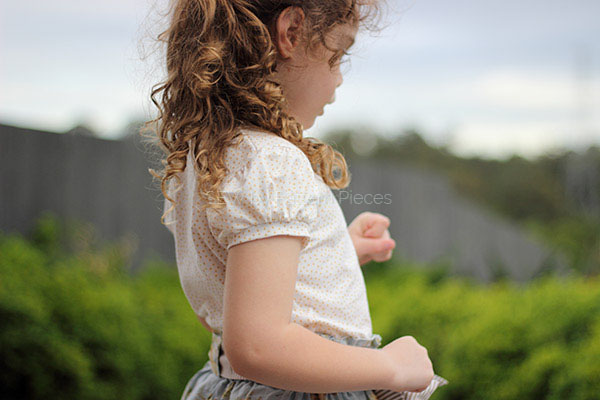
Plain Sleeve_Flared Bodice_Julia Jones
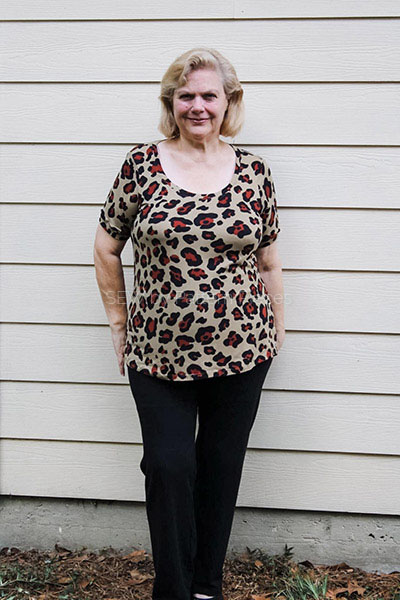
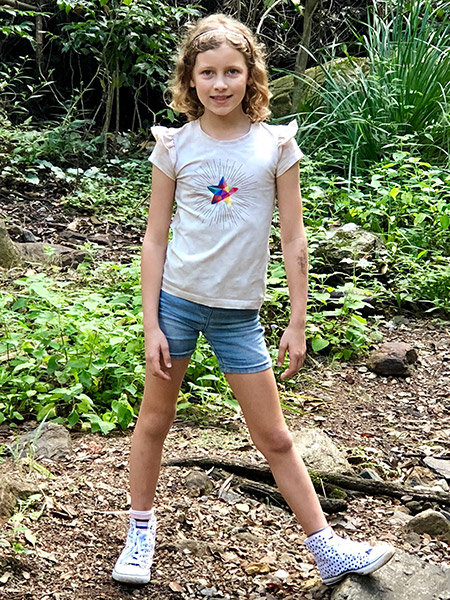
Round Neck_Fitted Tree_Jeanne Howard
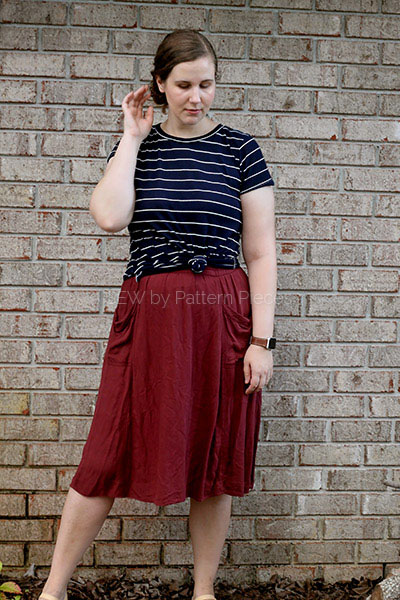
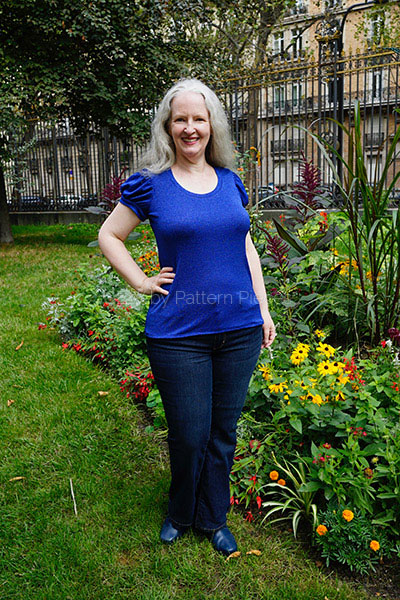
Flared Tee_Julie A Beveridge
Added length to Plain Short Sleeve_Fitted Tee_June Chance Butchee
I find having the Girls Fun Tee Pattern so handy for life’s little emergencies! For that necessary yellow shirt needed for tomorrow at school or for that costume for a school play that is coming up soon.
I have been so thankful for the Girls Fun Tee PDF Pattern many a time over the years. Here are a few examples of how it has been put to good use.
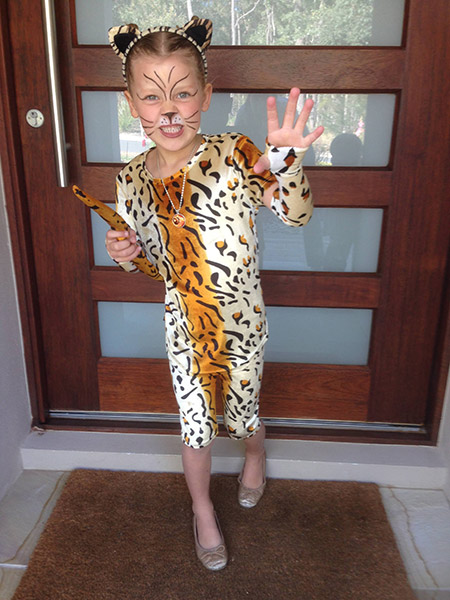
Letterland – Clever Cat Costume. Sized up and lengthened.
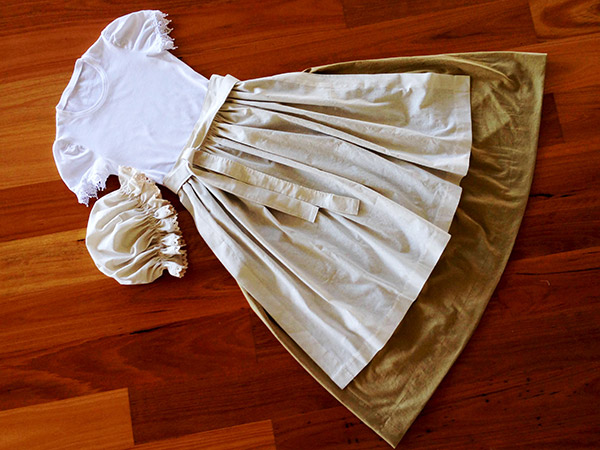
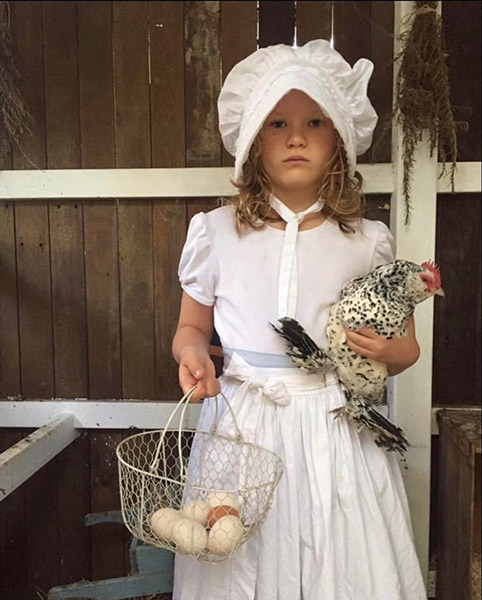
Colonial Day
Colonial Day
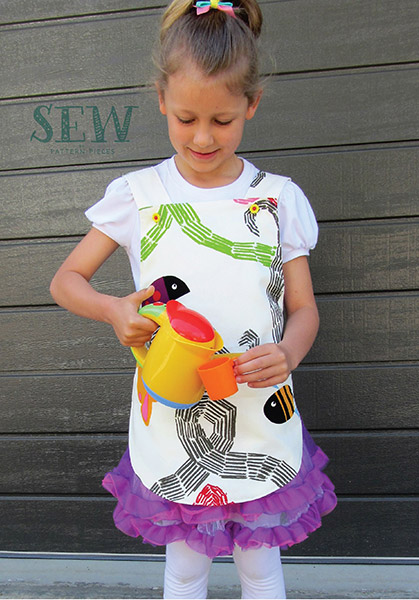
Dress Ups – The puff tee looks great with everything!
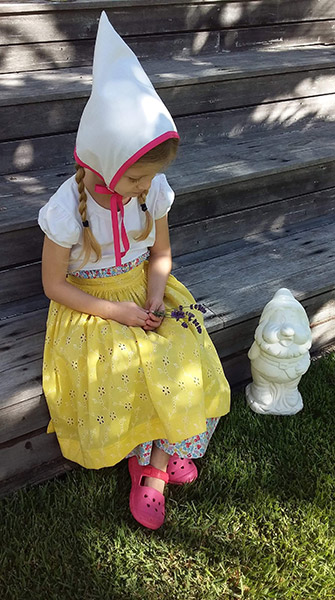
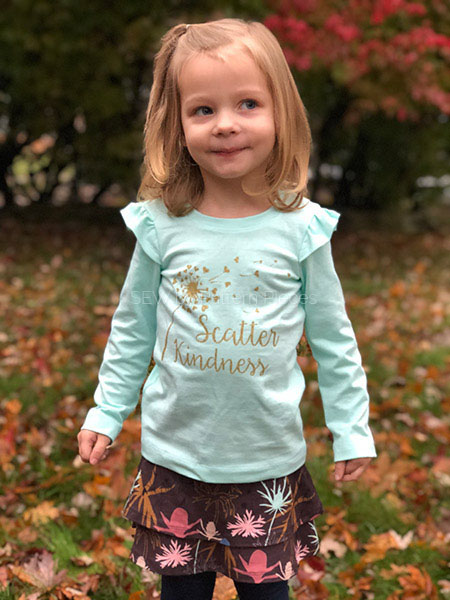
Book Week – Heidi
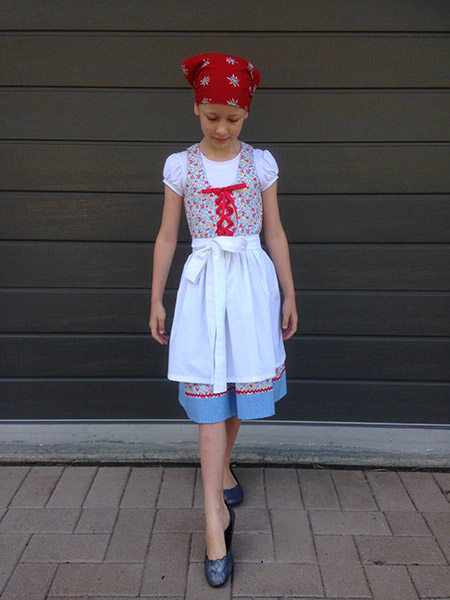
Multicultural Day – A little Dutch Costume
A Christmas Tee for the last day of school. This was worn to death and until it did not fit anymore!
An embarrassing Mum supporters t’shirt! The kids were sad when they moved schools and Mum did not have a supporters tee to wear anymore.
Do you have a need for a great fitting t-shirt pattern? Maybe you’d like to try our Girls Fun Tee Pattern?
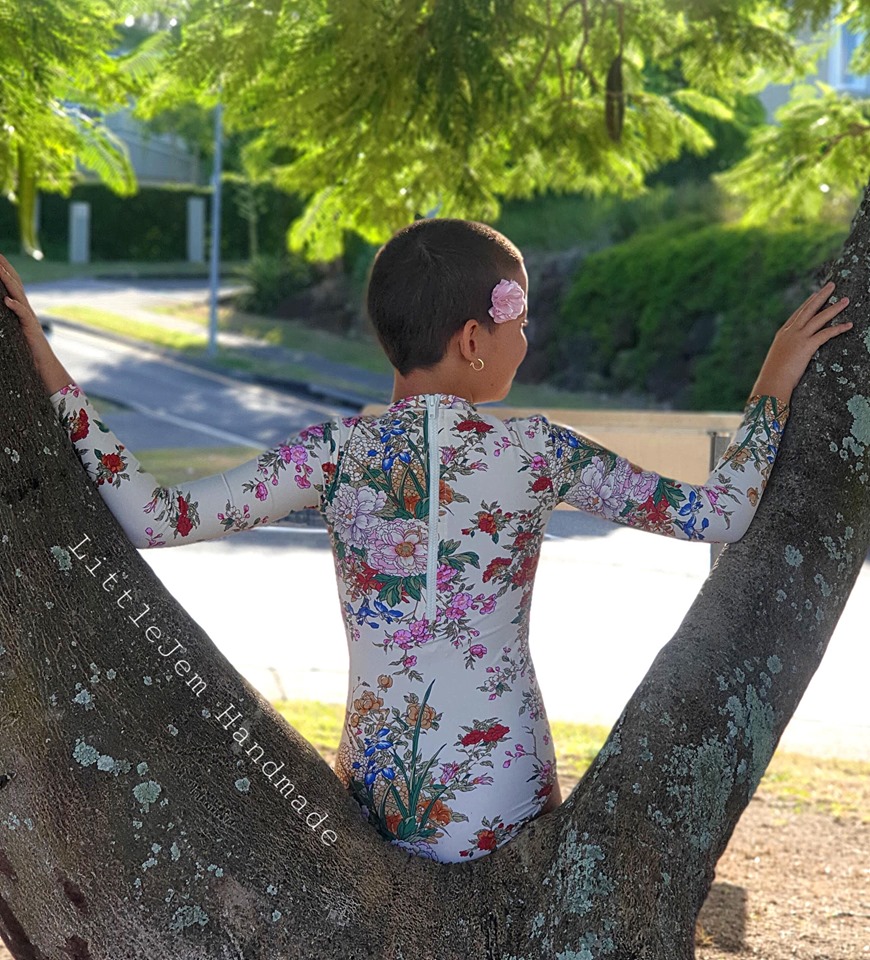
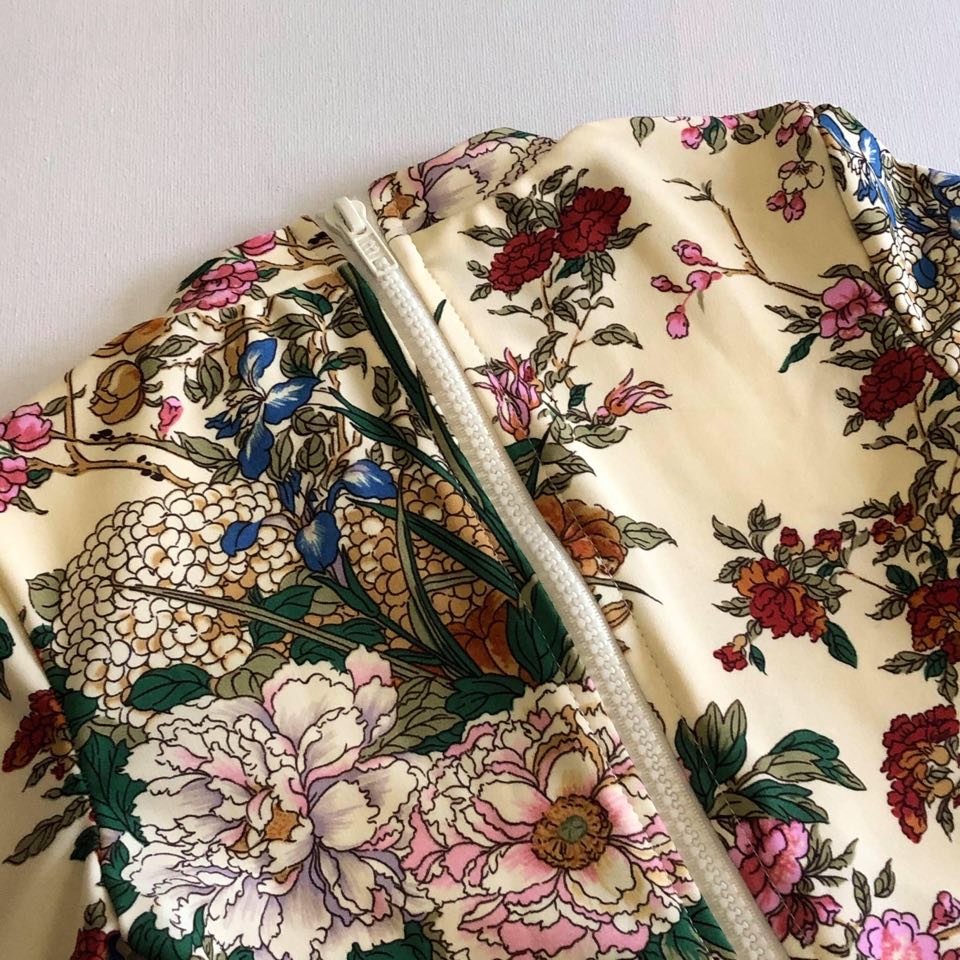
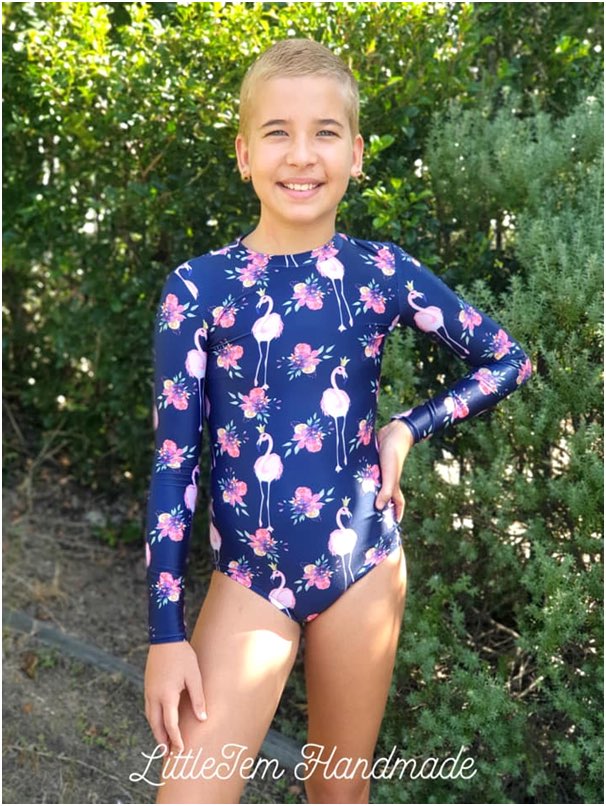
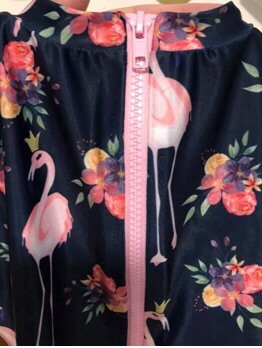
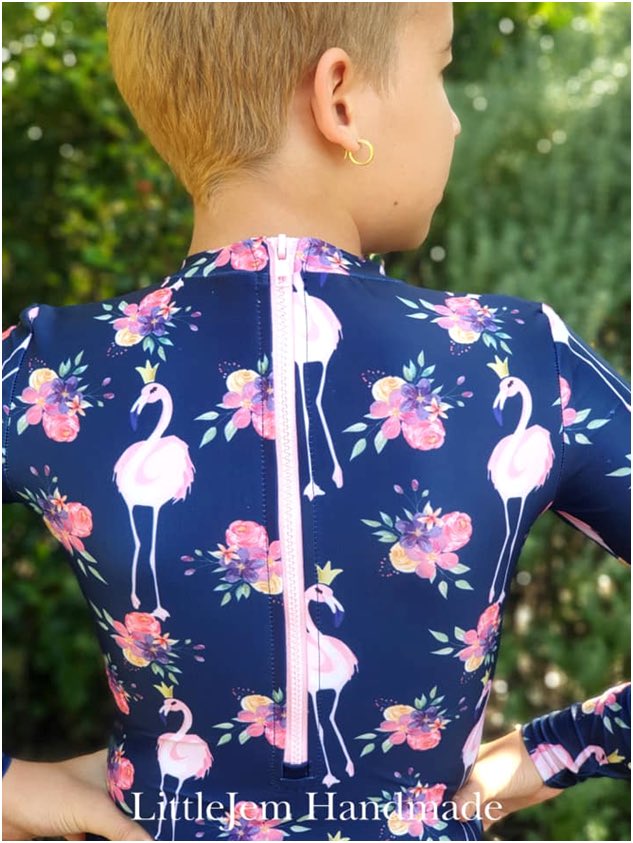
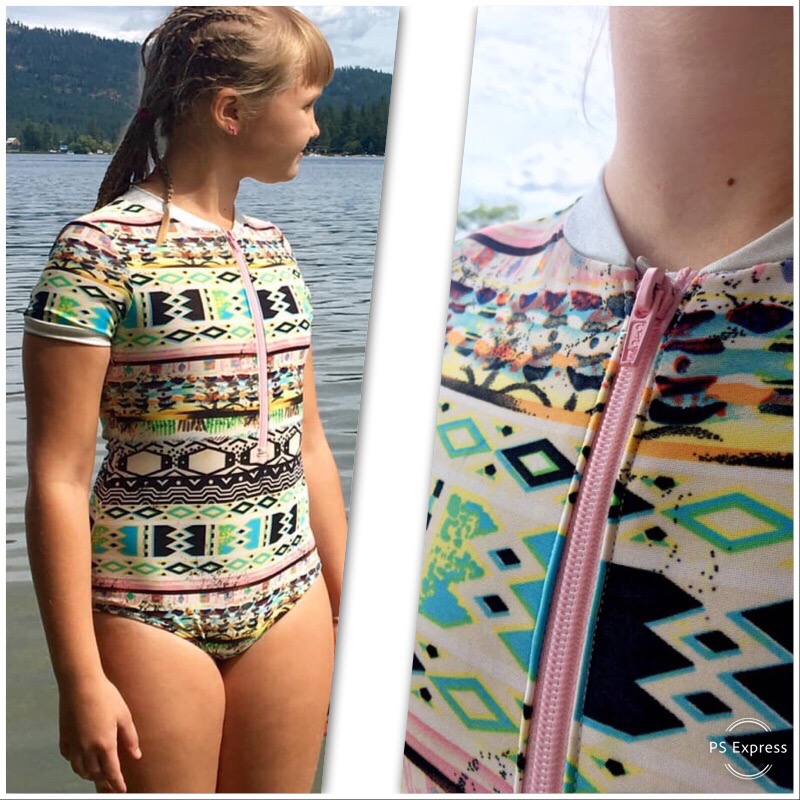
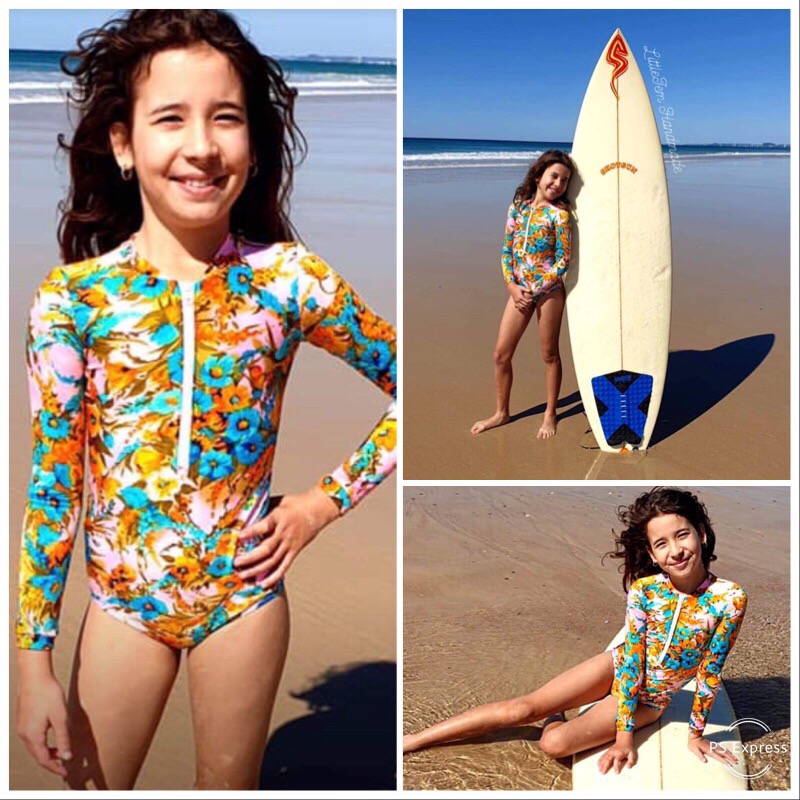
The lovely Samantha Wolgast fromLittle Jem Handmade has been sending me the most beautiful photographs of suits that she has been making from our Stinger Suit pattern, with the zip inserted up the back.
If you would like to keep a copy of this tutorial for later use, please download a copy here. (Works from desktop-only!)
The tutorial has also been added to the files menu of our Sewing Group.
I know many of you out there have been wanting to be able to do this also. I asked Samantha if she would be able to capture some pics of the process the next time she made one and put a few instructions with them, so that you can see how she does it and be able to follow along and make some of your own.
Samantha was only too pleased to do this for us and therefore I hope you enjoy reading and following along with her instructions below. We hope to see your own creations, using these instructions, in the near future either on our Facebook Group or tag me @sewbypatternpieces via your Instagram account.
Sammantha’s Instructions
So, I am sure we’ll get stuck into our sewing projects to while away the time while we are in isolation. I have been asked several times by my customers if I could do a stinger suit (awesome sun protection!) with the zipper at the back!
Well sure why not I said hahahaha…. Surely it can’t be that hard……well guess what? It isn’t hard at all! If you have already made a stinger suit you should find this super easy to do….
Grab your pattern & check measurements of the child you are making it for & work out the best size. (all sizing info and how to work out the mixing of sizes to get the perfect fit instructions are included in your stinger suit pattern). For my model I made a straight size 8.
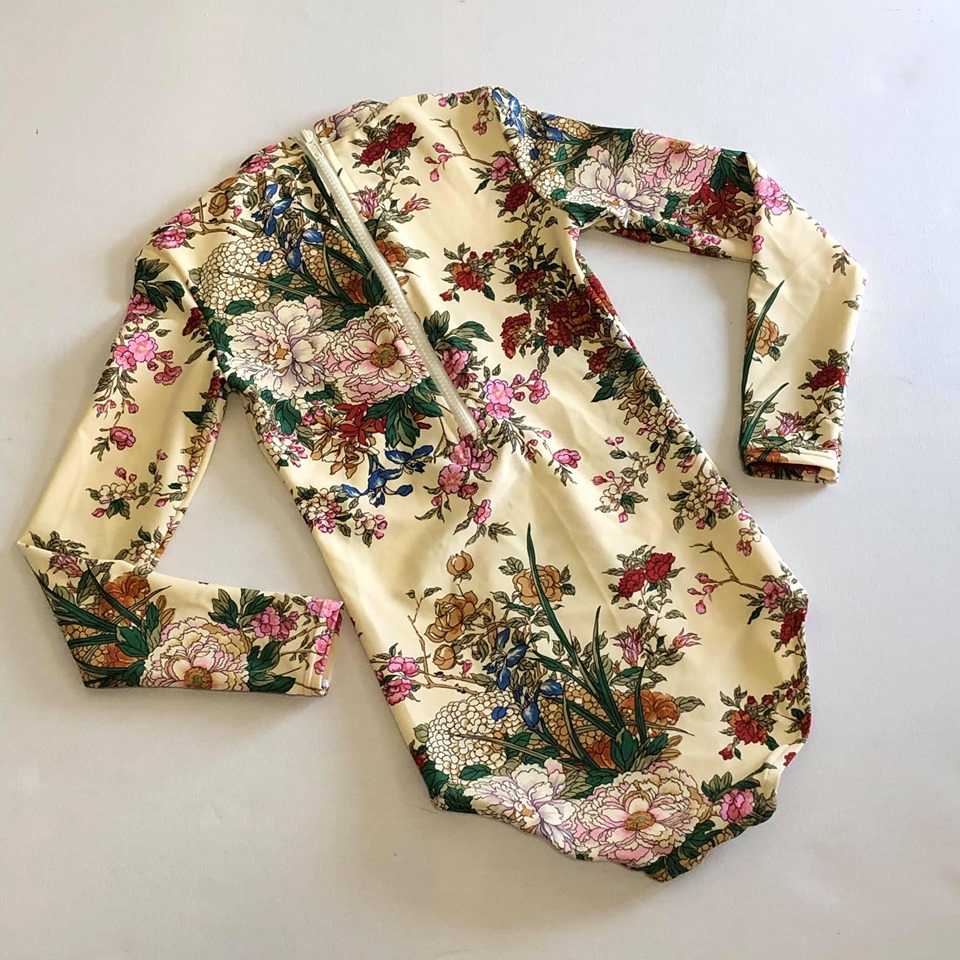
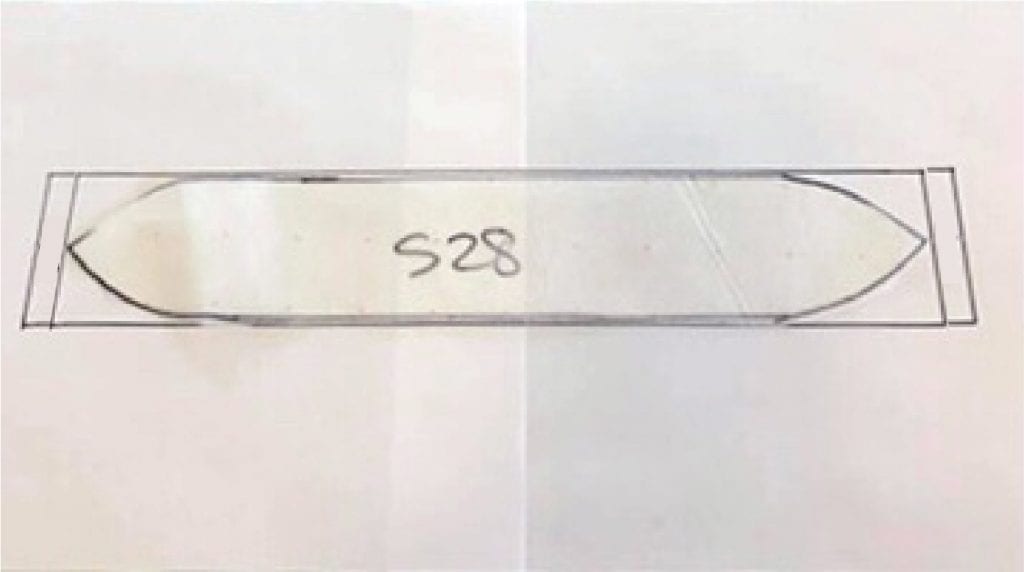
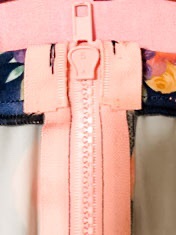
Gather all your pattern pieces…. For the collar, you will need to make a basic adjustment. Grab some paper or pattern trace & take your collar piece and re-draw making the curved ends into a straight rectangle piece adding a further 1/4″ or 6mm each side, see pic below.
Cut out the collar piece but leave the zipper cover for the moment.
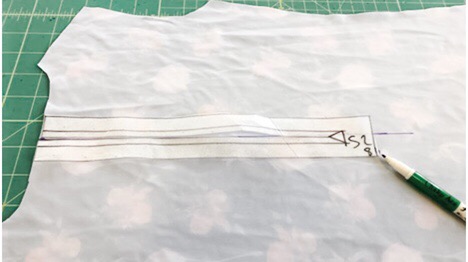
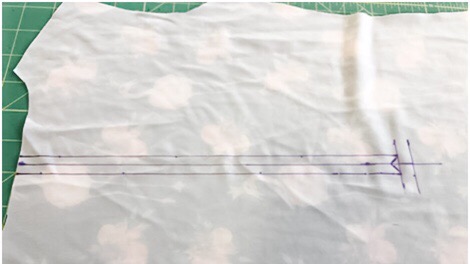
Now following the original instructions from the stinger suit prepare your BACK piece for the zipper… I like to draw on my lines with a sewing pen. See pics below.
For this suit I made the zipper about 10cm longer than what would have been needed for the front. The back neck is higher than the front and extra is also required for the zip to reach to the top of the collar.
I drew the mark at the end of the pattern piece adding the extra, then drew on the lines.
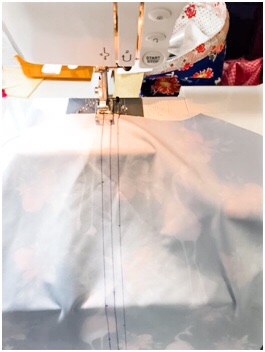
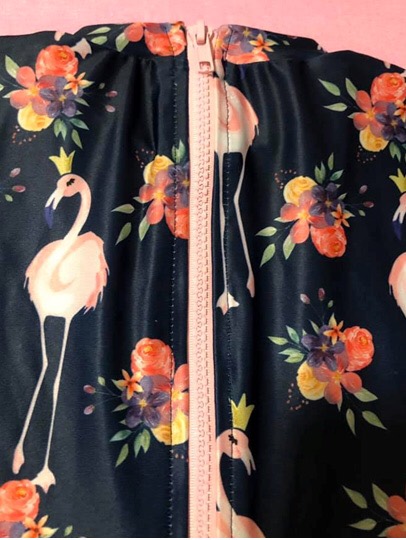
Now you are ready to proceed just like you would any other stinger suit, do not forget to sew in your little tab at the base of the zip as described in the purchased instructions.
After you have sewn the front & back pieces together you will need to attach your NEW collar piece (it should be a rectangle) The end of the collar should line up with the edges of the zip insertion spot on your back piece. Sew on your collar matching the centre fronts together.
Now you are ready to insert your zip. Make sure that the top of the zipper sits nicely to the top of your collar.
You now need to add your zipper guard & top stitch (same as the original pattern) you will need to add extra length, to the zipper guard, so re-measure how long you will need. Finish off inserting & top stitching your zip.
Now complete the rest of your suit following the instructions, and you are done!
Thank you so much to Samantha for this awesome tutorial.
If you would like to purchase a copy of the original pattern you are welcome to visit our store. The Stinger Suit is available in both Ladies and Girls Sizes.
Shop for Pattern: Girls Pattern HERE Ladies Pattern HERE
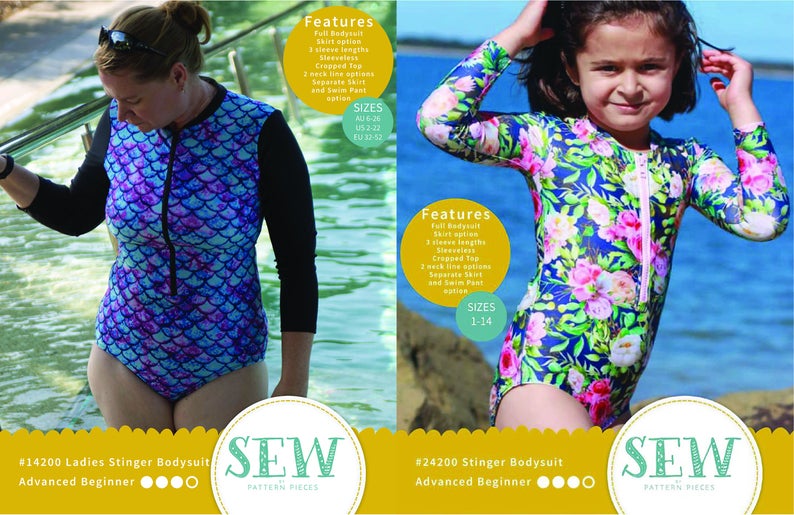
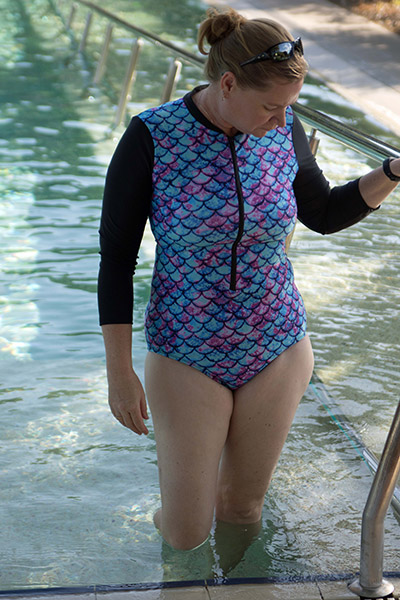
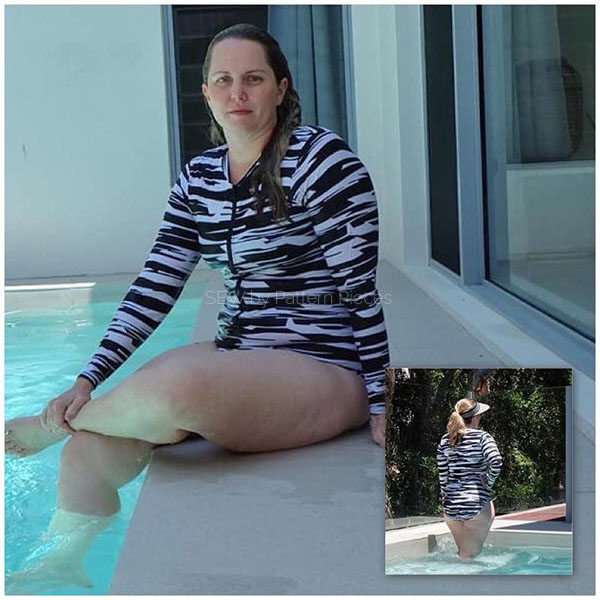
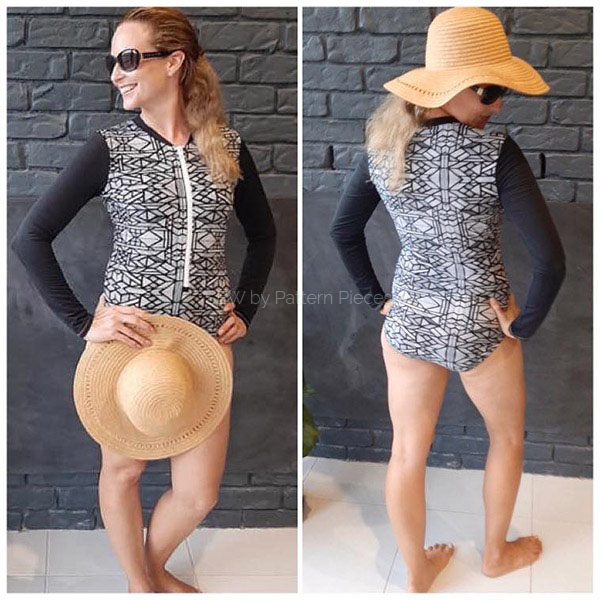
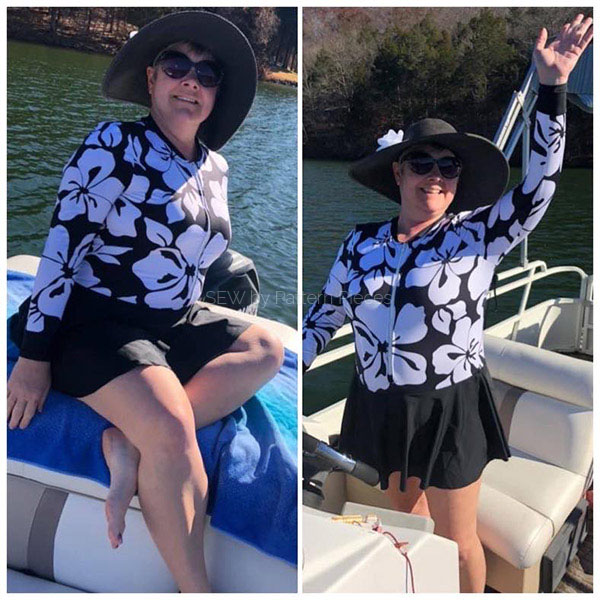
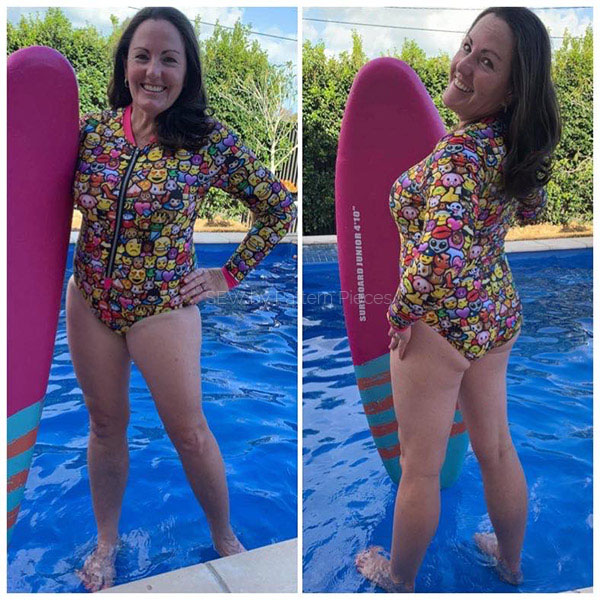
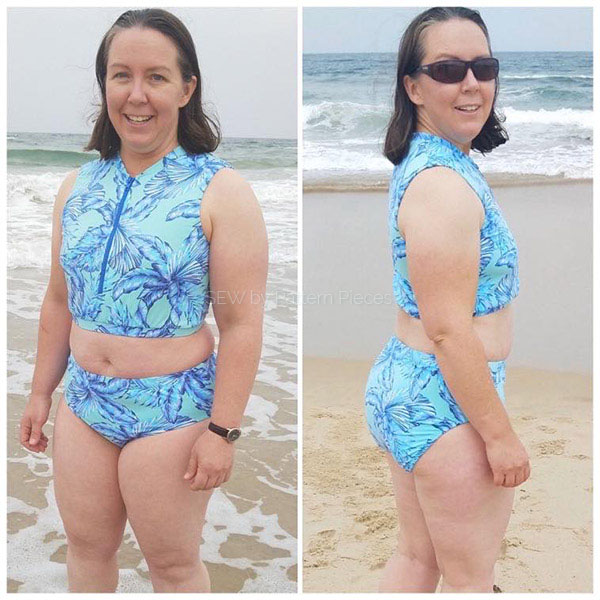
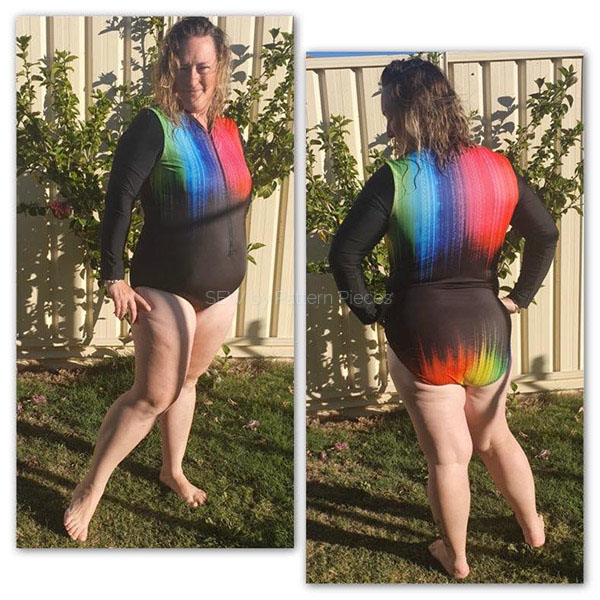
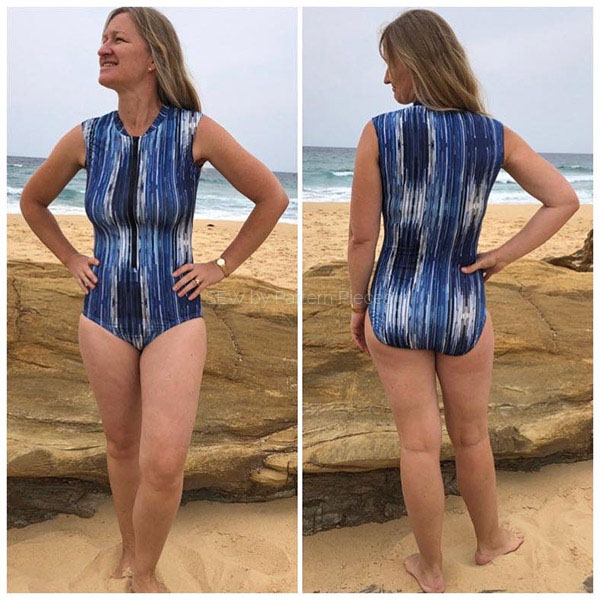
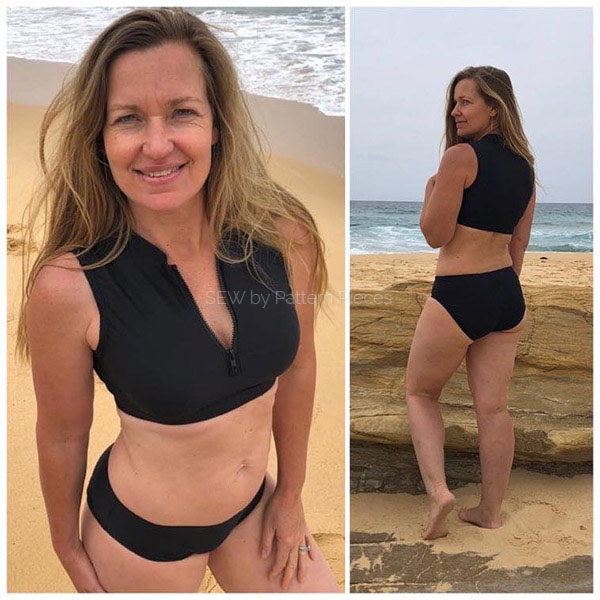
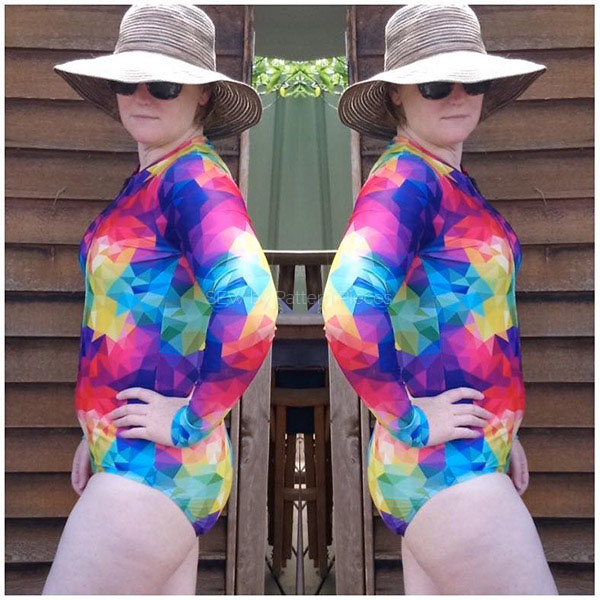
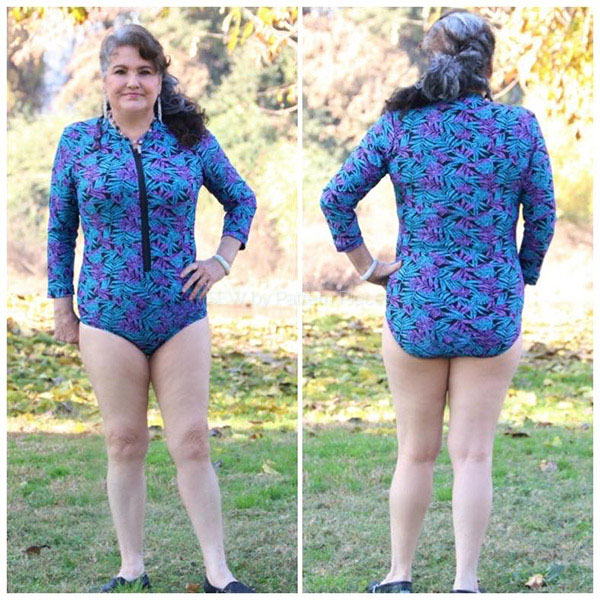
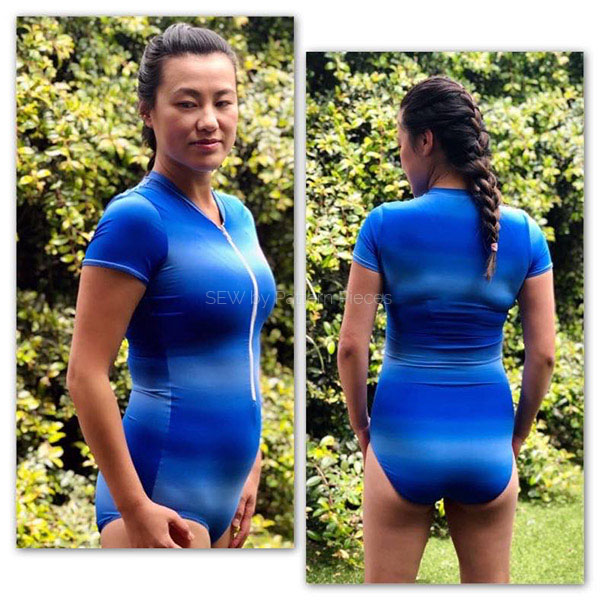
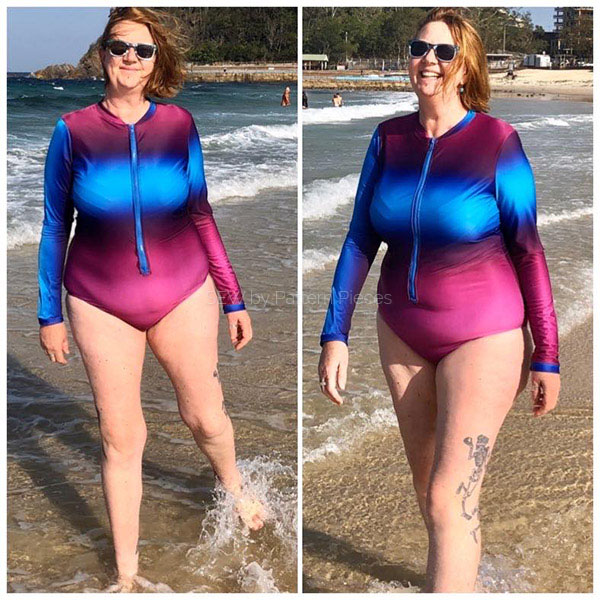
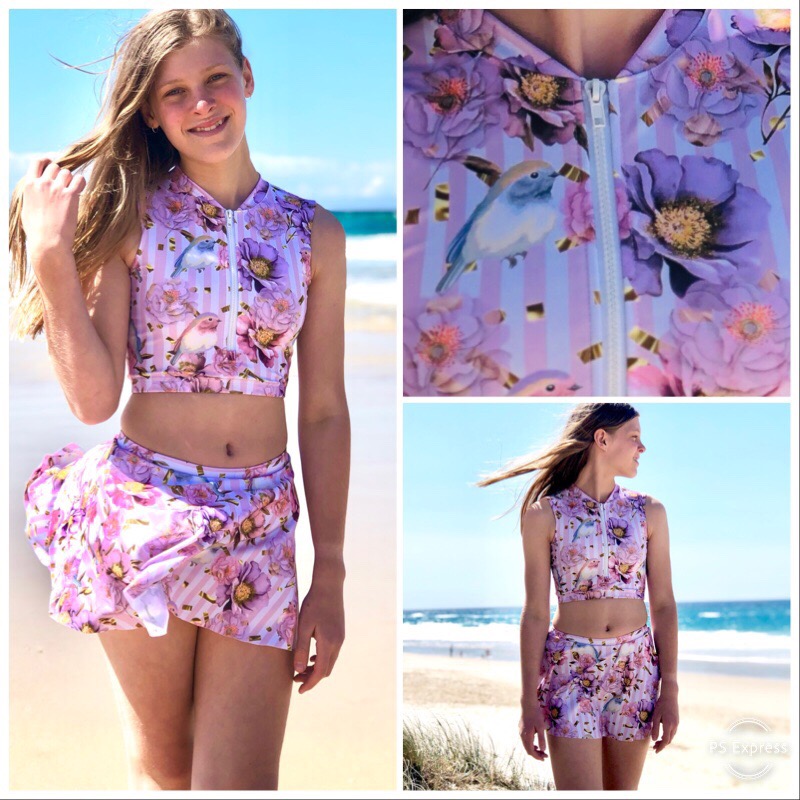
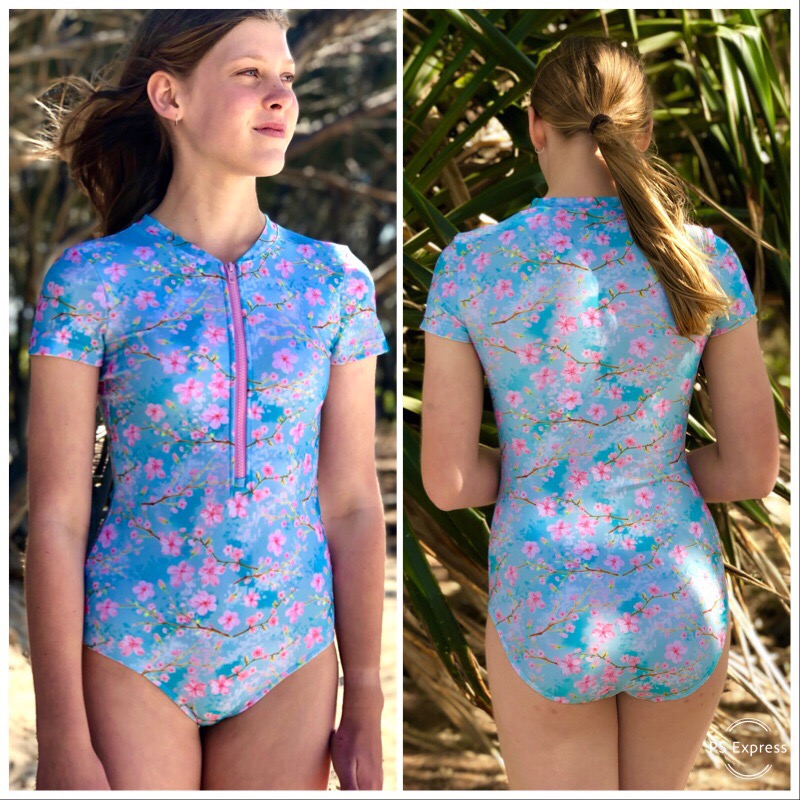
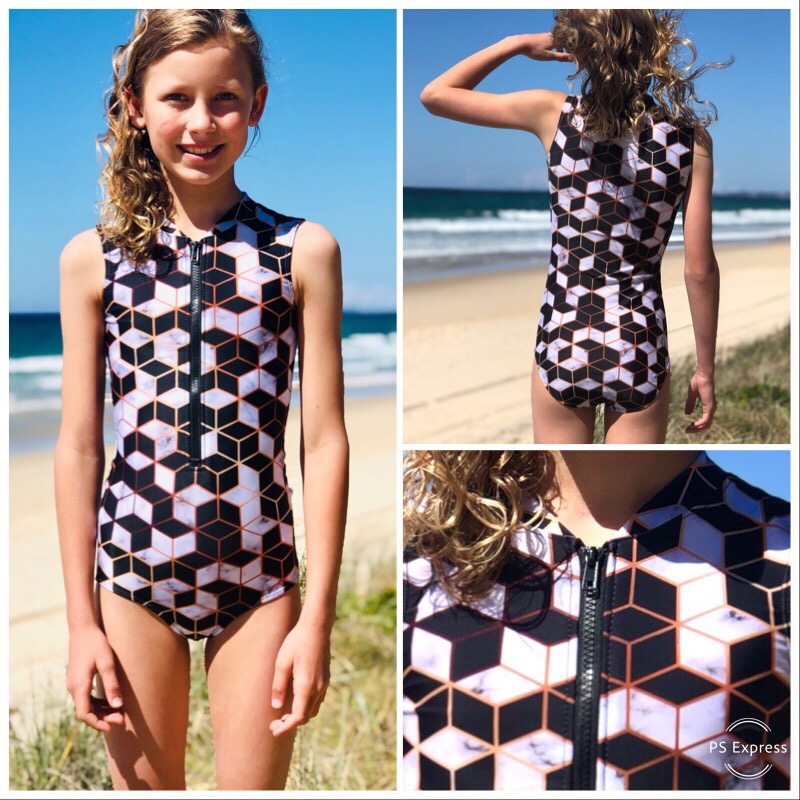
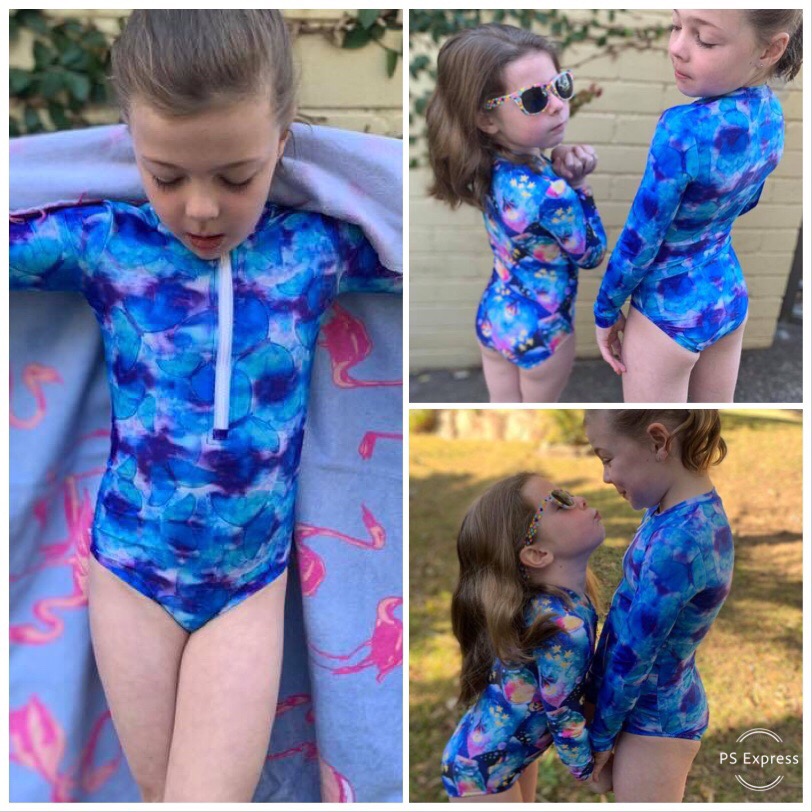
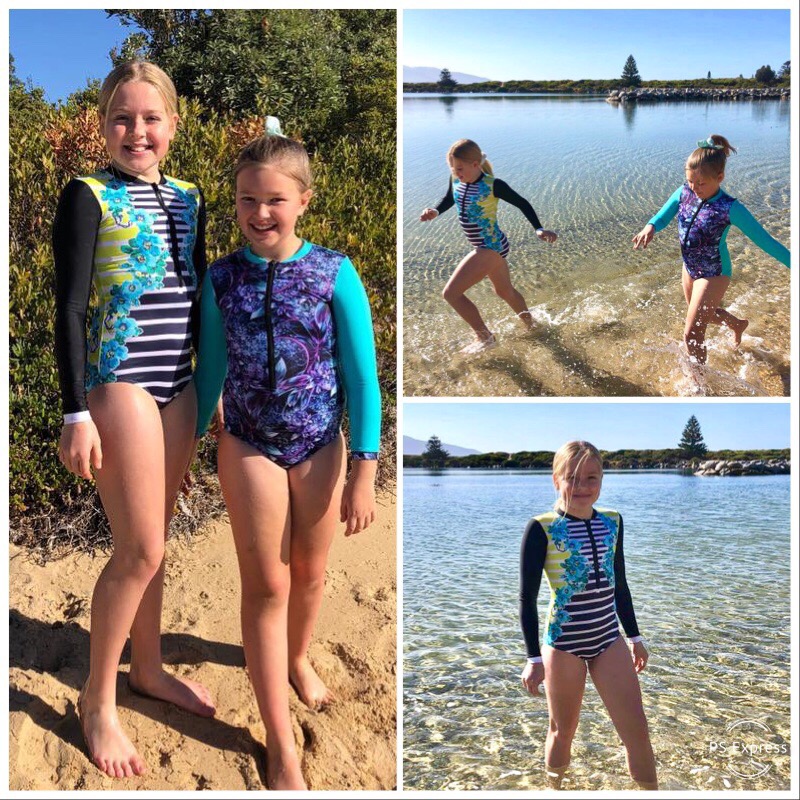
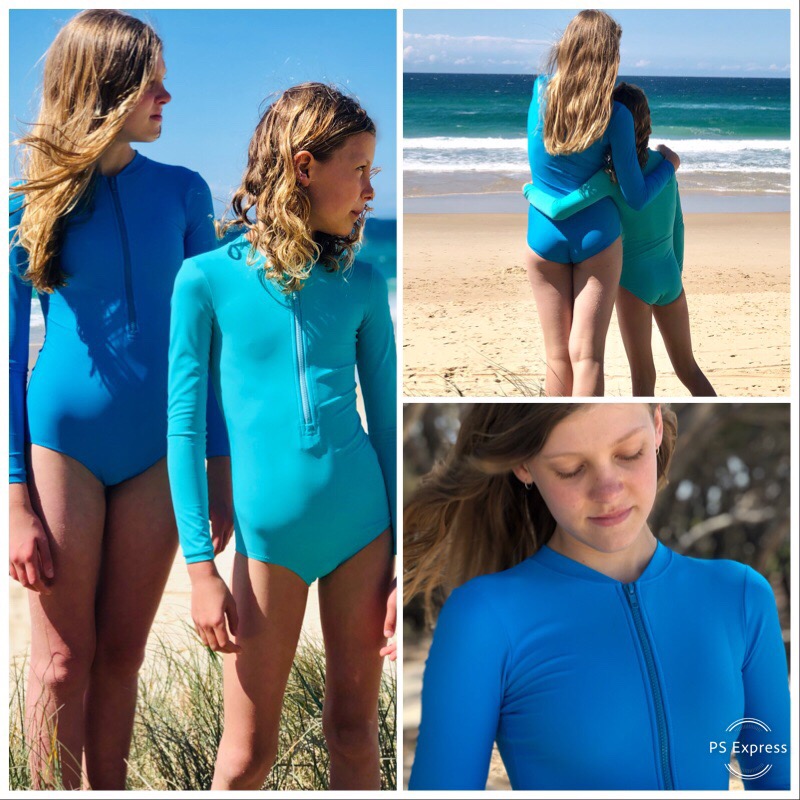
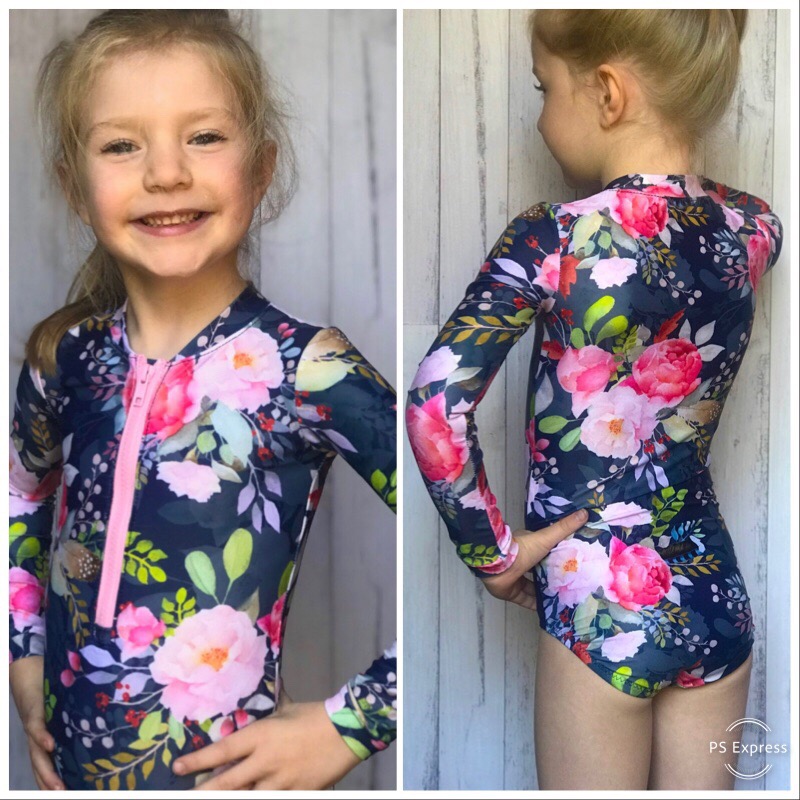
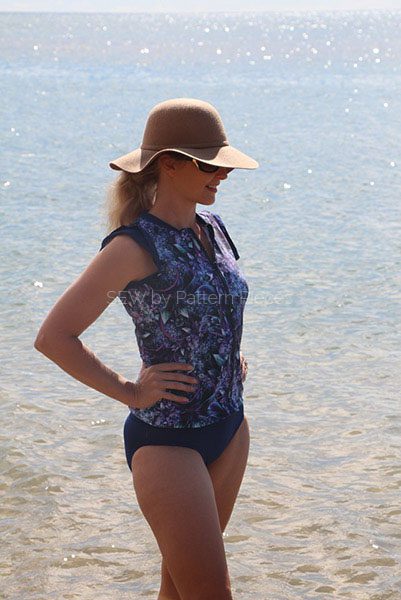
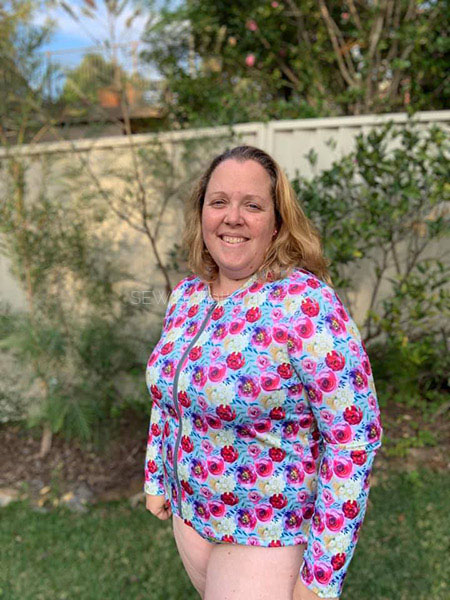
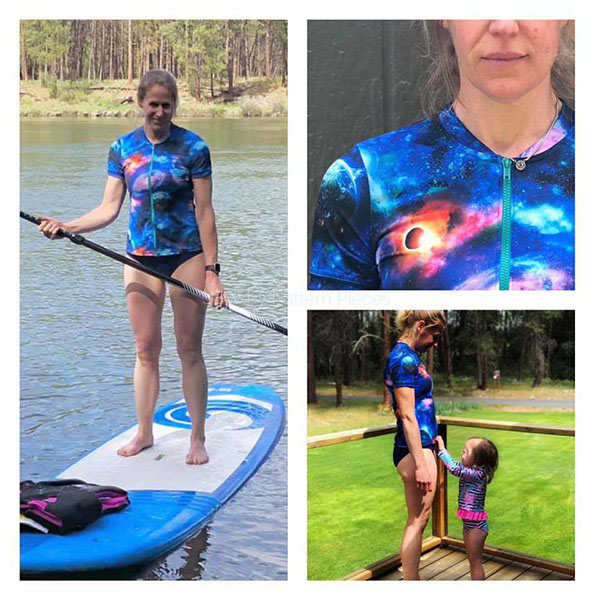
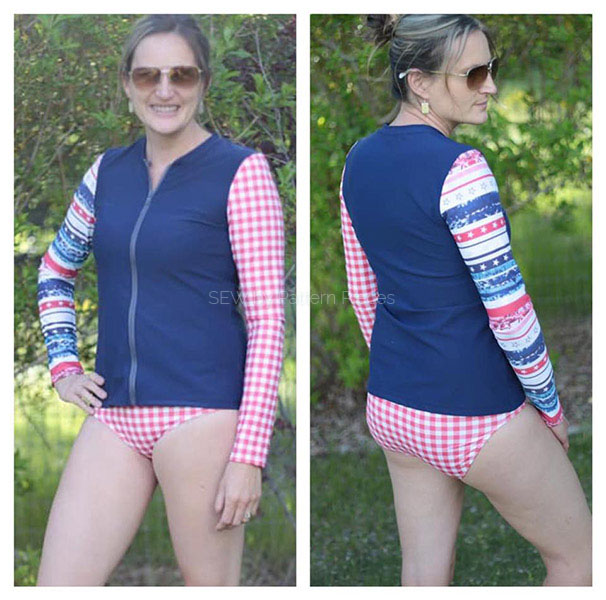
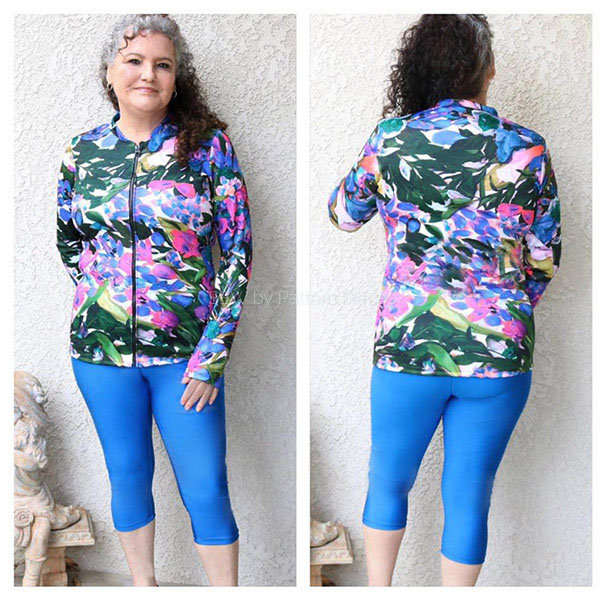
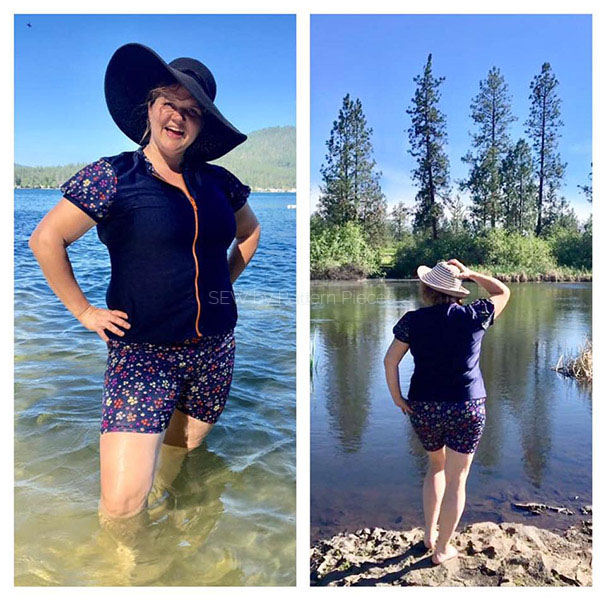
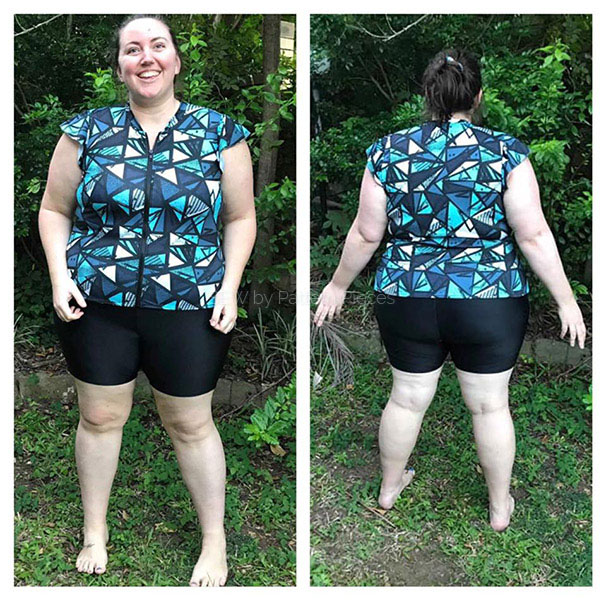
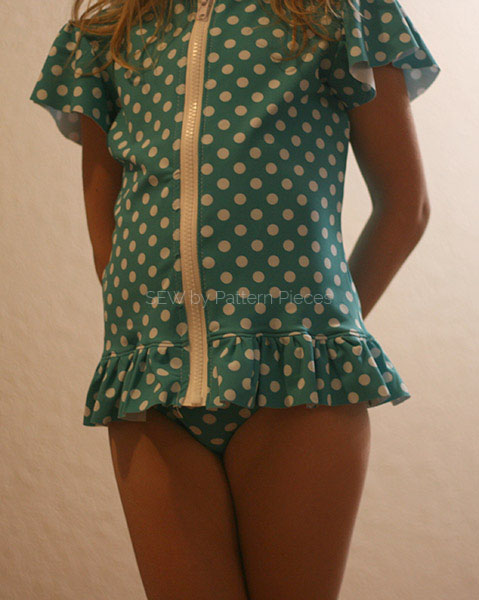
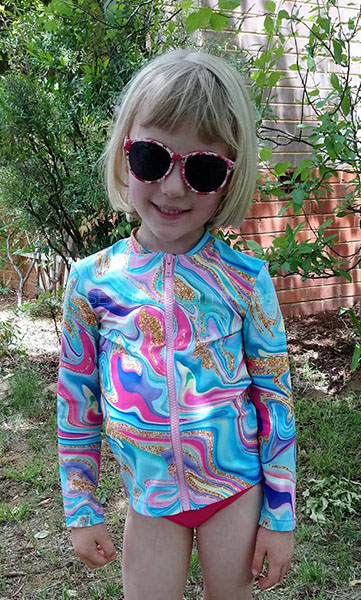
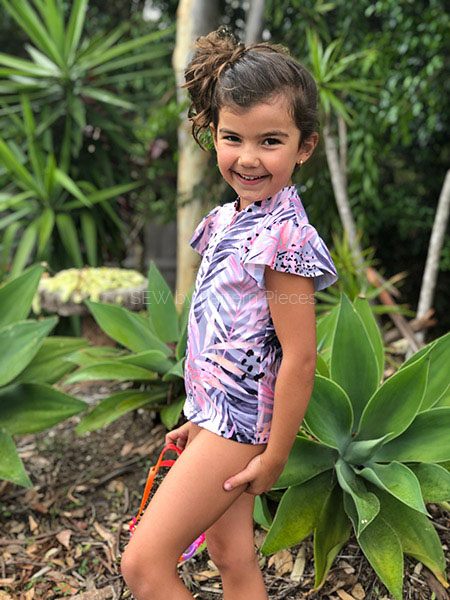
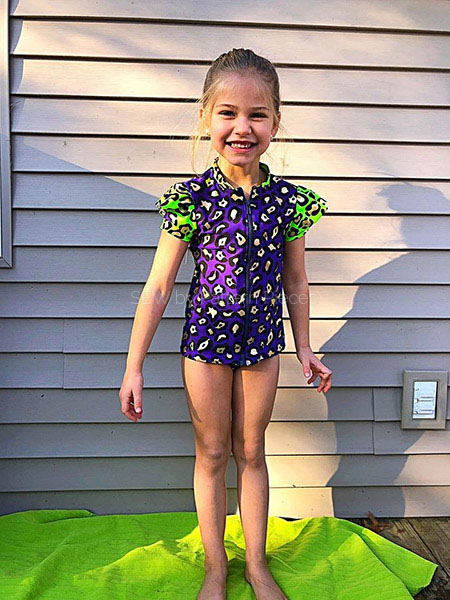
It is with much excitement today that I share with you the Ladies Stinger Bodysuit Tester Round Up. This style has all the same options as the girl’s stinger suit but with the added option of cup sizes.
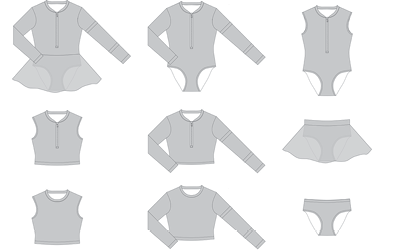
The Ladies Stinger Bodysuit is a comfortable, skirted bodysuit with the option of sleeveless, short, 3/4, or long sleeves. You also have the option of 1pc or 2 pc.
A wide range of sizes have been made and are included in this pattern are as follows: AU 6-26, US 2-22, EU 32-52 and cup sizes A through G.
This style has been on my to do list for a number of years as it is a style I have personally been wanting to make.
This pattern has been tested in all available sizes and cup sizes and fits like a dream when all size measurements have been adhered to on the chart. There are ladies out there that have not been able to wear one-pieces for years and now due to the fact that they can sew, and because of all the sizes available to them in this pattern they can confidently head to the water looking so good. A A fact that makes me so happy!
I am so proud to say that ladies that had a real fear of sewing zips and especially into stretch have now mastered the art and are so happy with their finished projects.
The written instructions guide you through every step of the zipper installation, with links to step by step video tutorials. Making zipper installation into stretch super easy to master.
Now for you to see all the wonderful suit these lovely ladies have made across all sizes I present you with the Ladies Stinger Bodysuit Tester Round Up.
Aimee Louise
Ali Gadsby
Amy Hodge
Brooke Ashcroft
Jacqueline Evans Bledsoe
Janette Barnes
Jennifer Williams
Katy L Geyer
Nicole Jupp
Rachel Harris
Rachel Harris
Sarah Mumford
Synthia Lee Gerritson
Tai Xie
Teri Roberts
These ladies all look so fantastic in their new suits. I hope that you have loved seeing all the options available to you in this pattern. Are you in the market to make a Ladies Stinger Bodysuit, that will protect you in the Summer heat?
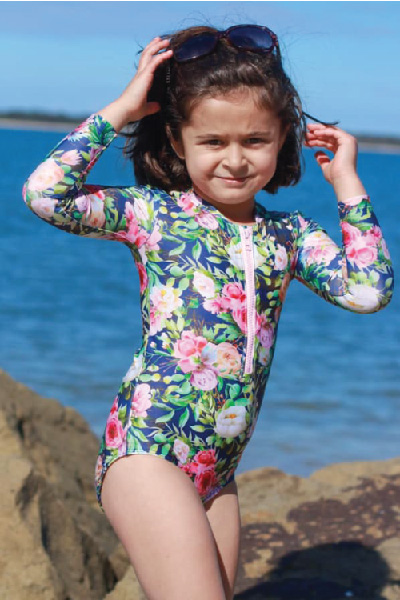
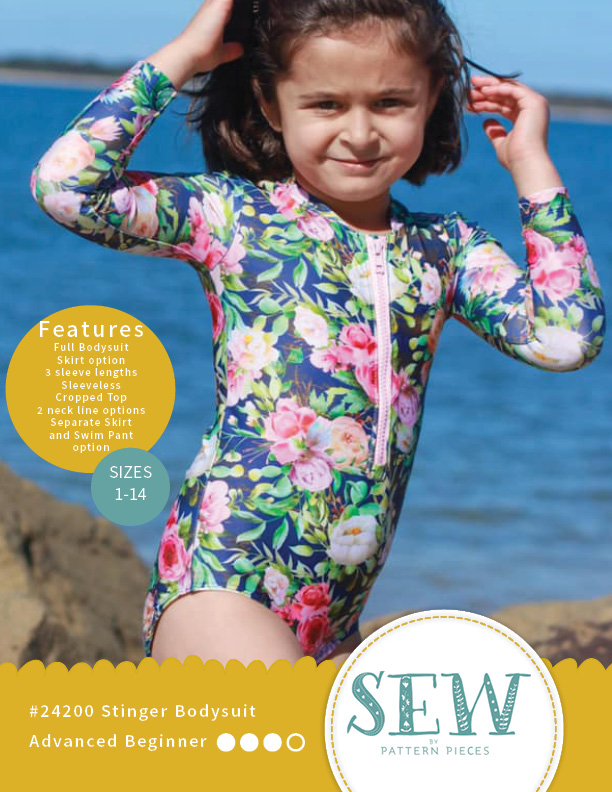
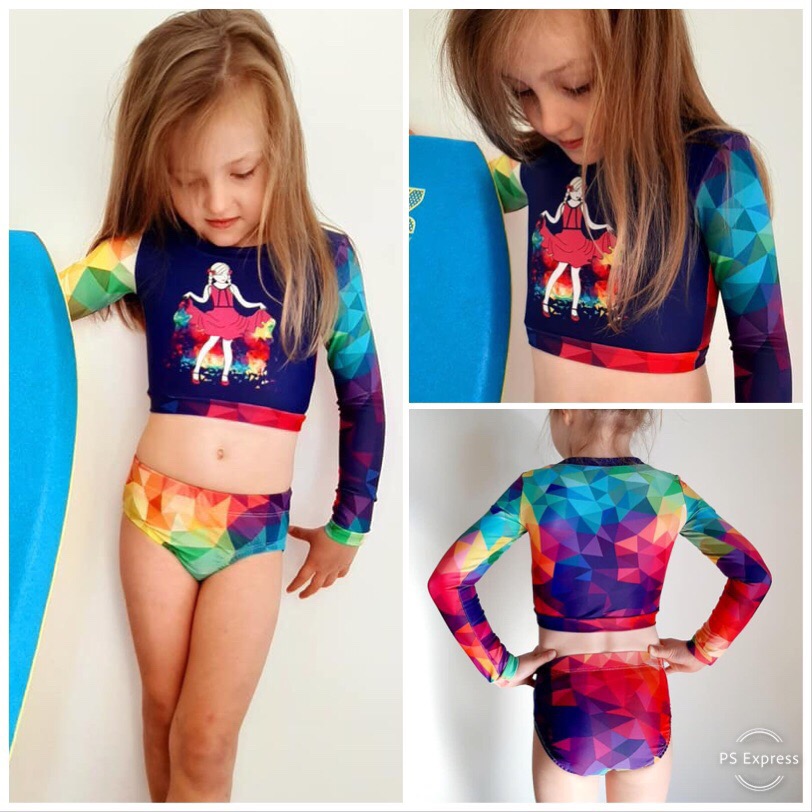
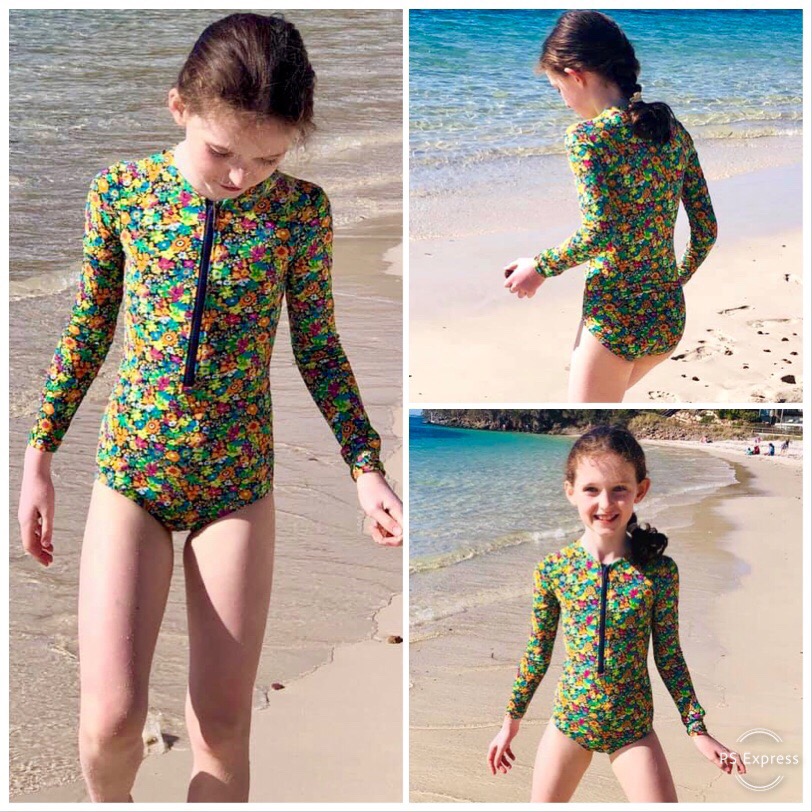
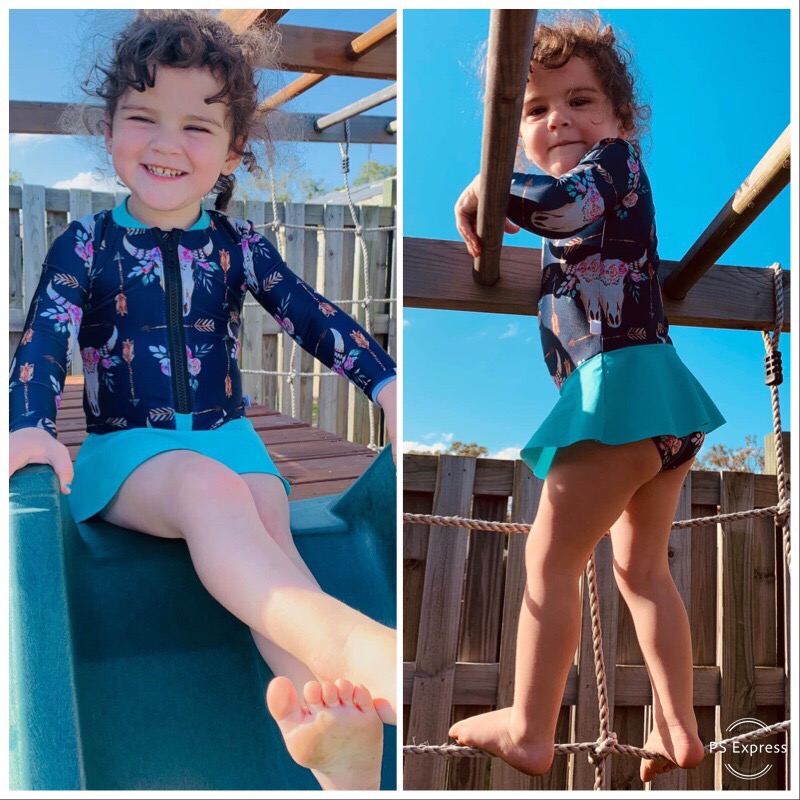
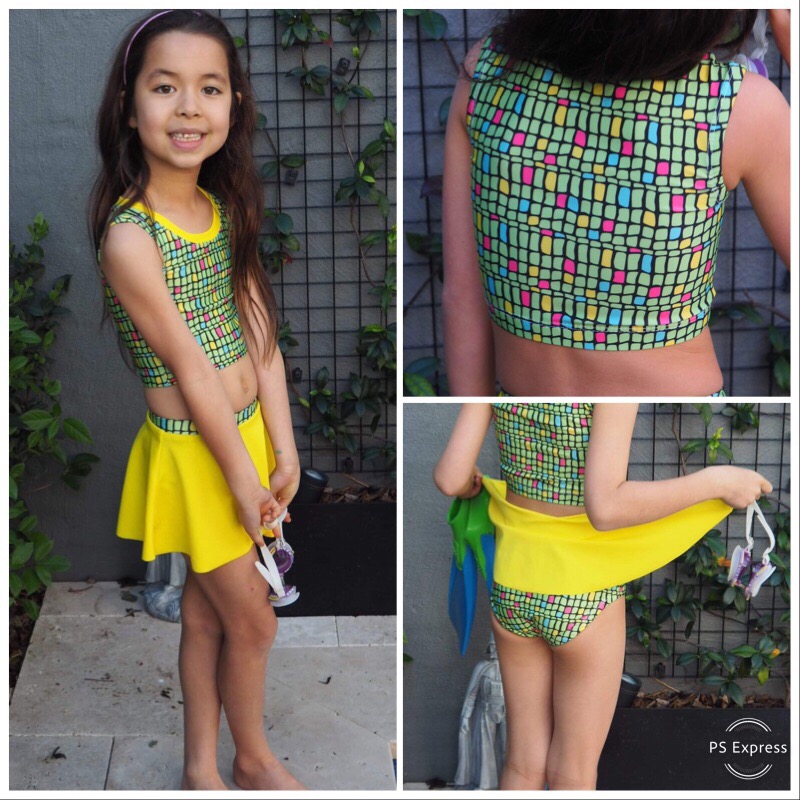
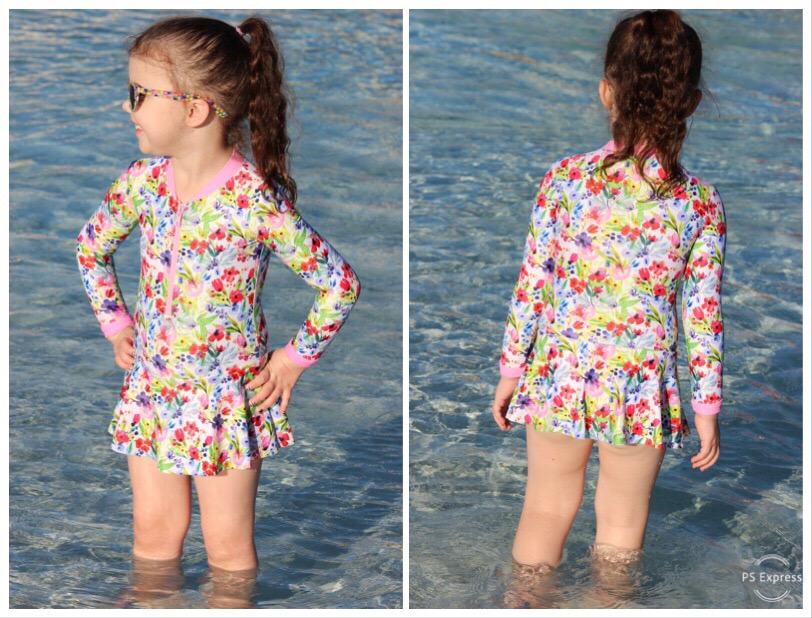
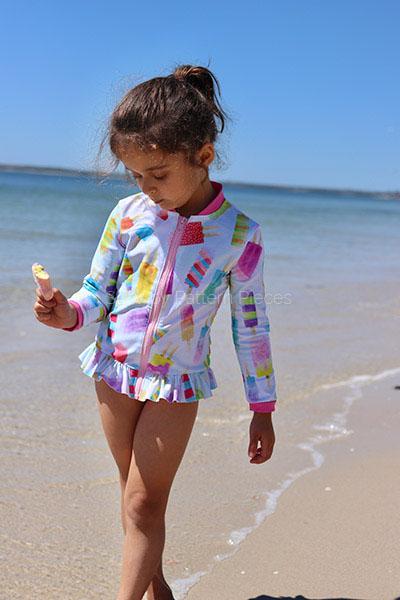
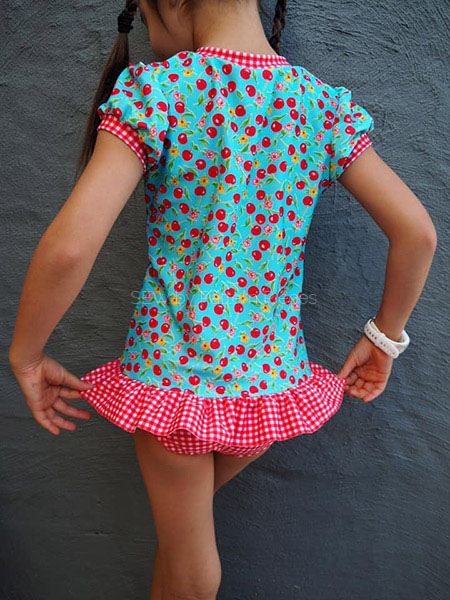
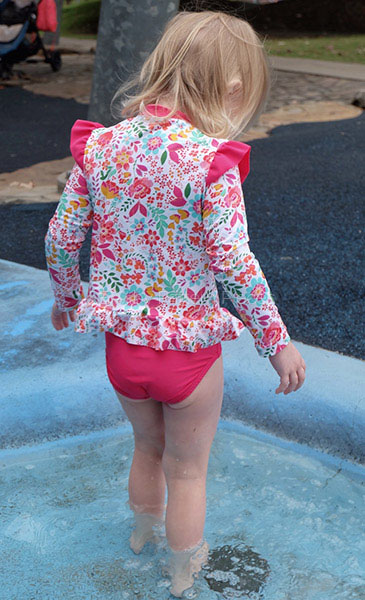
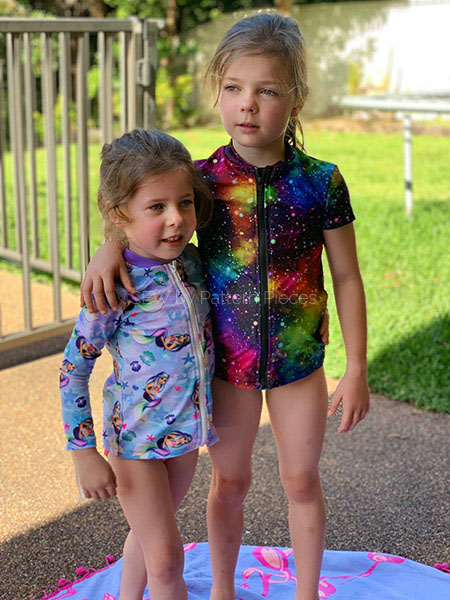
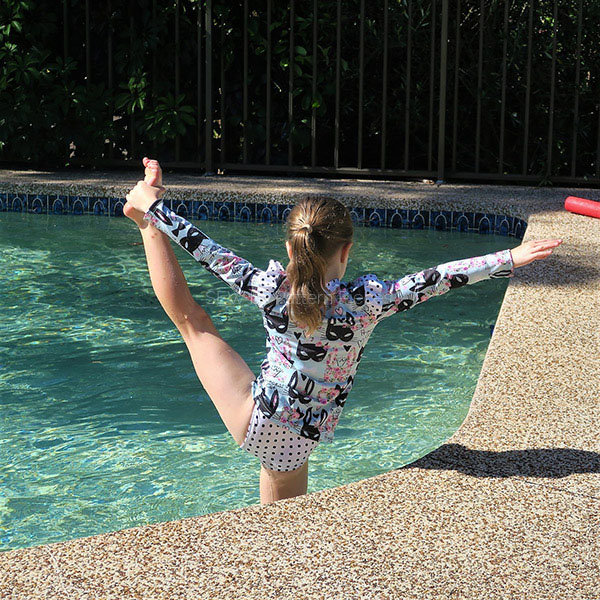
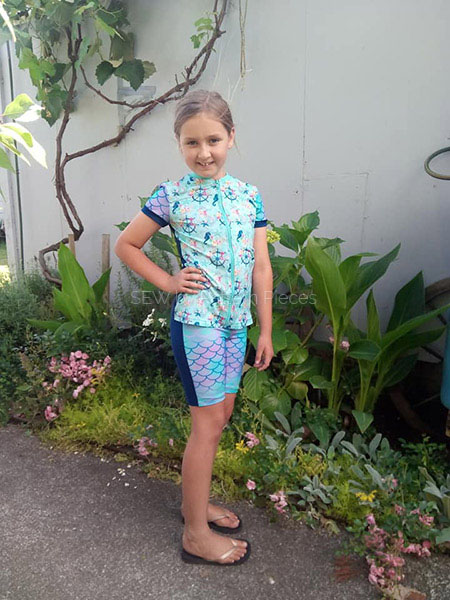
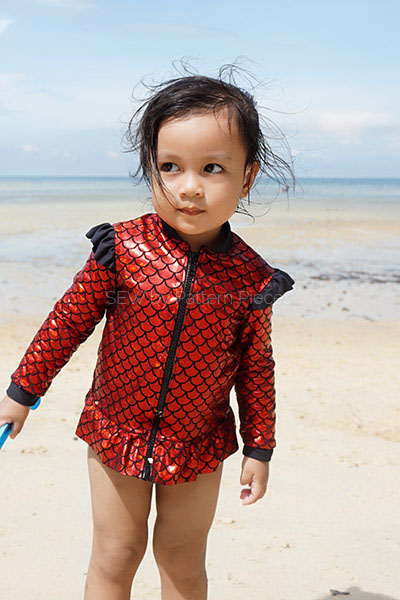
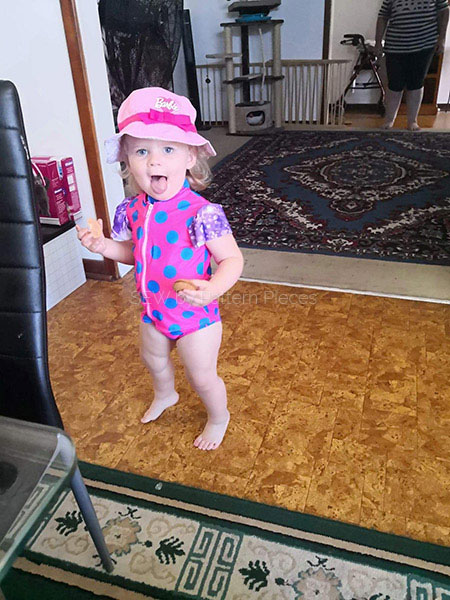
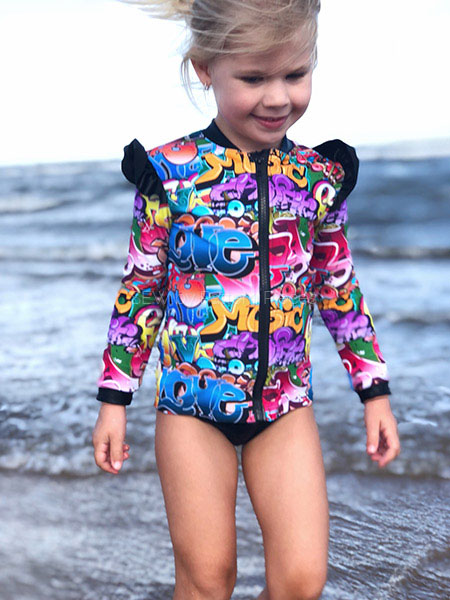
It is with much excitement today that I share with you the Girls Stinger Bodysuit Tester Round Up. We have many style options included in this pattern. It is a comfortable, skirted bodysuit with the option of sleeveless, short, 3/4, or long sleeves. You also have the option of 1pc or 2 PC. The sizes included in the Girls Stinger Bodysuit PDF Pattern are from 1-14.
50% 4-way stretch knit fabric blend containing Lycra/elastane/spandex. Chunky Plastic Zip – 5mm Width – Open or Closed End Video tutorials to shorten zip from the top or the bottom included. Magic Tape or “Sew Easy” Wash Away Quilters Tape (Dissolvable) 1/4”-5/16” or 6mm-8mm Leghole and Armhole Elastic 3/8” or 10mm Crop Top and Swim Pant Turnover Waist 3/4” or 20mm Crop Top and Swim Pant Waistband Elastic 1” or 25mm
To make a Girls Stinger Bodysuit just takes one step further than making a plain swimsuit. The Zip! You need not be afraid of inserting a zip. You just need to get hold of some wash away tape. Using this tape to hold the zip will make sewing a breeze. If you join our Facebook Sewing Group you will see a post, with this picture, where members have shared where they get their tape or zips from. There are many places online where you can buy Wash Away Tape from and have it sent right to your door.
We have found zips in both Spotlight and Lincraft and some of these stores carry the tape also. In the instructions of the pattern, there are video links, showing you how to shorten your zips if too long and another to help you sew the zip into your garment, using the wash away tape.
Be prepared to be blown away by our tester’s gorgeous makes. They have gone all out with fabrics, photography, and look at those zipper installations. Such perfection!
I will always be very thankful for the effort testers go to, to help me sew and check the fit of the patterns, look over and give suggestions for the instructions, and then help promote the new styles on social media.
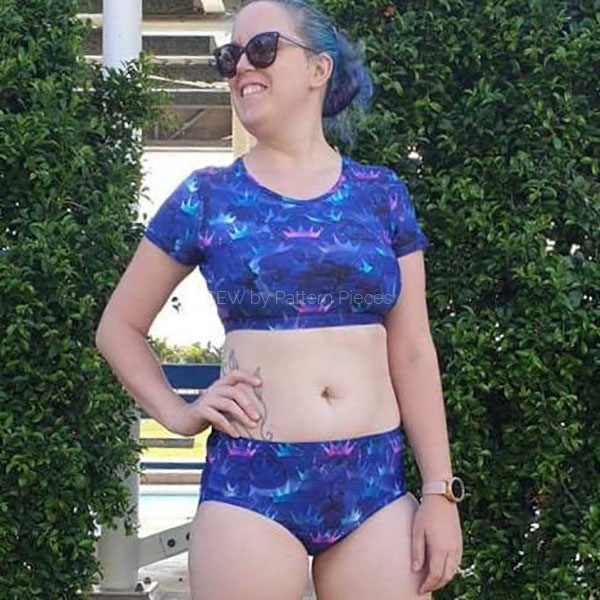
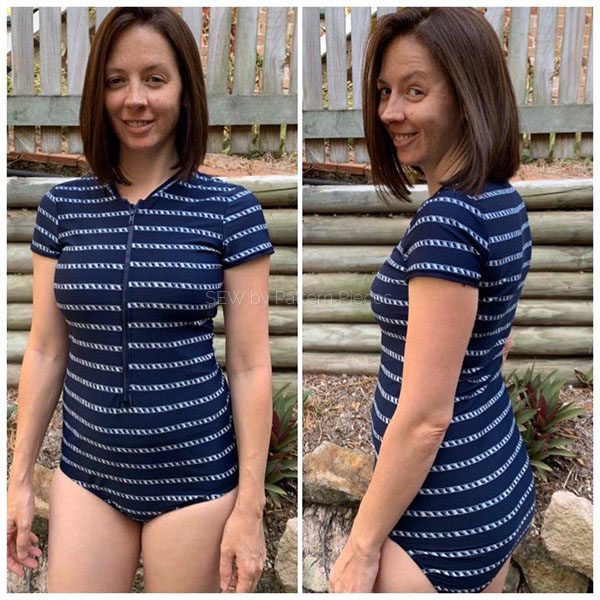
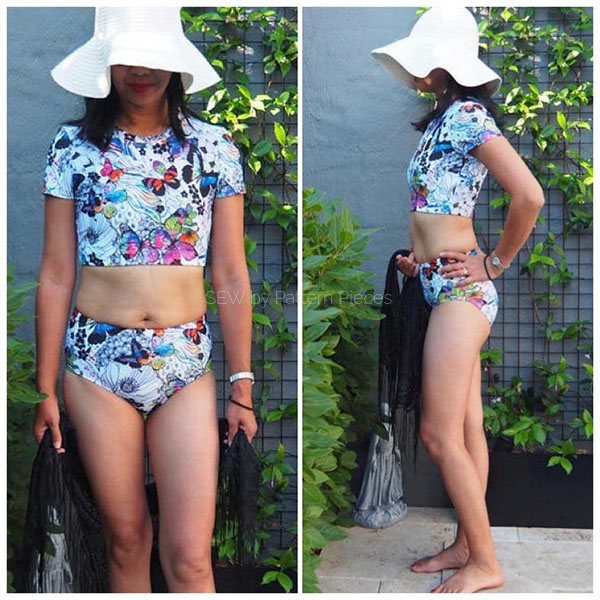
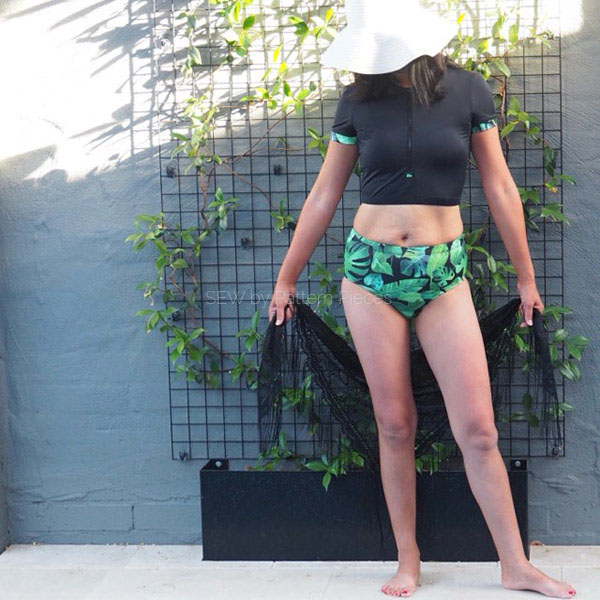
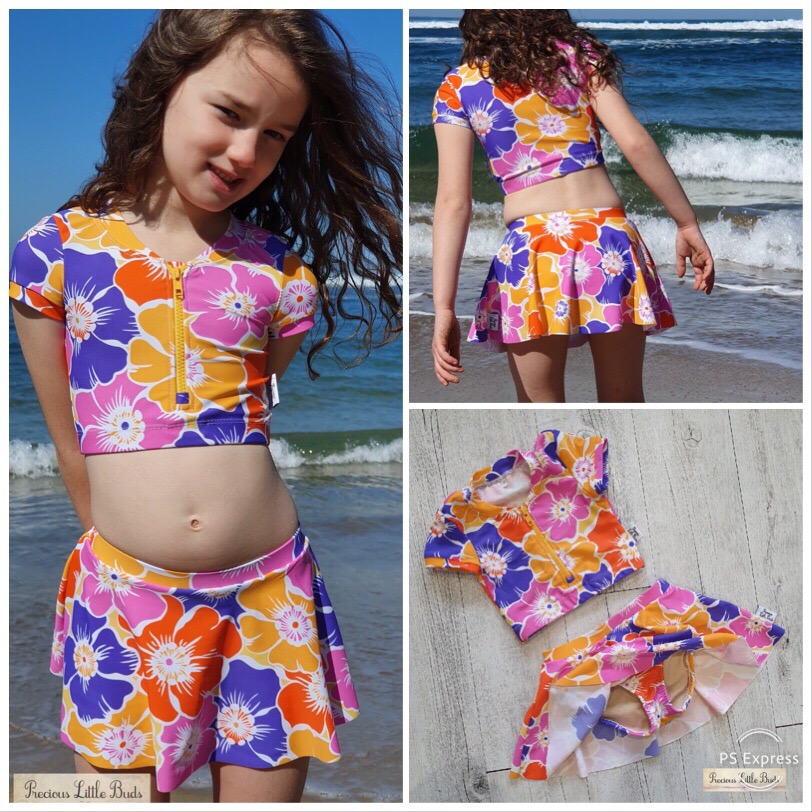
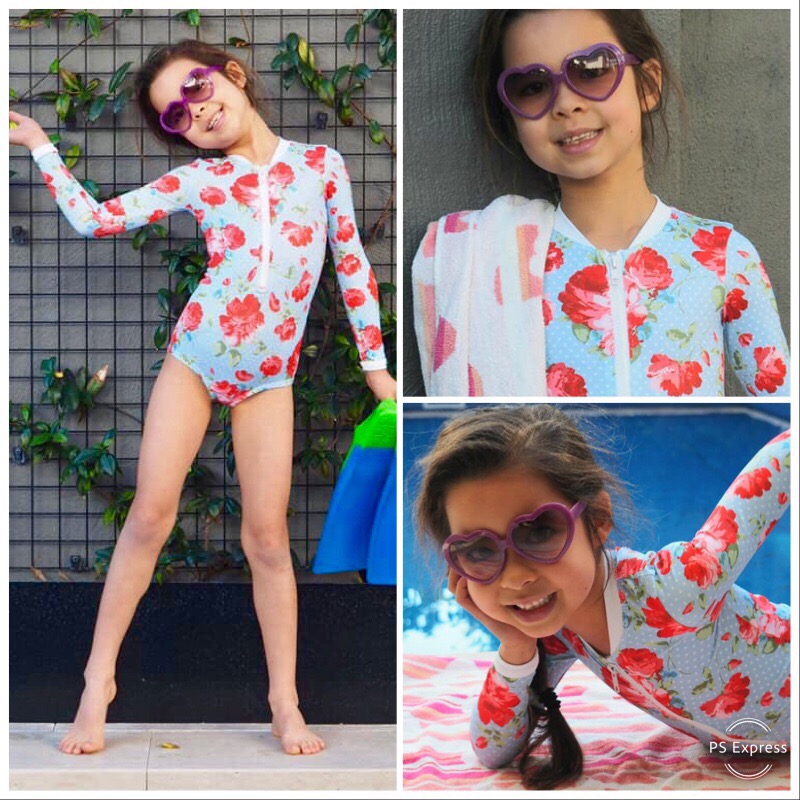
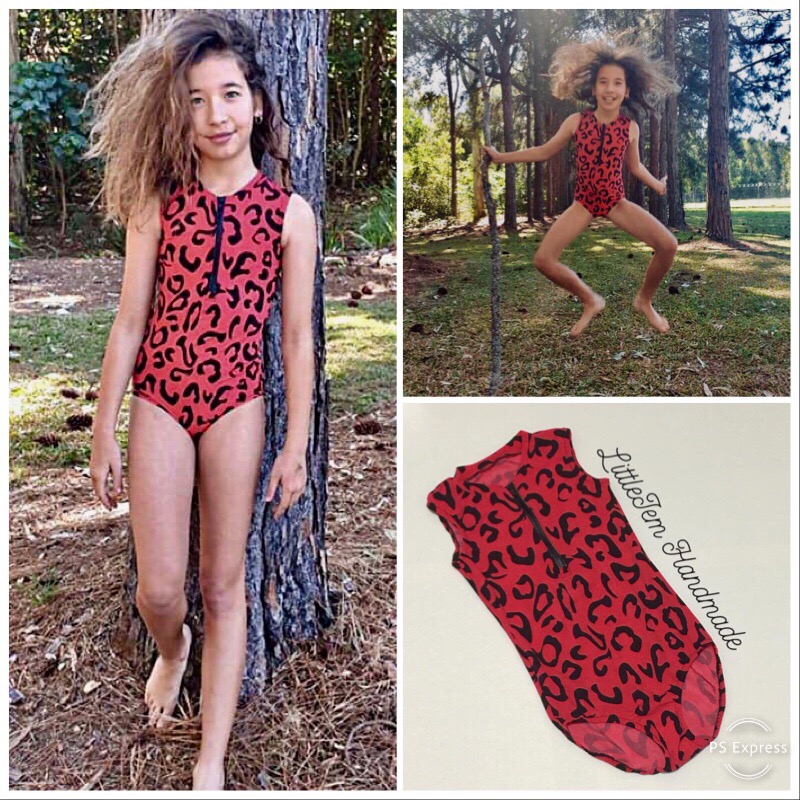
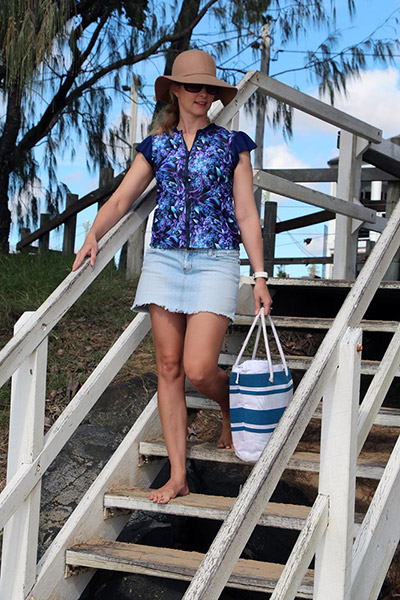
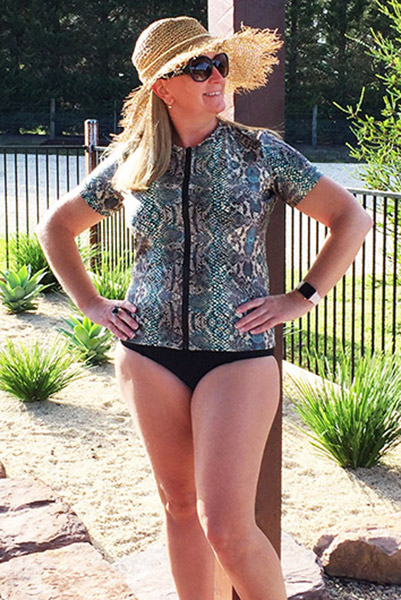
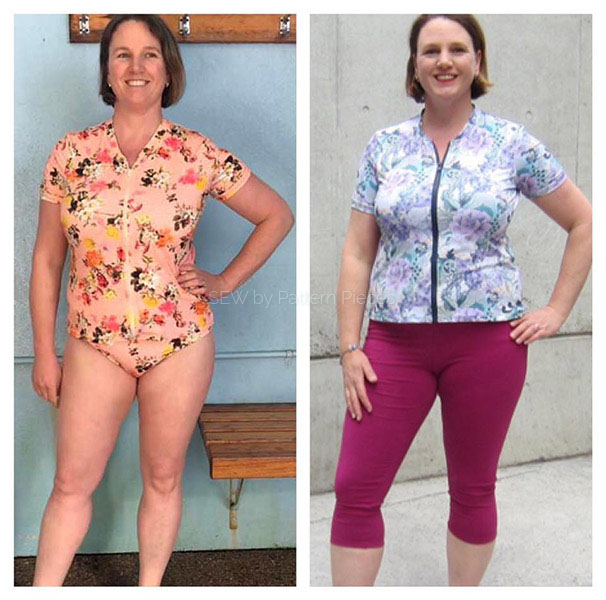
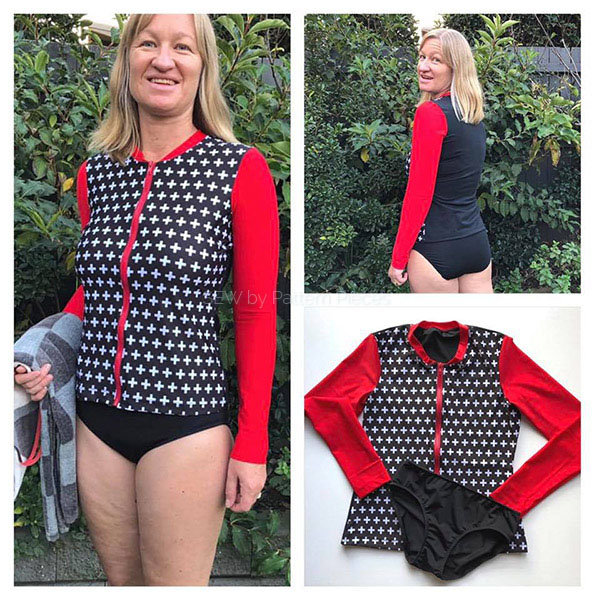
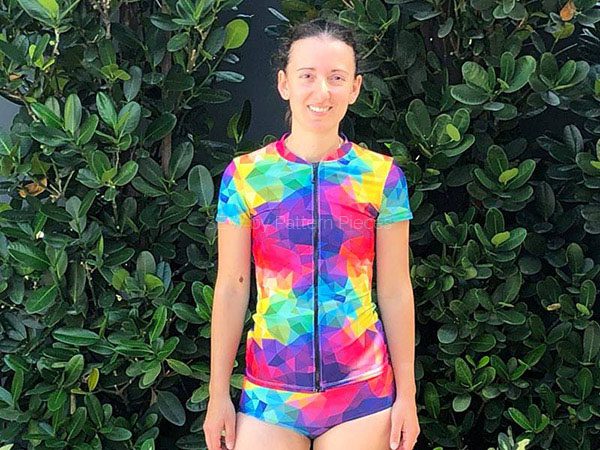
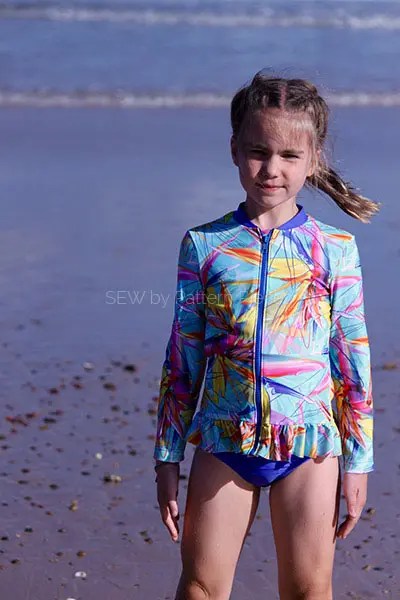
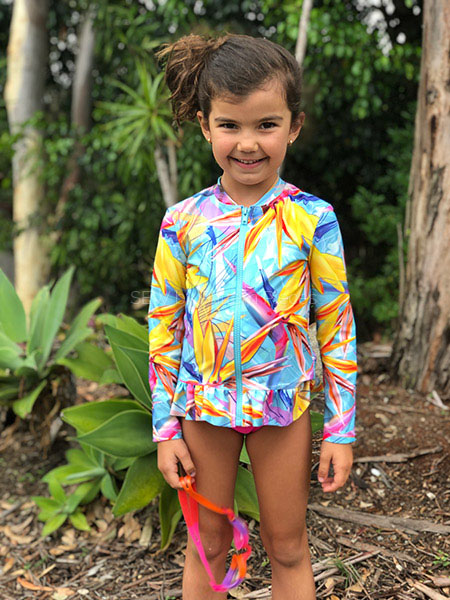
For the Ladies Zip-It Good Rashie Set it was no different. Firstly, what does this pattern include? This pattern is brimming with options.
Zip front closure,
Plain or frilled hem,
Fitted body,
Flutter, puff, short, 3/4, long sleeve options.
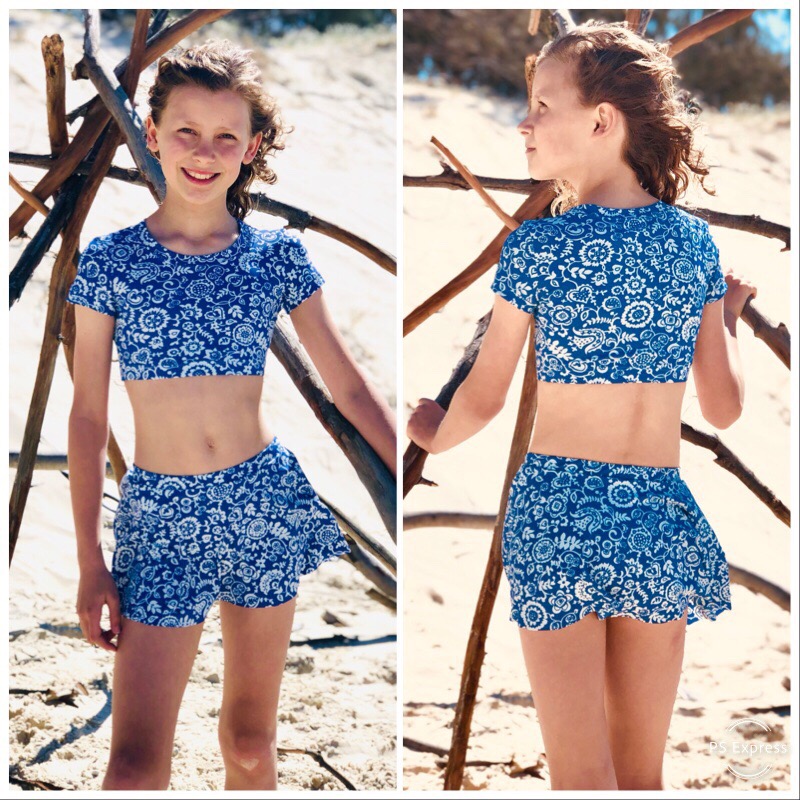
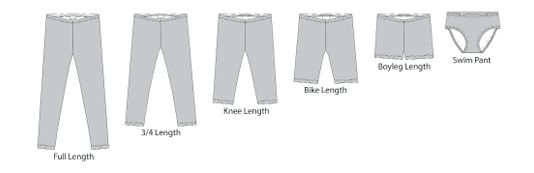
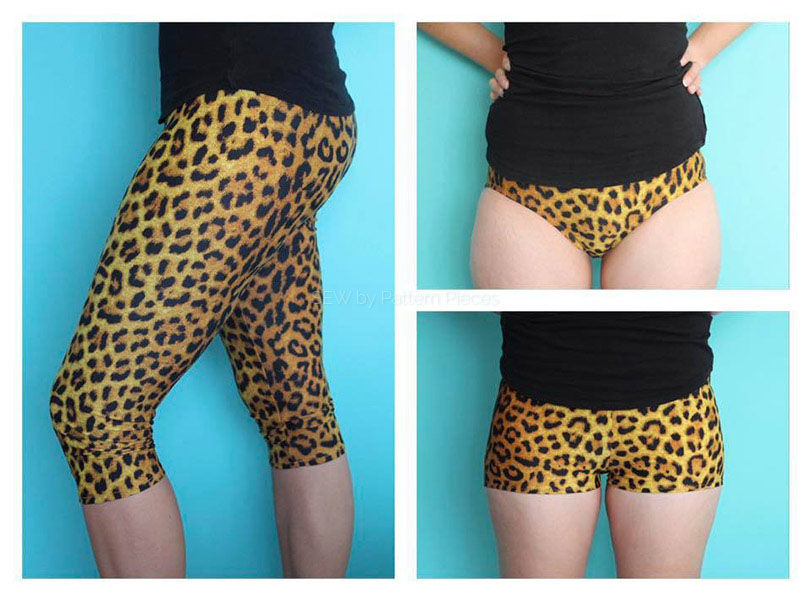
Swim pant,
Leggings with 5 length options.
This pattern comes in a wide range of sizes, but the most exciting detail is that it comes with front pattern pieces specially made for cup sizes A through G.
AU 6-26, US 2-22, EU 32-52.
All pattern pieces are computer-generated, color-coded, and layered so you can choose to print the actual sizes you require.
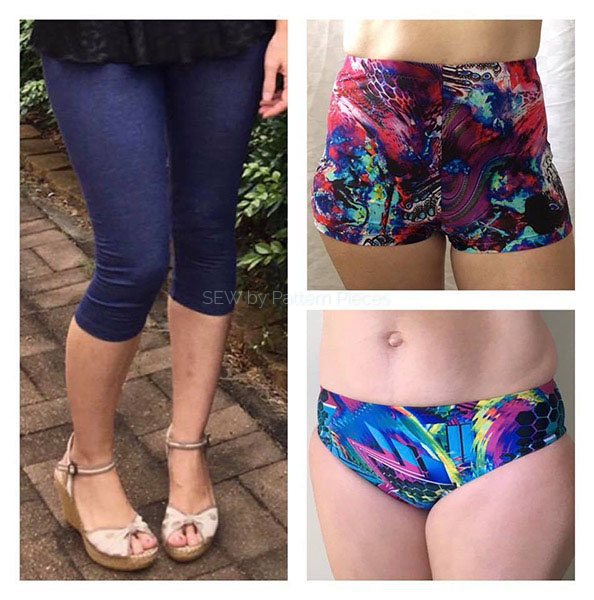
These are a few of the lovely versions of the leggings and swim pants that our fabulous testers made in the first part of the test.
Hannah Bnana
Brooke Ashcroft Hannah Bnana Kylie Pollard Synthia Lee Gerritson
What I love about making my own rashies is being able to use the gorgeous fabrics that are available on the market. I cannot understand why we need to settle for plain black, white, and navy when we visit the stores.
To make a rashie all it takes is one step further than making a t-shirt. The Zip! You need not be afraid of inserting a zip. You just need to get hold of some wash away tape. Using this tape to hold the zip will make sewing a breeze. If you join our group you will see a post with this picture where members have shared where they purchase their tape from. There are many places online where you can buy it and have it sent right to your door. In the pattern, there are two video links. One to help you shorten your zip if it is too long and another to help you sew it into your garment using the wash away tape to hold it.
Next, the zips. They are also easy to get hold of to sew your garment. In Australia, both Spotlight and Lincraft have a great selection. The zips used are just a standard 50cm or 19 5/8″ open-ended chunky 5mm or 1/4″ zips. Have a search online if you cannot purchase from your closest store.
In the weeks to follow, we tested Ladies Zip-It Good Rashie Set and wow what an array of gorgeous results we had.
One of my long time testers Alison had a brain wave and decided to try out the band from our Glamour Swirl Skirt on the Swim Pants. They look awesome and were able to be added to the pants with no adjustments necessary to the band or pants. She just popped them straight on.
You can find the free file to this pattern in the “Files” section of our Group. If you choose to join this is the link HERE
Linda Stilling
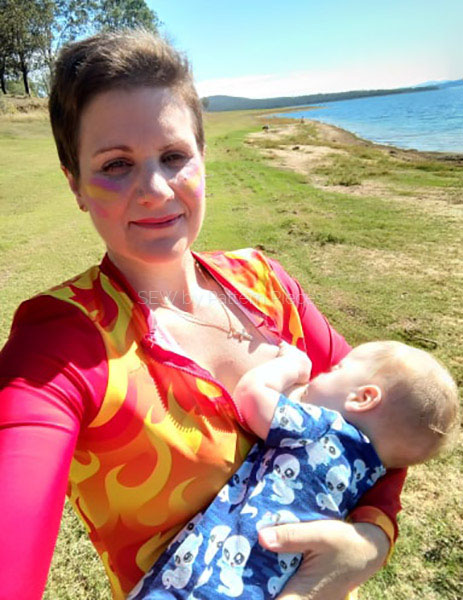
One of the most beautiful times of our lives is being able to breastfeed and this can be difficult when you are near the water. One of our testers remedied this with the use of her Ladies Zip-It Good Rashie. How cool is this? The zip front allows the ability to breastfeed while in your swimsuit.
Robyn Buchbach
If you are in love with the makes you have seen and wish to make a Mummy and Me version you are also able to purchase the pattern as a bundle. Yes, we have this same pattern in girls’ sizes. From size 1-14 youth. Here are some fun pics of Mum’s with their little ones in pieces from the Girls version of the Zip-It Good Rashie Set.
Don’t forget you also can add a fun frill to your rashie. It looks so adorable!
So are you wanting to have a summer where you can head to the water for the day and not come home sunburnt? Ready to bite the bullet and make your own?
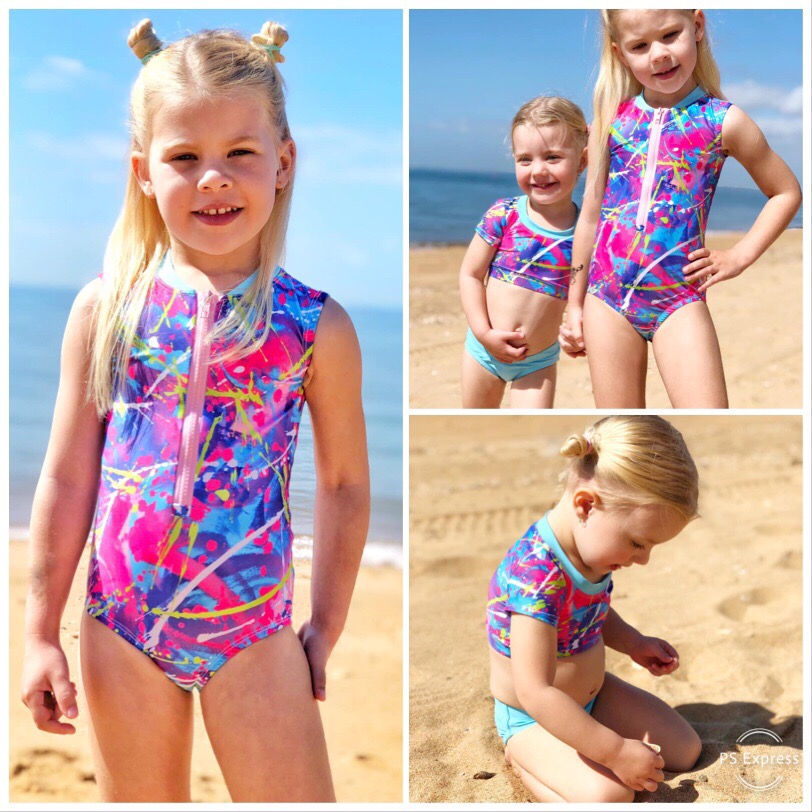
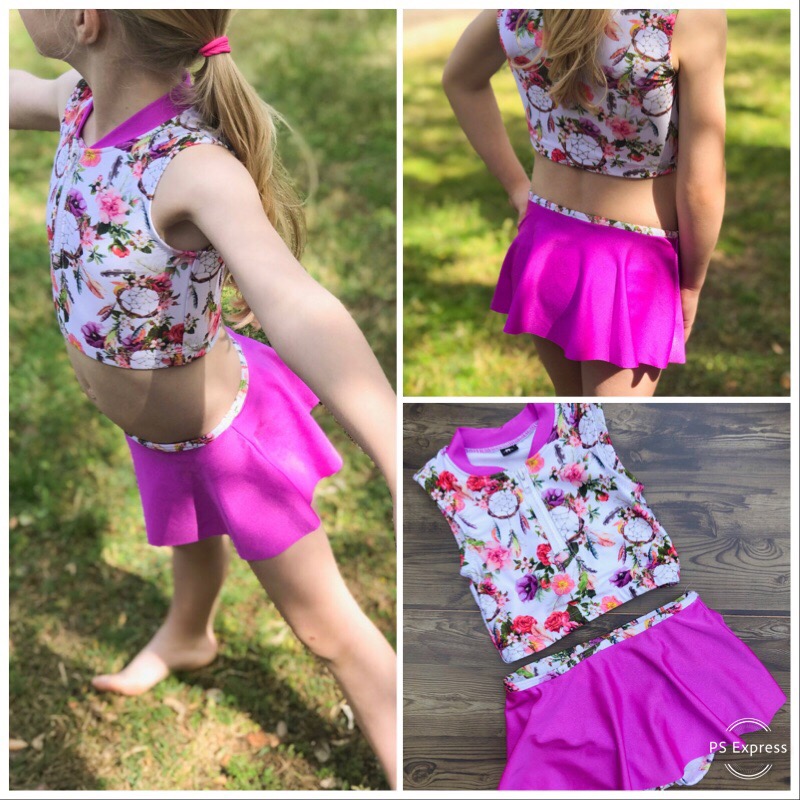
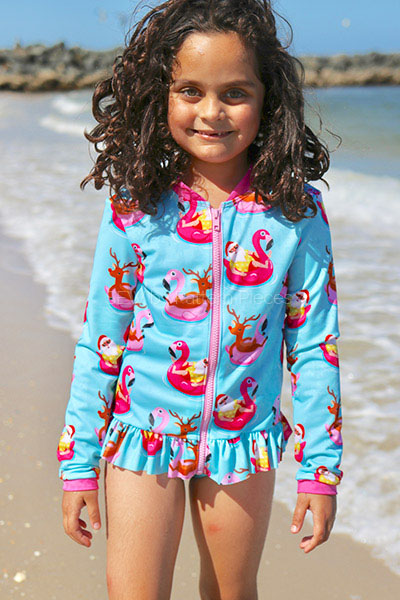
Get ready for cuteness overload in this Girls Zip It Good Rashie Set Tester Round Up. Our pattern testers have sewn up a storm putting together these gorgeous zip front rashies in the hope they can keep their little ones burn free this summer.
Such a huge selection of options are available in this pattern. You could make a different option of rashie every year, for years to come. On top of these options shown here, there is the option to add a frill on the hem as well.
Amy Hodge
Alice Blackmore
Fea Stephens
Fea Stephens
Linda Stilling
Michelle Ball Johnson
The written instructions guide you through every step of the zipper installation, with links to step by step video tutorials. Making zipper installation into stretch super easy to master.
Tanya Karolia
Sarah Mumford
Carmen West
Helen Currie
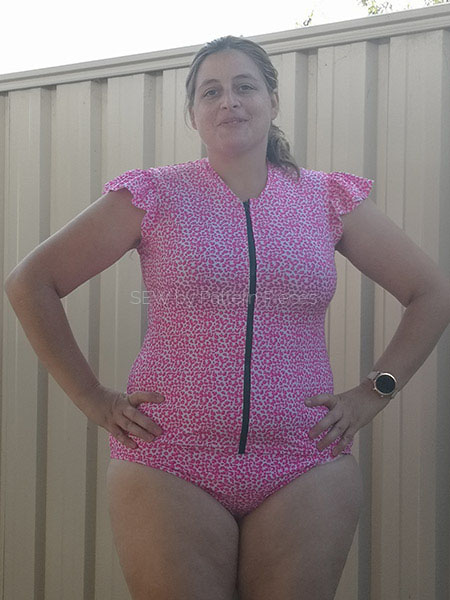
It does not matter what the age. Frills look so sweet on both long sleeves or short sleeves. You have the choice to add cuffs or turn up the hem on the sleeves.
When you have such fair skin and there is the risk of stingers in the water a pair of leggings come in really handy at the beach. The swim pants can be worn underneath if you do not wish to line the leggings.
Karen Fildes
Kristy Fleischmann
Nabilah Razif
Shannon McClain
Yvonne Pyke
Shannon McCraken
Weren’t they just the cutest photos to scroll through? Are you ready to make your kids burn free this summer with a Girls Zip It Good Rashie Set as well?
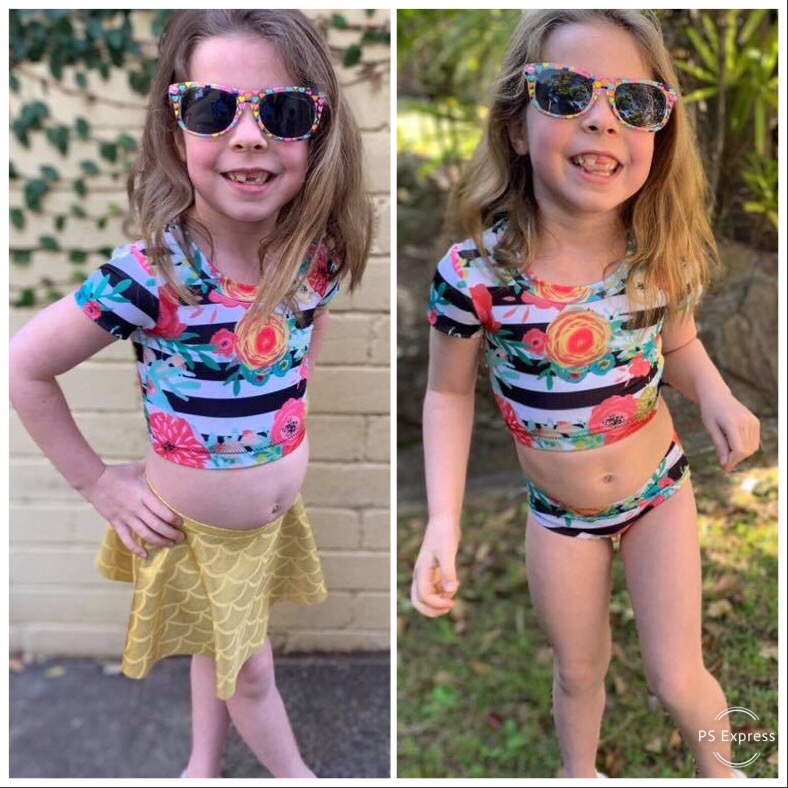
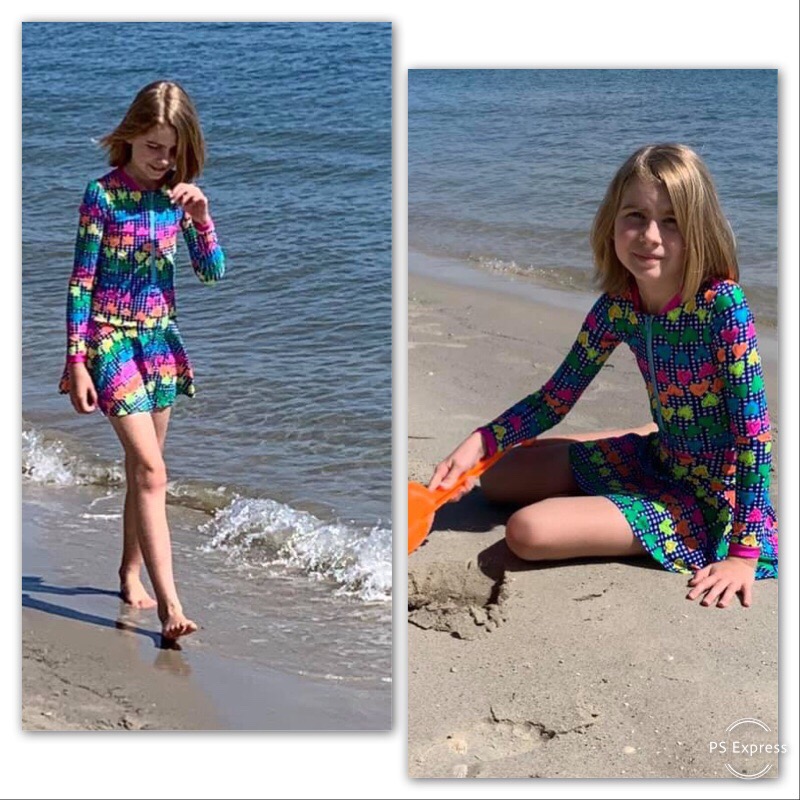
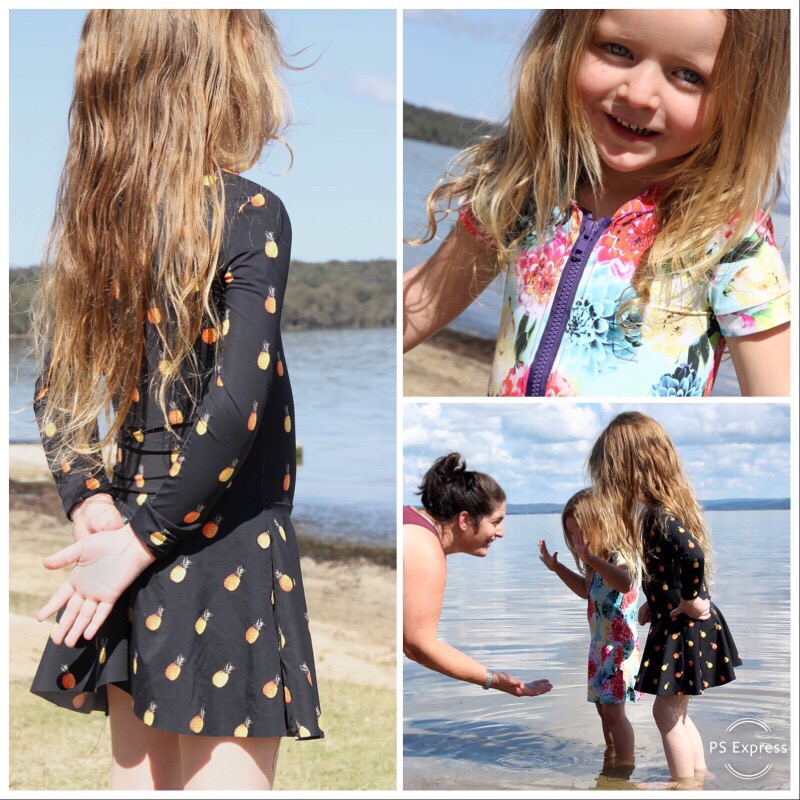
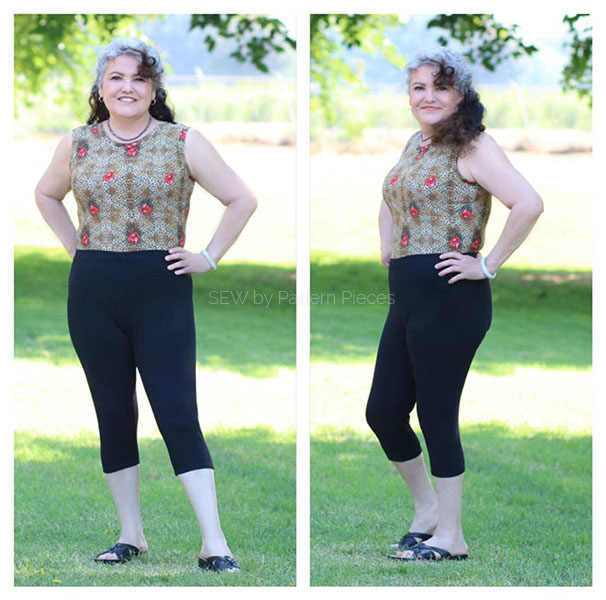
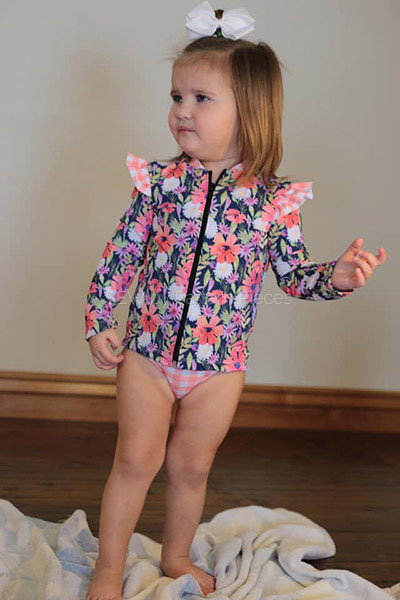
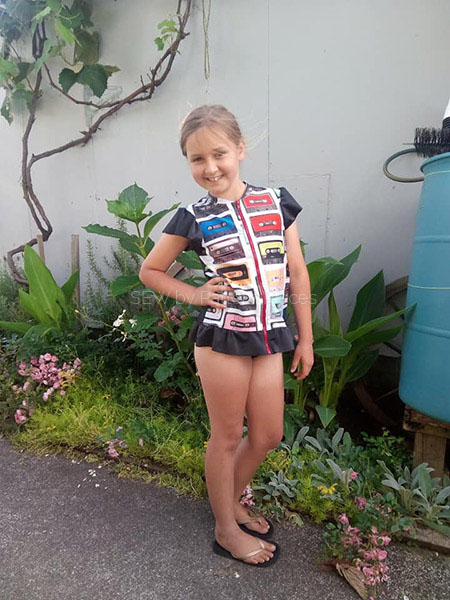
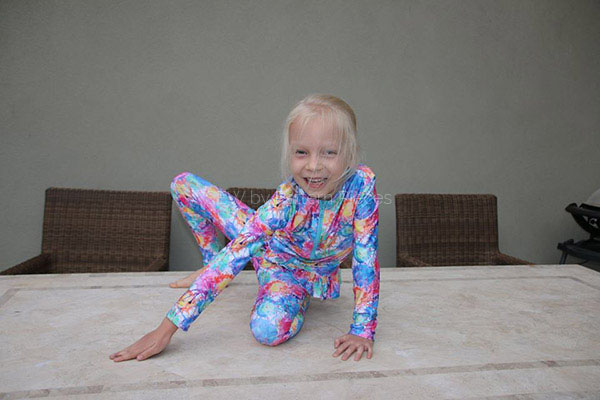
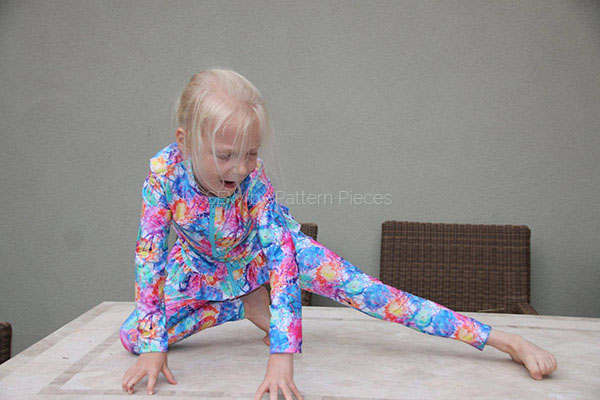
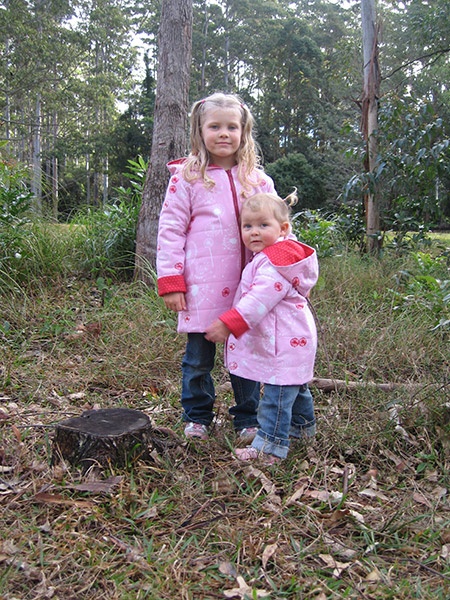
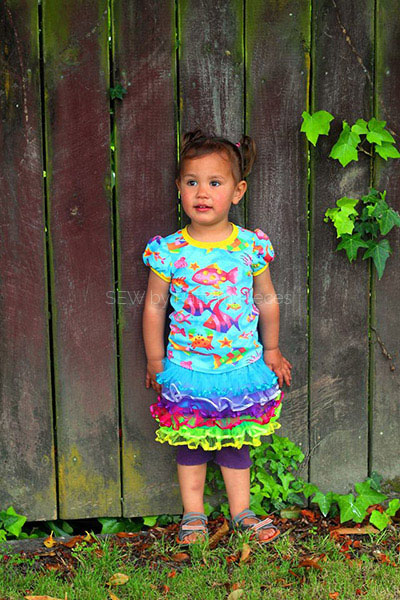
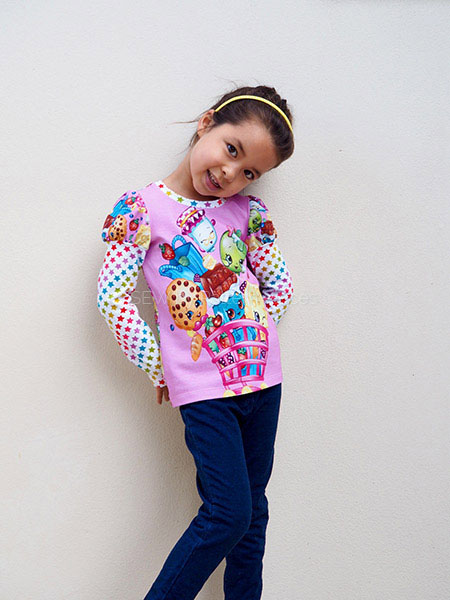
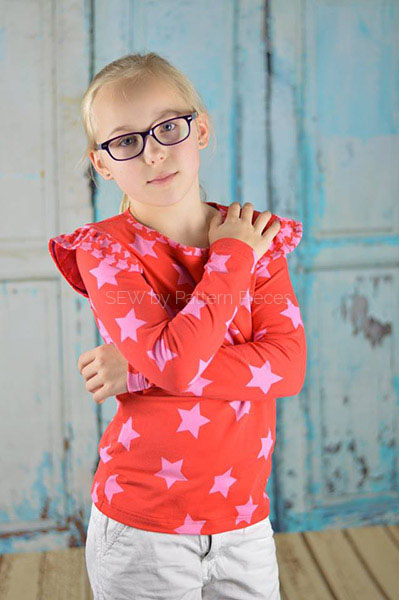
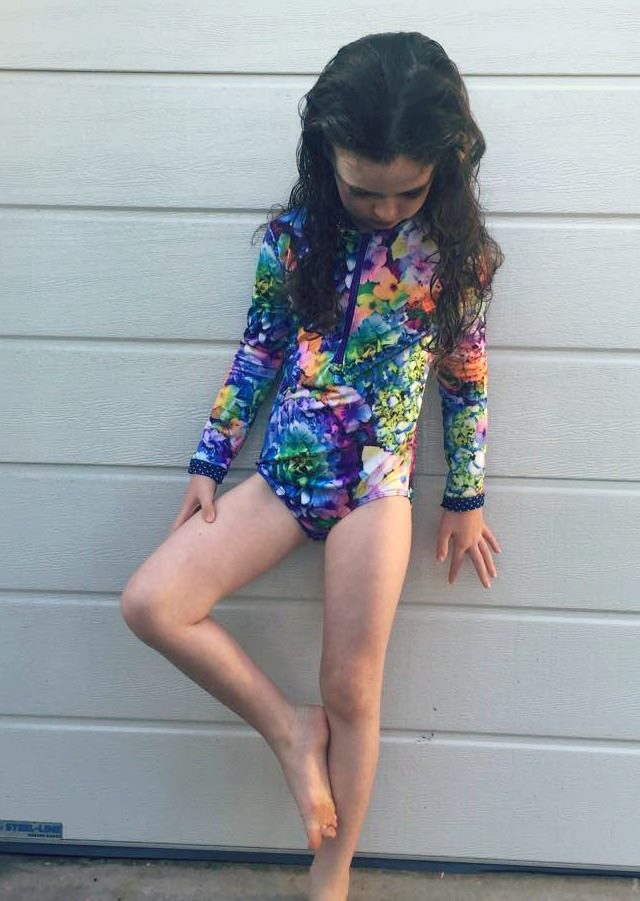
I am here today to show you the Girls Revised Fun Tee Tester Round Up but first I would like to tell you about how it got to this stage. The Girls Fun Tee pattern was the first pattern that I released when starting SEW by Pattern Pieces. I have learned so much since that first day. One of the things I was not aware of at the time was just how big the online sewing community was.
I have always loved to sew but since I left Home Economics at high school and Design College I have not really talked much to anyone outside of work about sewing. Talking to friends about sewing was always a quick conversation as it was not a shared interest. I never thought to look at Facebook for sewing related groups.
Then one day I found a fabric designer that I loved and she had a PDF Pattern for a girl’s quilted jacket. It was the first time I had come across a PDF pattern. I had been making clothes for my girls either from patterns I had made or from the big 5. I decided to sew up a jacket for each of them from this pattern. They loved them and got a lot of wear out of them that Winter.
My little cuties in their cool homemade jackets.
Now that I had been introduced to PDF Patterns, I set about working out how to write them. I had been working in the rag trade for many years as a patternmaker but I had felt I had stopped learning and was not sure which direction to head with the skills that I had. It was then that I found the Pattern Workshop course for designing PDF patterns. My mind was blown with the possibilities.
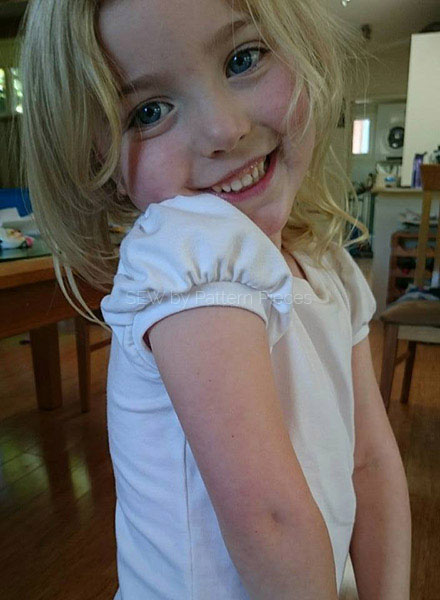
I began drafting a little Fun Tee for my girls. I could only find plain 100% jersey at Spotlight and at that stage Lincraft was not easily accessible but I do not think their knit range was great, at the time. So, I used some fun iron-on transfers to jazz them up.
The very first version of the Girls Fun Tee on my two girls.
During the test of this pattern, I was amazed at some of the fabrics and prints testers were making their tees out of. After the test, I started buying some of the amazing stretch cotton Lycras and sewing them up for my girls. I then realized that the pattern needed tweaking and this was the catalyst for the revised version.
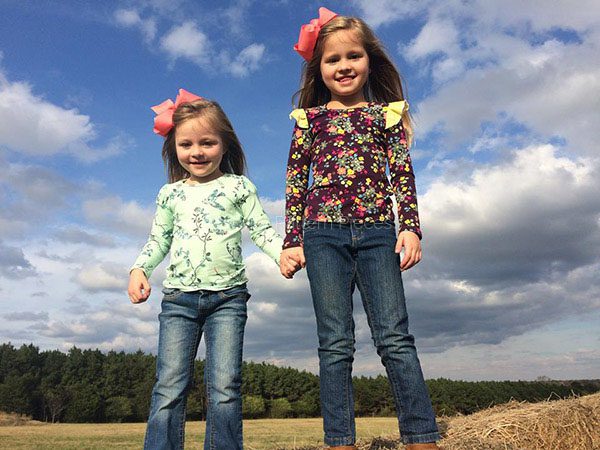
For a second time, my team of testers did an amazing job and I look forward to showing you all their gorgeous makes. In the Girls Revised Fun Tee, we added a few more sleeve options giving you a tee with lots of style choices.
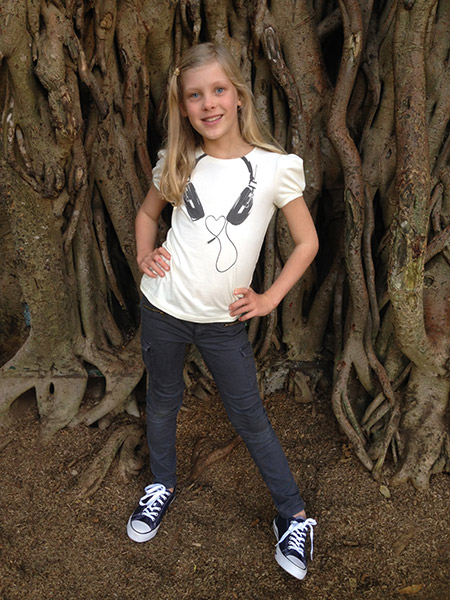
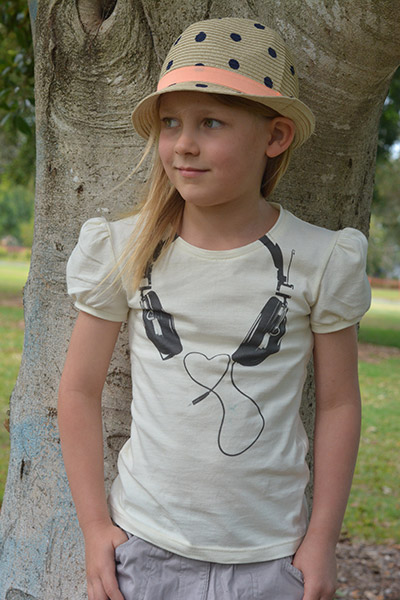
The Revised Fun Tee and its options.
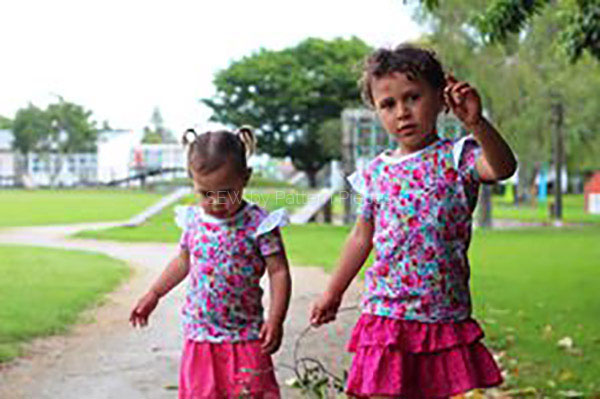
The Girls Revised Fun Tee Tester Round Up, get ready to see lots of cuteness right here, as I love all these makes. It brings me so much joy to see these photos as this is what I love about doing what I do.
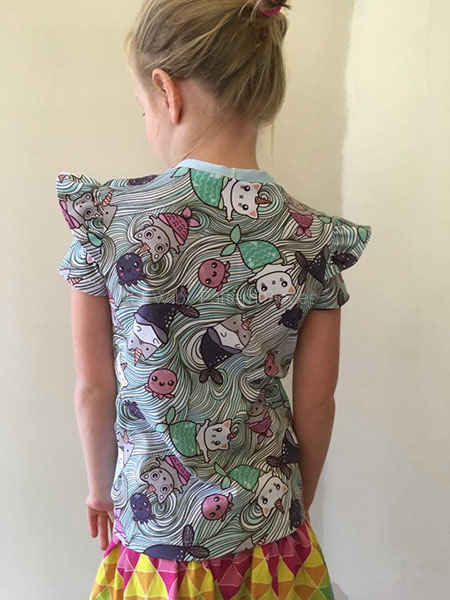
Abigail Shelling
Abigail Shelling
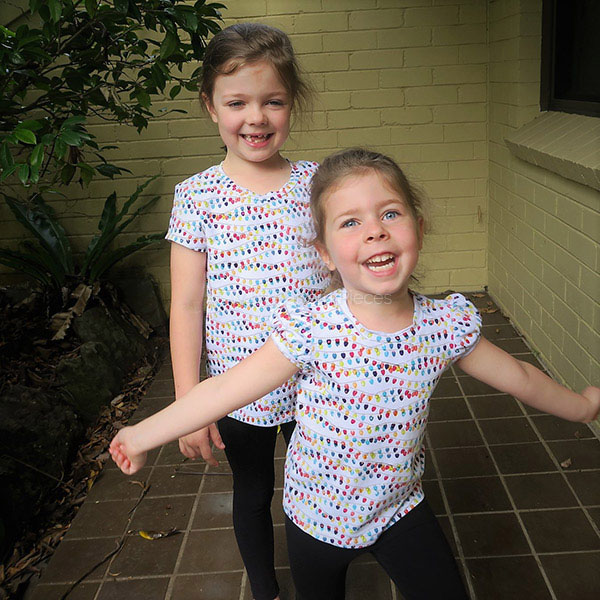
Amy Hodge
Anja Wouters
Anja Wouters
Cassie Fussle
Cassie Fussle
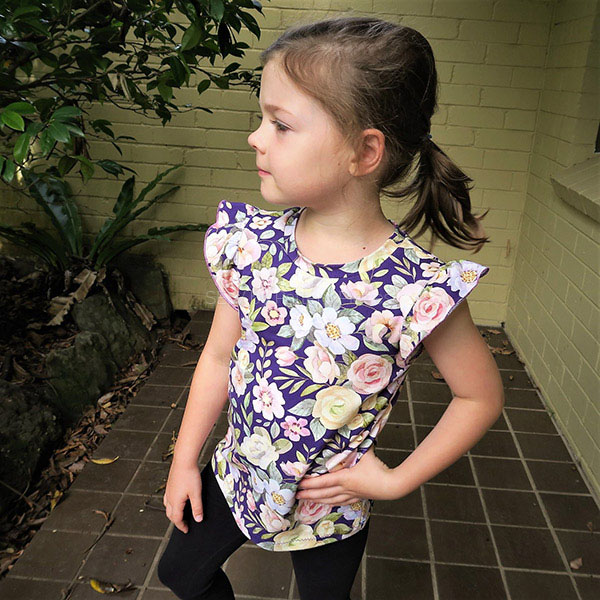
Fea Stephens
Fea Stephens
Fee Stirt
Karen Grimshaw
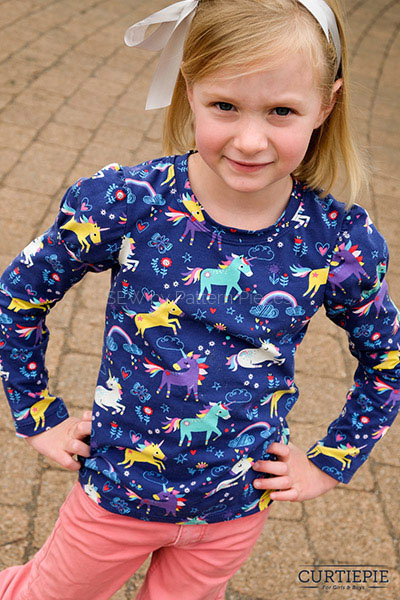
Kel Curteis
Kel Curteis
Sandra Schommer
Sue-Jones
Amanda Kaye Saffold Jones
Sarah Mumford
It was such a fun test the second time around. The fit was gorgeous on all the girls and I am much happier with all the tweaks and new sleeve options. I hope you will love the Girls Revised Fun Tee as well.
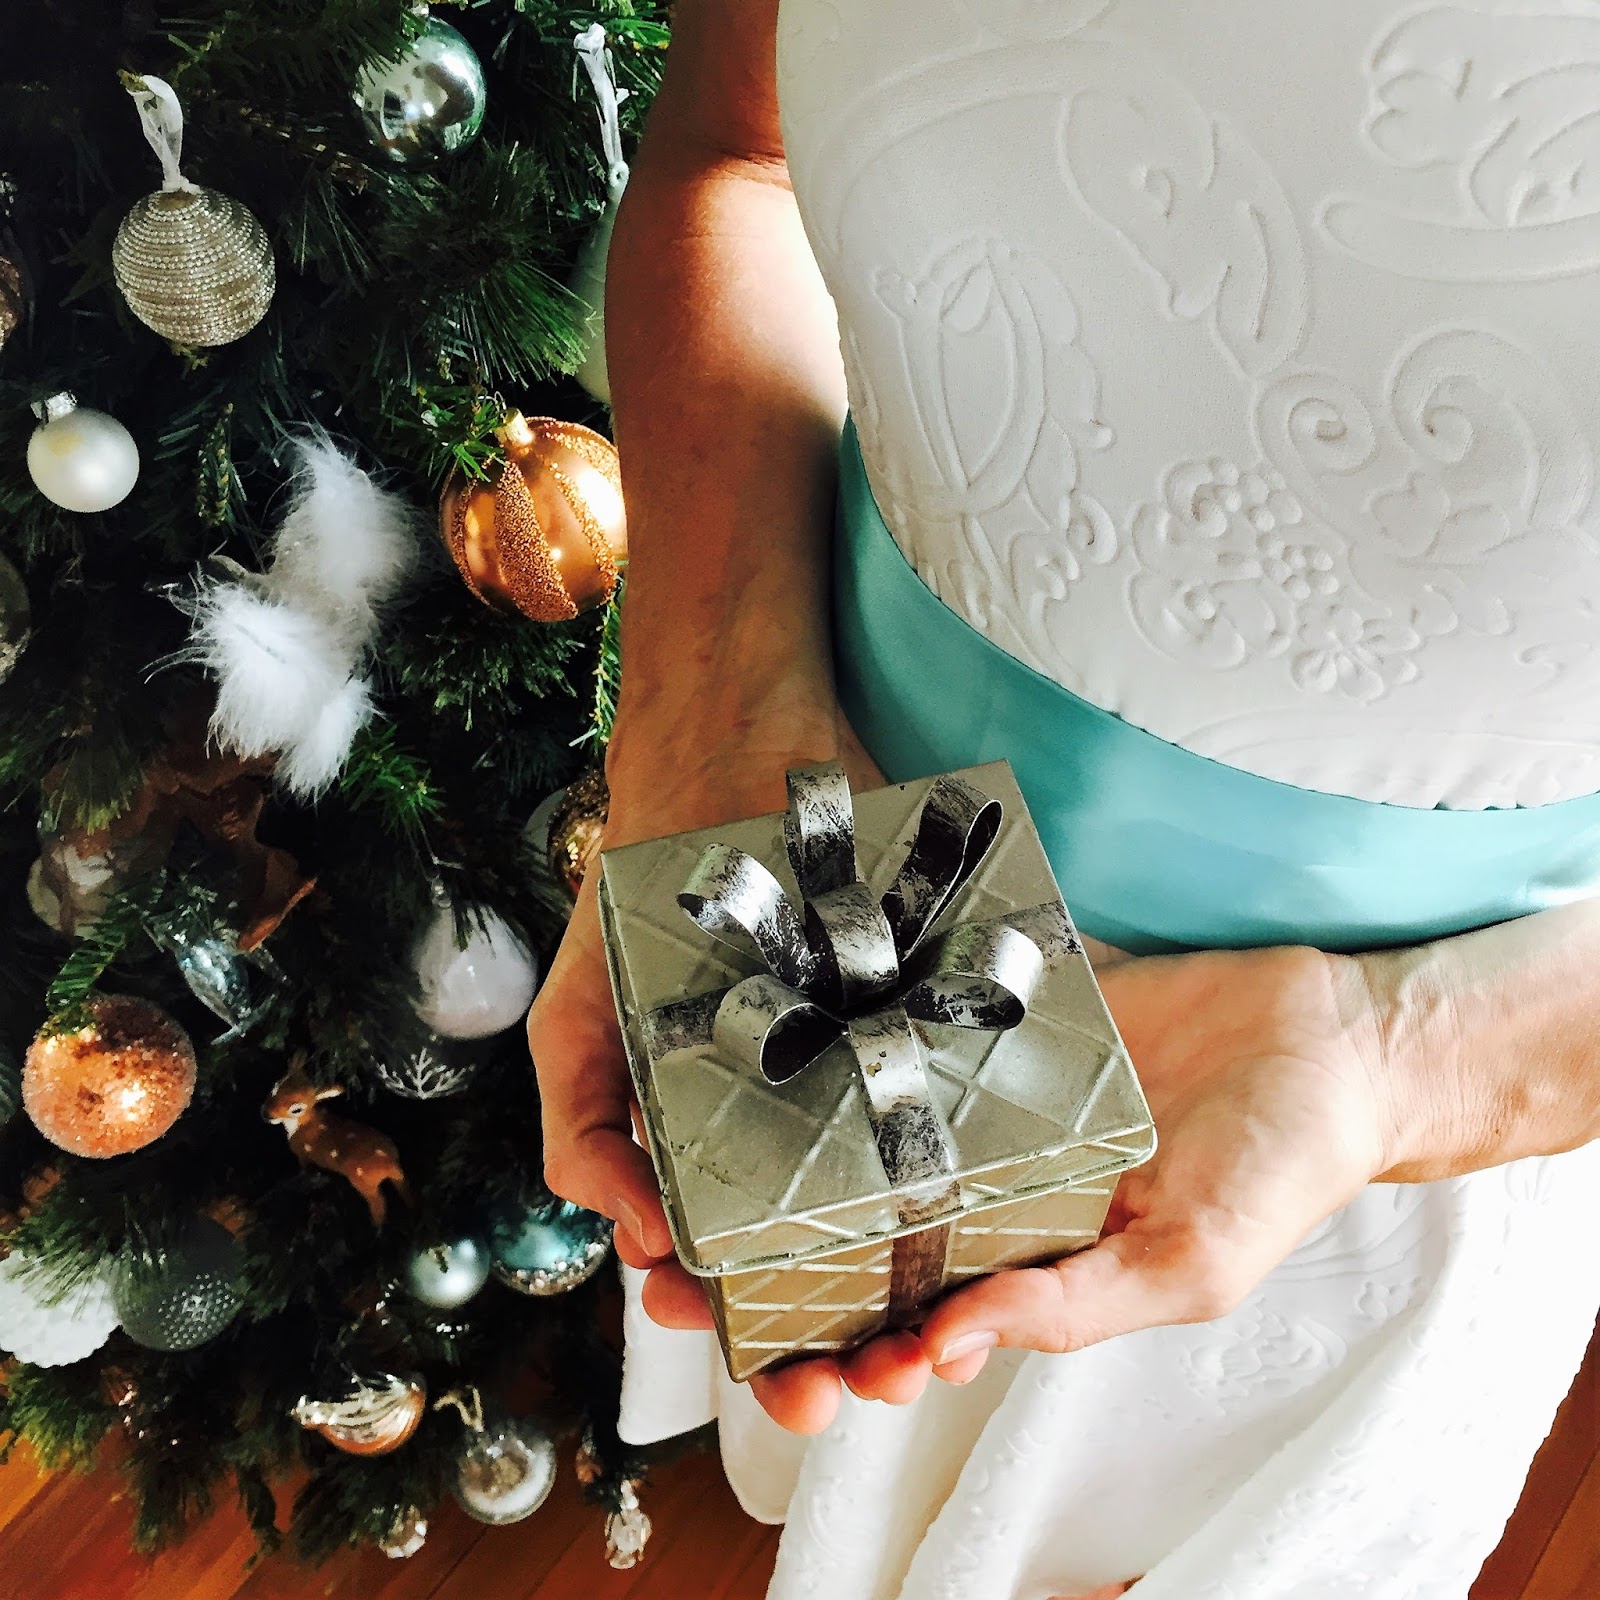
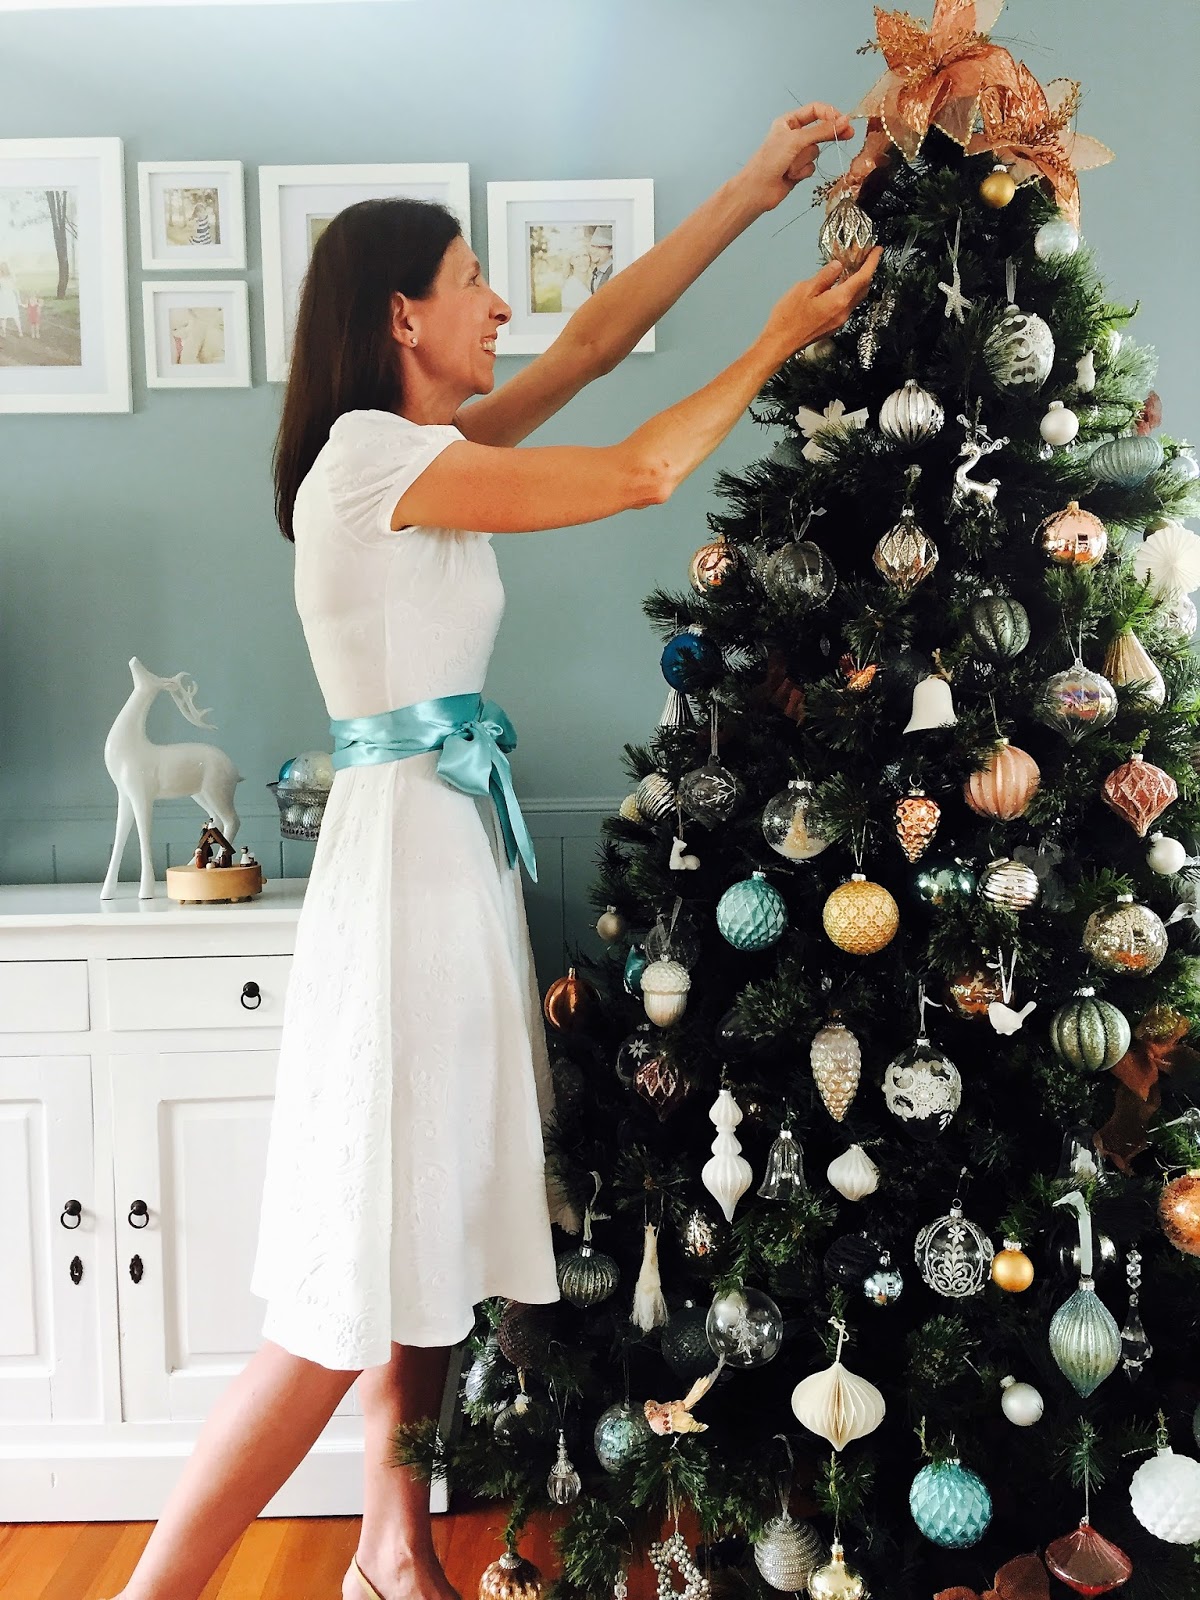
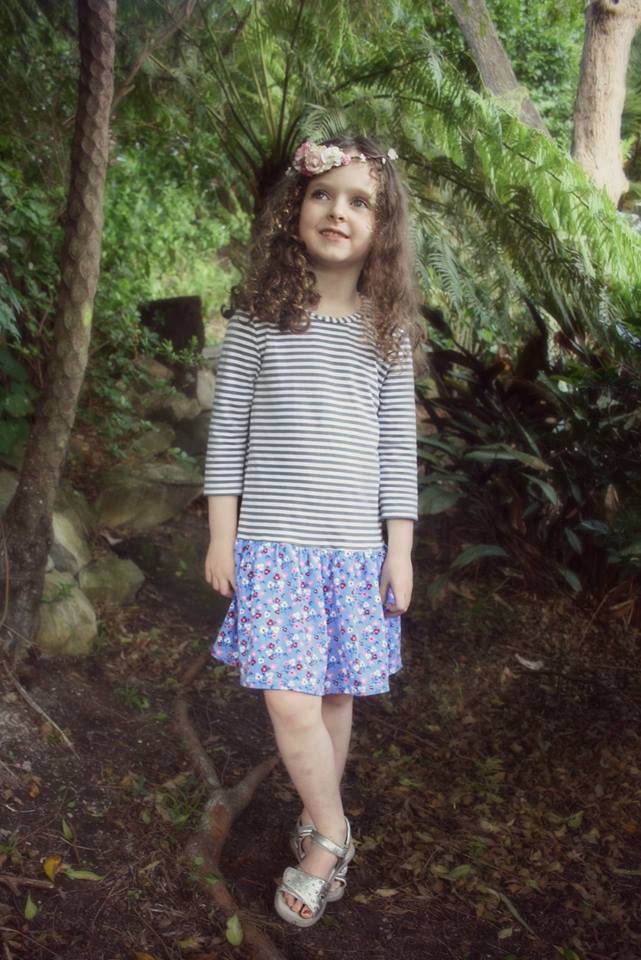
It is that time of year where we are looking for something to wear that is a little festive. Ever since I laid my eyes on this beautiful fabric in a destash group (Thank you Sneha), I have had the vision of this dress in my head. I am so excited that I have now had the time to put it together and also to be able to share it with you.
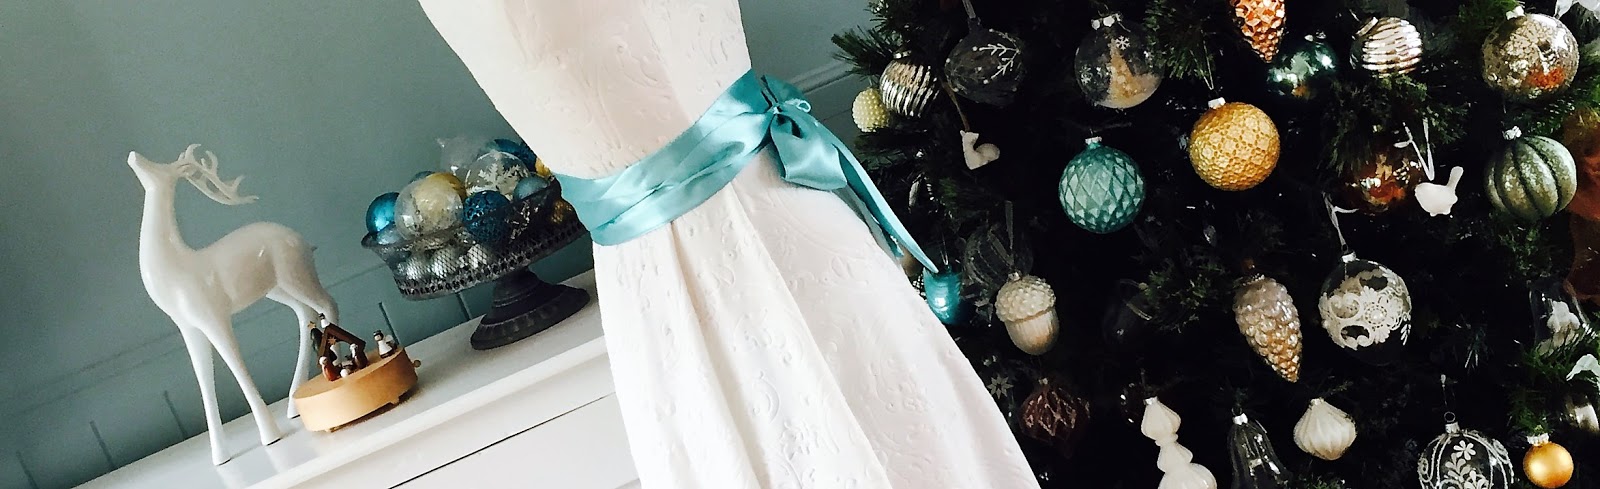
Thank you to the lovely, awesome, fantastic, and very patient Tasha Kimlin who took the following photos for this post. Tash has the most amazing eye for detail and this is represented throughout her home. As soon as I saw her stunning tree (as it is every year!) I knew I had to use this location as the backdrop to showcase this dress.
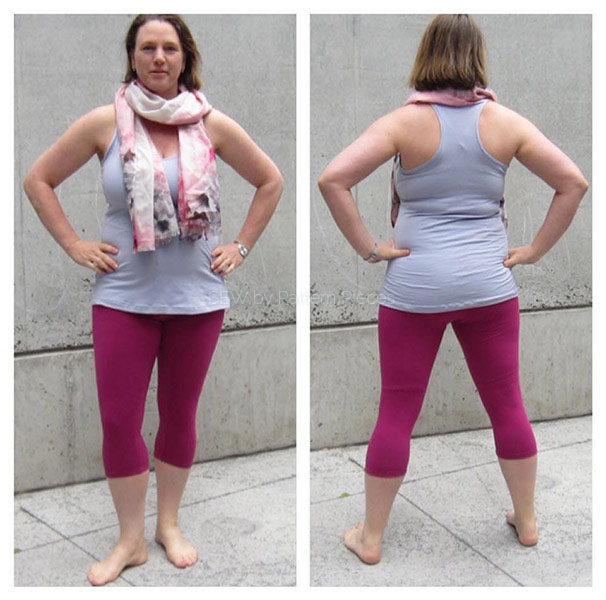
In order to create this dress, I have taken the Ladies Fun Tee and brought it in 1/2″ each side at the waist and cut it off 1″ below the lengthen shorten line at the waist (I am long in the body!) Next I measured the Glamour Swirl Skirt (Free when you join my group) waists and found a size to fit the top half of the Ladies Tee and used that for the skirt. This skirt is a full circle.
There are many options to create a feature at the waist. One idea could be an actual belt! We very nearly used a rose gold one. Another idea could be a contrast band in stretch. We decided, in this case, to use a statin sash, about 8cm wide and wrapped around twice and tied into a bow. The sash finishes the dress off nicely worn either at the front of the dress or at the back.
Have you decided on your Christmas outfit this year? Using the Ladies Fun Tee could be a great option. We live in Australia and I find this dress so comfortable in the heat, no need to iron and it has the ability to dress up or down to suit the occasion. Plus I can change the band at the waist and my shoes and have a completely different outfit.
The Ladies Fun Tee is available with Fronts for A-G cup
Sizes supplied in this pattern
AU 6 – 26, US 2 – 22, EU 32 – 52
We have had many lovely designers contribute to the prize package for this tour. With only a couple of weeks until Christmas, we thought it would be a great idea to showcase a pattern from each designer that would make a great gift to give away over the Festive Season.
Every one of the businesses that are featured in this post has kindly donated the prizes for The Christmas Gift Giving Blog Tour, so I hope you love reading about the fun projects they have on offer and pay them a visit.
All of the contributors are listed in alphabetical order.
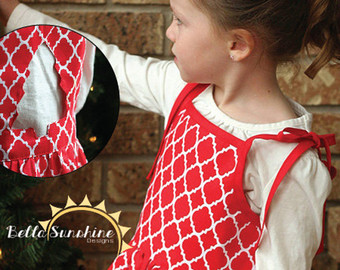
The holiday cutout dress by Bella SunshineThe Holiday Cutout Dress & Top is packed full of options. Different cutouts, different lengths, and an optional appliqué give you the opportunity to make it unique every time you sew it. Layer it over a long sleeve shirt and leggings for the winter or keep it as is for warmer months. And with the different cutouts available in various sizes, you can make one for every one of your favorite holidays. Included cutouts feature a heart, shamrock, bunny, star, pumpkin, and tree.
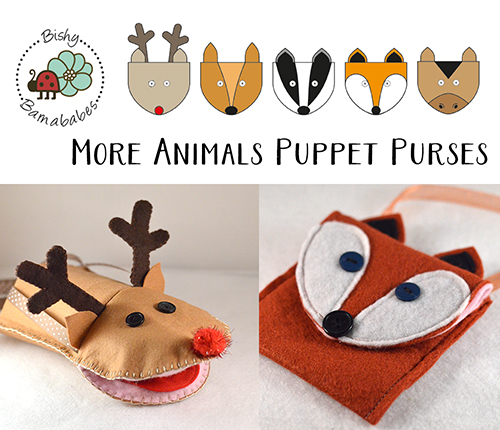
The Puppet Purses from Bishy Barnababesmake great, fun gifts that can be whipped up in no time. Using felt or fleece, they are a unique design that combines both a puppet and a small purse for loose change or other treasures. Kids love them! There are two sets of animals and both patterns are currently on sale in the Bishy Barnababes shop.
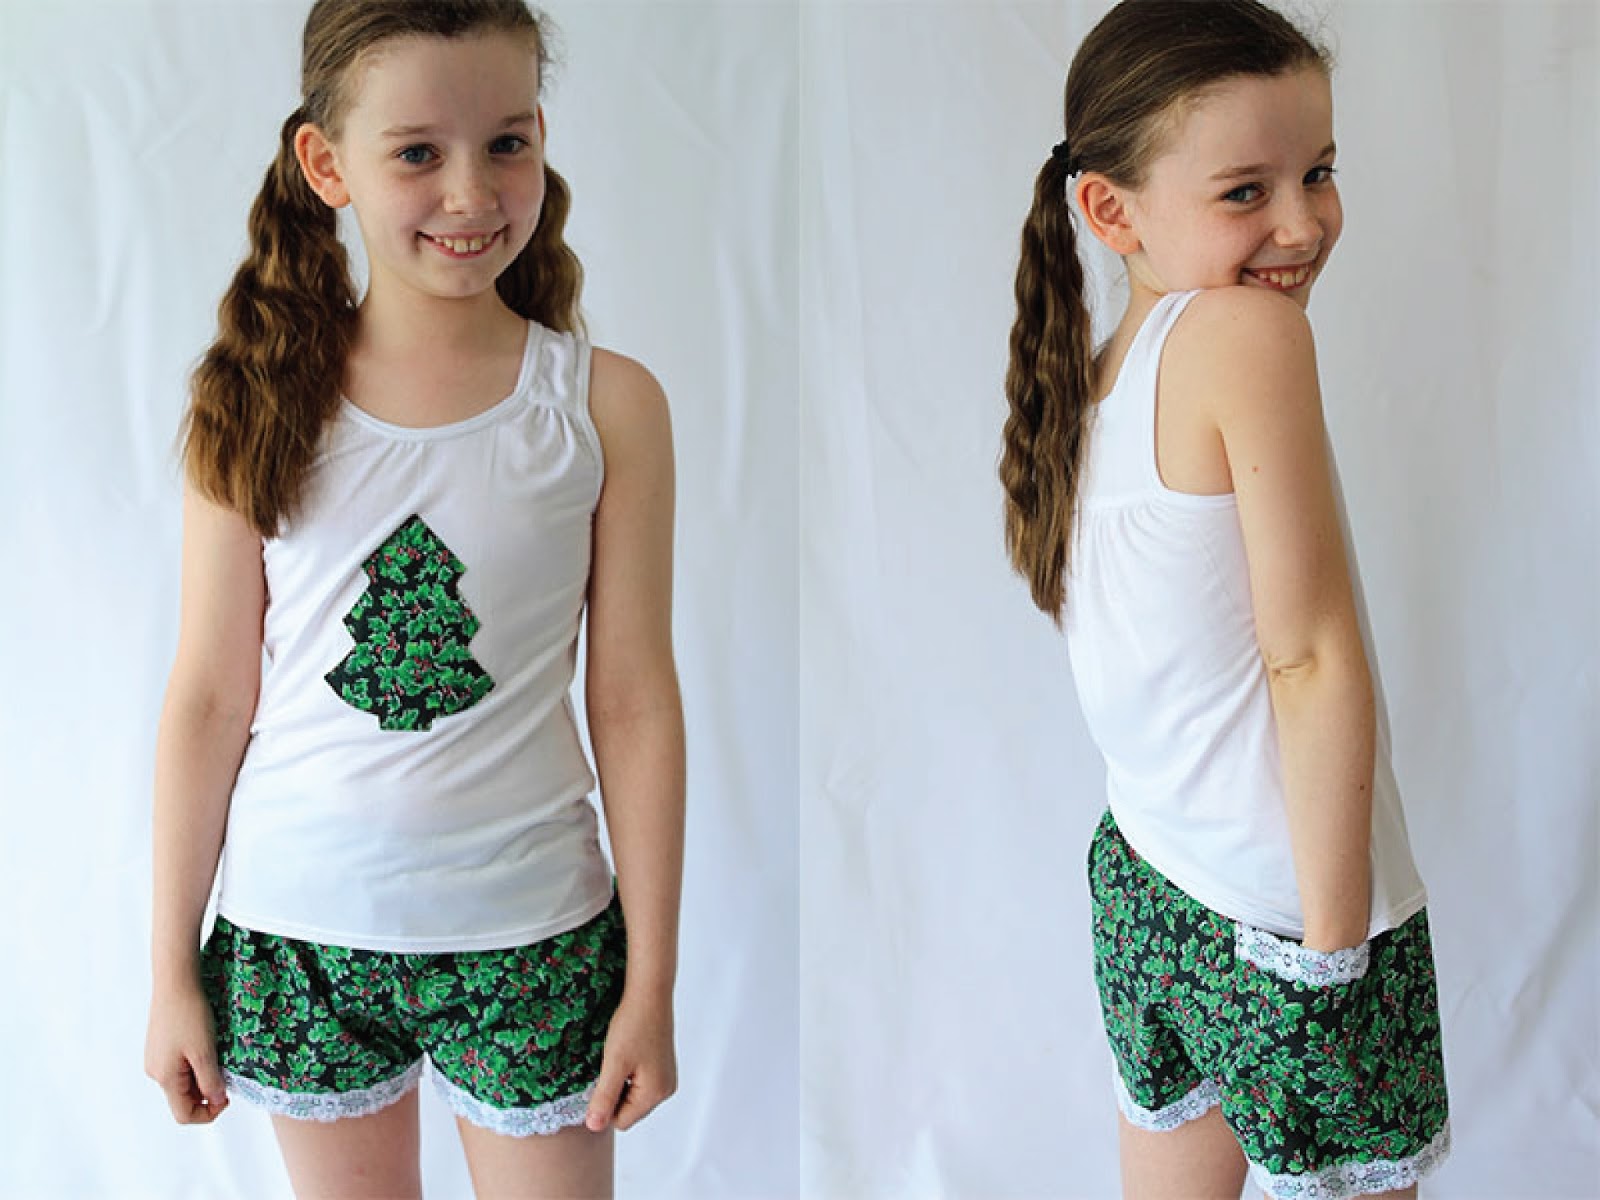
The Primrose Pj’s from Daydream Patternsis a super cute design for your favourite girl – perfect for sleepover parties and summer fun! An easy and quick Christmas present – who doesn’t need new jammies for Xmas?
The pdf pattern includes pajama shorts with lace edging along the hem and pocket and a stretch knit singlet top with soft gathers across the front shoulders and across the back. The pattern includes 4 applique templates – a heart, a cupcake, a butterfly shape, and a Christmas tree shape, especially for the festive season. Also included is a sleep mask in size small and medium. Full instructions on how to make these are included in the tutorial.
The pattern includes size 4 – 14 girls sizes and a detailed instruction tutorial with illustrations. An A0 copy shop file and a 36″ wide copy shop file are also included.
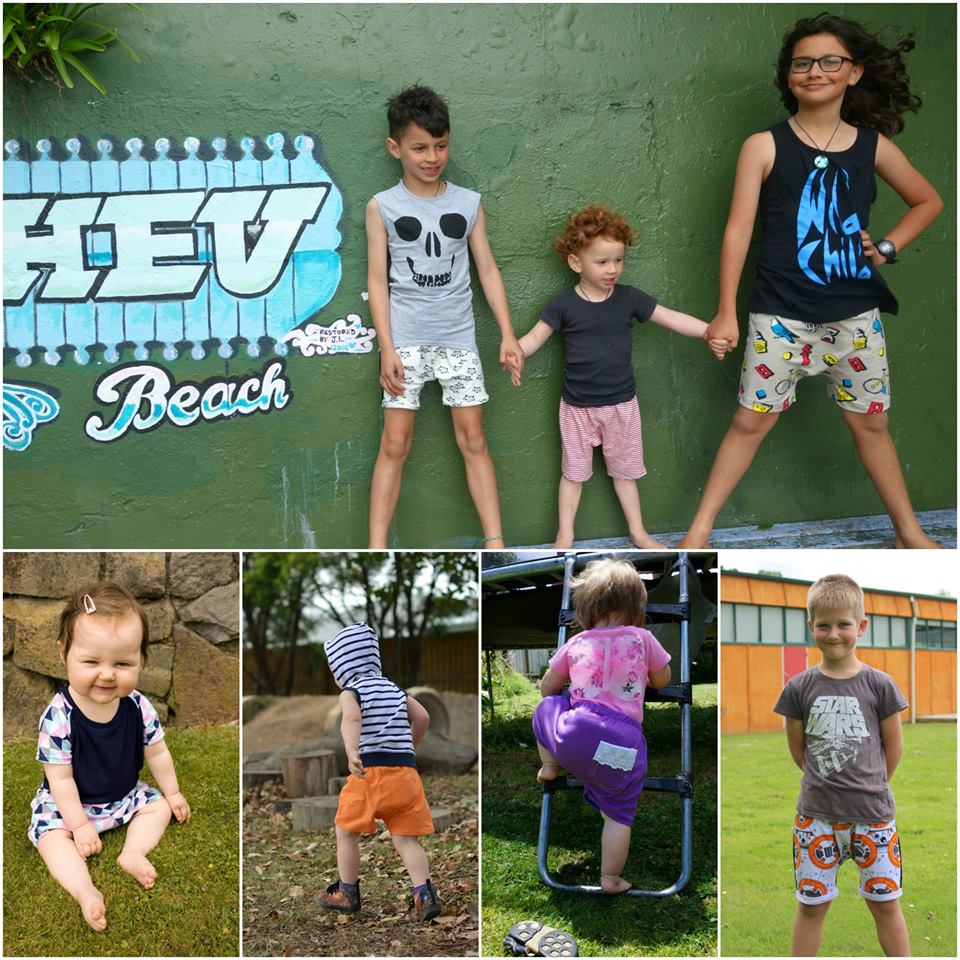
Harem Shorts Little Kiwi’s Closet. Easy to sew and super addictive to make, just one pair of these harem shorts is not enough. Made from comfy knit these shorts move and grow with your child as they explore their world. Smaller sizes are suitable for cloth and disposable nappies.
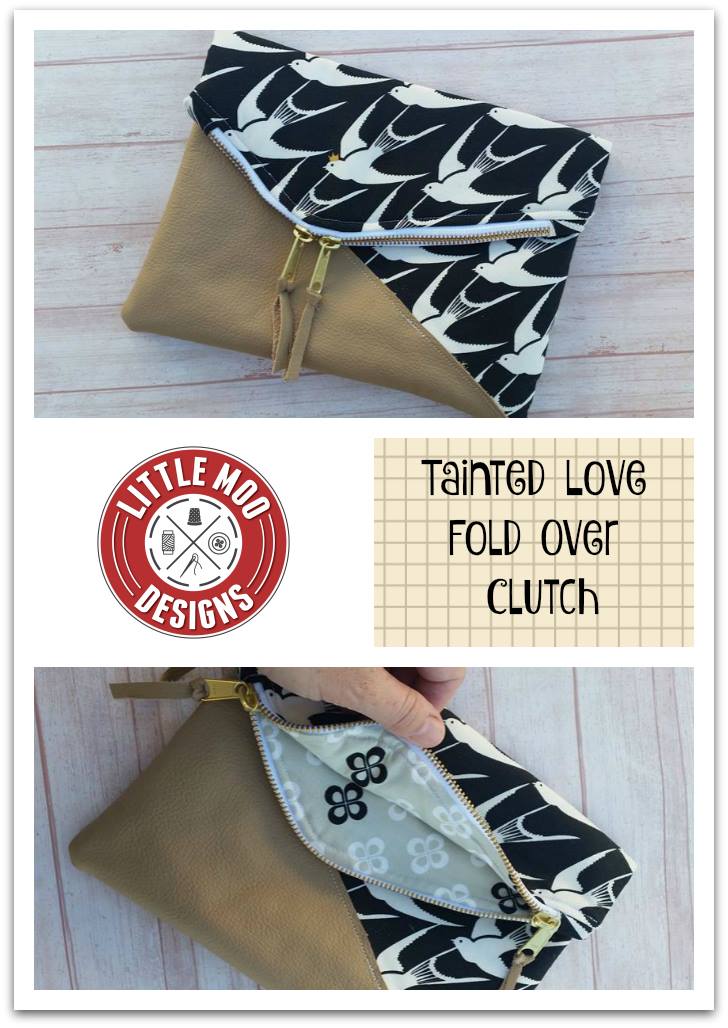
The Tainted Love Fold Over Clutch from Little Moo Designs brings together clean lines, contrast panels and a double zipper focus for a perfect clutch to take you from daytime to evening. This grab and go style clutch features an internal zipper welt pocket and a double card slot holding all of your essentials in one place. Designed for leather and vinyl, the contrast panel allows the Clutch to be matched to your favourite seasonal outfit.
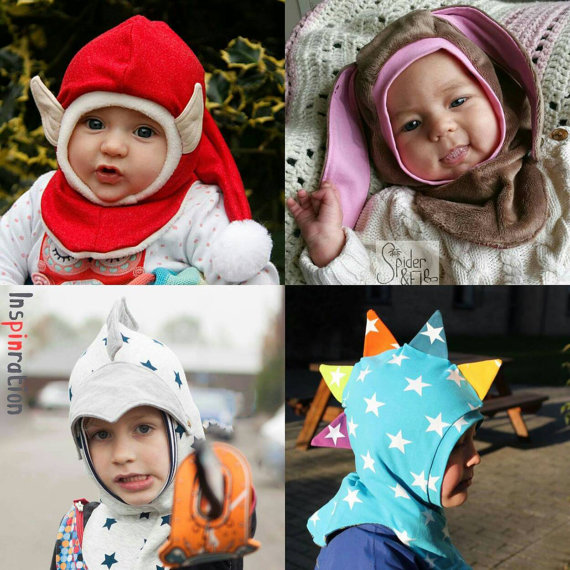
Coif from Mother Grimm DesignsThere are 4 basic Coif styles- One Seam, Two Seam, Short, and Long Pixie points. This is a close-fitting hood/hat that can be lined and made reversible. It can fit easily underneath coats and tops, keeping the neck and the entire head warm – meaning that scarves and other bulky items are not necessary to keep warm.
The add-on features a completely different bonus free coif pattern that allows you to make a shark/dolphin/fish. The add-on pack also contains a selection of different ear styles and sizes (including Dragon, Rabbit, and Puppy), spikes/teeth as well as a range of Knight crests and a visor for budding adventurers.
Your imagination can run wild and create a completely new and unique look every time.
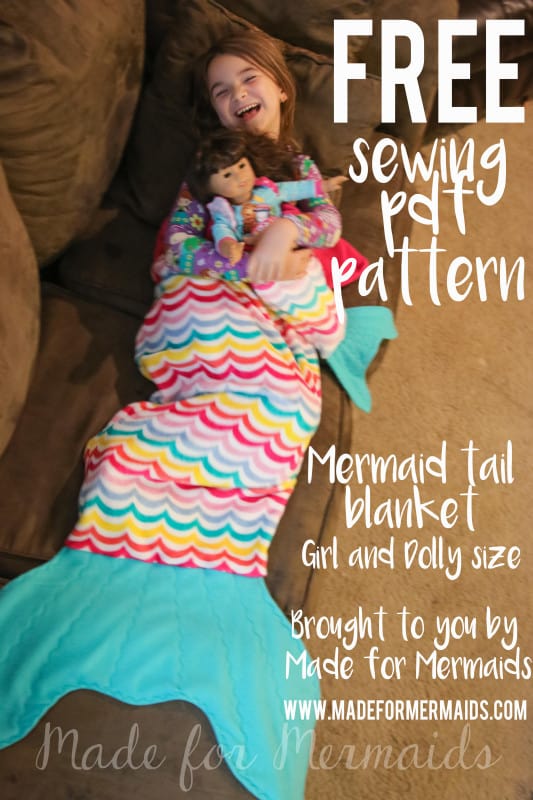
Mermaid Tail Blanket from Made for Mermaids are comfy, take little fabric, adorable, and a quick sew! If you need a quick gift for ANY child, they will love this fun blanket. Very easy fit with options given to make it fit a large size range. Matching dolly takes NO extra yardage and makes the perfect add on to your handmade shop OR your doll loving daughter. Mermaid tail blankets for everyone! Free Downloadable pattern from their website.
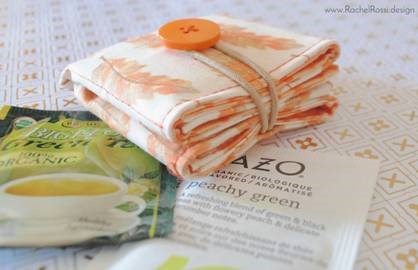
The Tea To Go tea bag travel case from Rachel Rossi Designs makes a great gift for any tea lover: mothers, grandmothers, best friends, and sisters! Tea To Go is the perfect way to travel with your favorite teas, It includes 6 pockets and folds up small enough to fit in your jeans pocket.
A PDF sewing pattern for a camera toy by Swoodsen Says, with both neck strap and wrist strap options. A small vinyl pocket on the back allows you to slip in pictures for a ‘view-finder’ to use in pretend play. Perfect as a softie for a baby or infant OR a prop for dress-up & imaginative play for an older child.
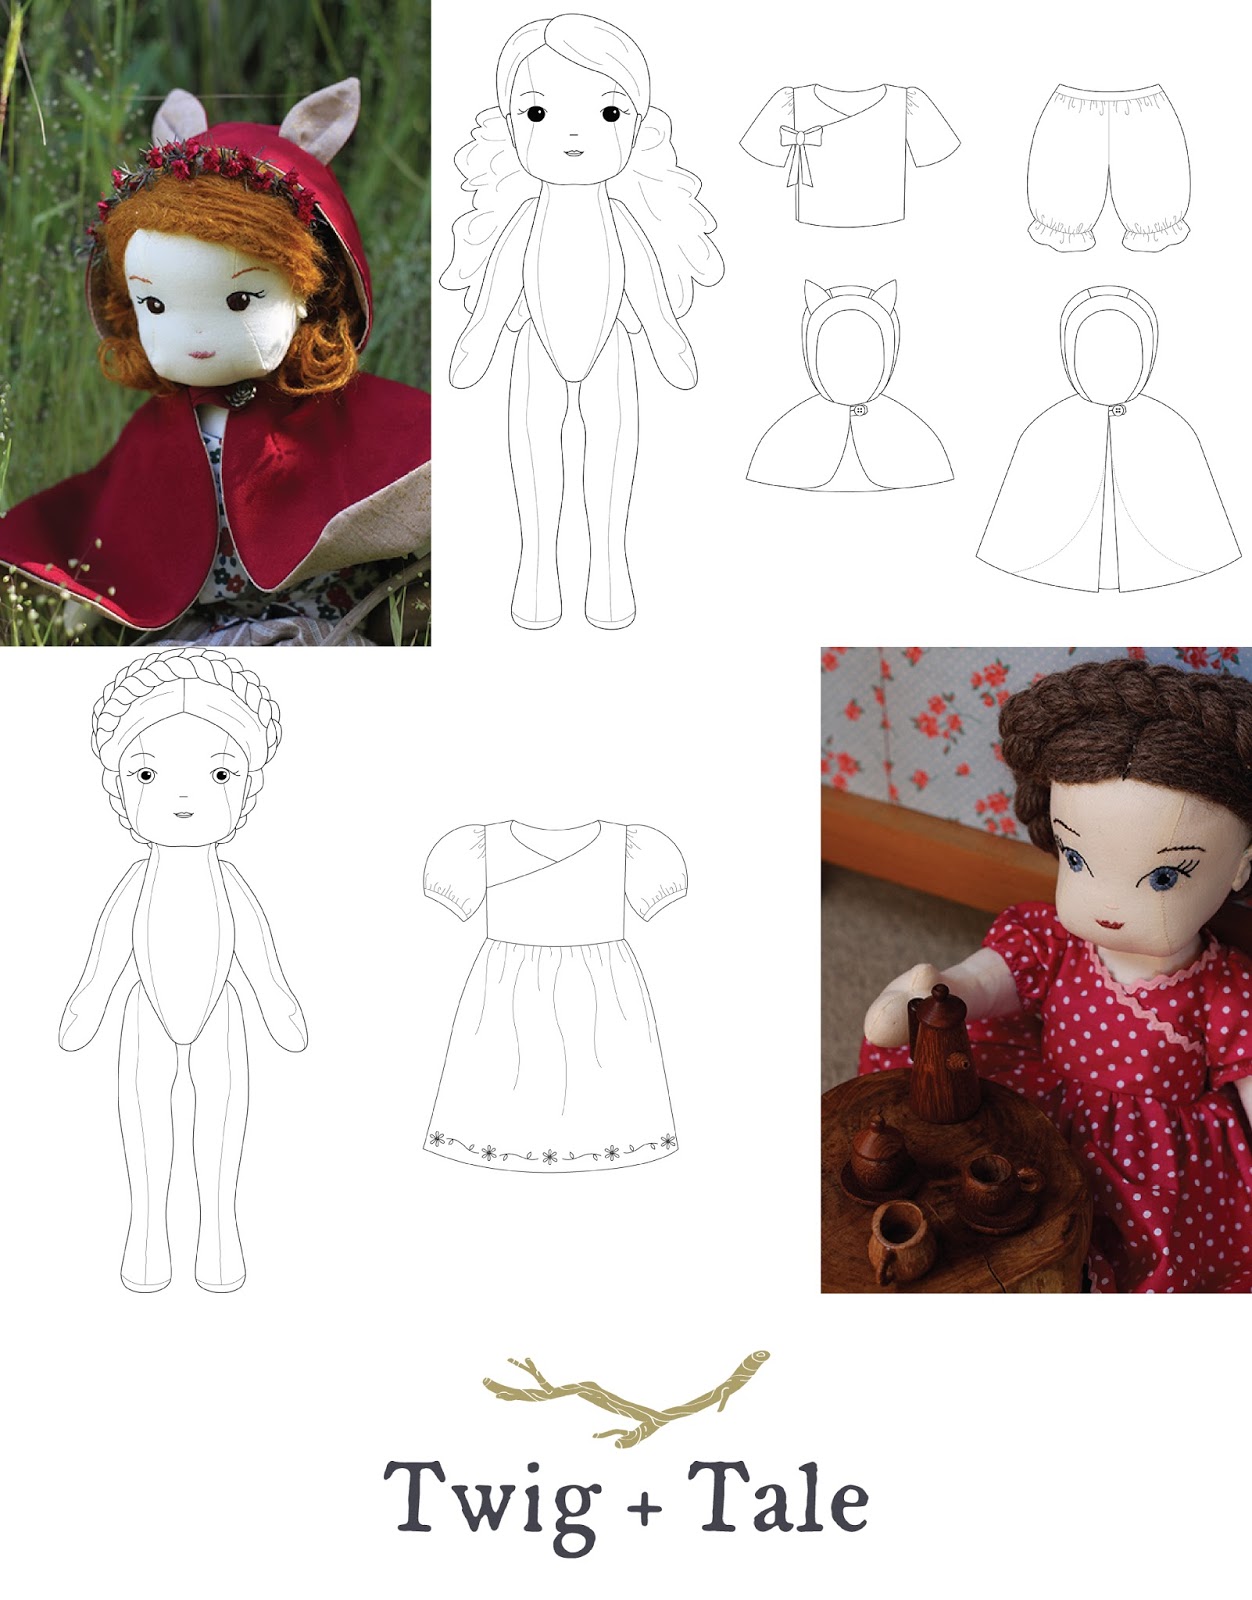
The Briar and Fluer dolls from Twig and Tale are wonderful for young ones learning about the world absorb all they see, hear, and feel with wide-open eyes and hearts. A doll made from natural materials makes the intangible real and shows them love can be held and nurtured. Made by you, he or she will always be perfect in their eyes, a priceless gift, and lifelong friend.
These delightful dolls have clear, detailed tutorials – no previous dollmaking or embroidery experience is required!
The patterns for their lovely wee clothes are also included so your doll is all ready for someone special to love and play with.
The Fable Headband from Wolf and Tree This pattern has so many options that can be made out of woven, knit, wool, felt…..Make ear muffs with a round shape or troll shaped. You can also add ears or flowers to embellish or omit the ear muffs and make beautiful headbands to turn this pattern into a pattern for all seasons.
Use the pattern to make crowns as party favors and gifts. This pattern does it all.
Today we have seen amazing gift giving patterns on the market,
which one will you grab hold of and sew for a friend or family member?
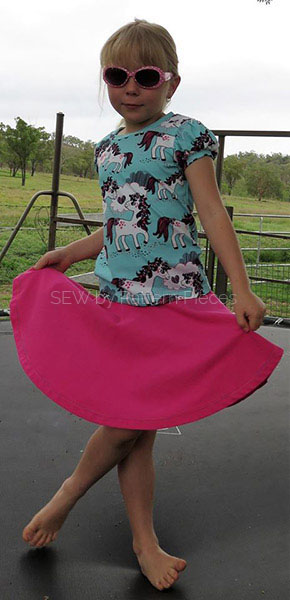
Taking the Girls Fun Tee and Girls Skip Skirt Pattern am going to show you how you can change the flare on the hips of the pattern pieces, to give you the option of making a slightly looser dress over the hips. This is what I have done with the dress below. It seems to go with this style of skirt nicely.
We have three further gorgeous photos of the dresses made from combining the Fun Tee and Skip Skirt. Isn’t it fun to see the different looks that can be achieved when doing this?
The patterns have been made so that the top and the skirt fit together perfectly so that you have the option to create a dress. The instructions to create the looks above come with the #22101 Skip Skirt pattern.
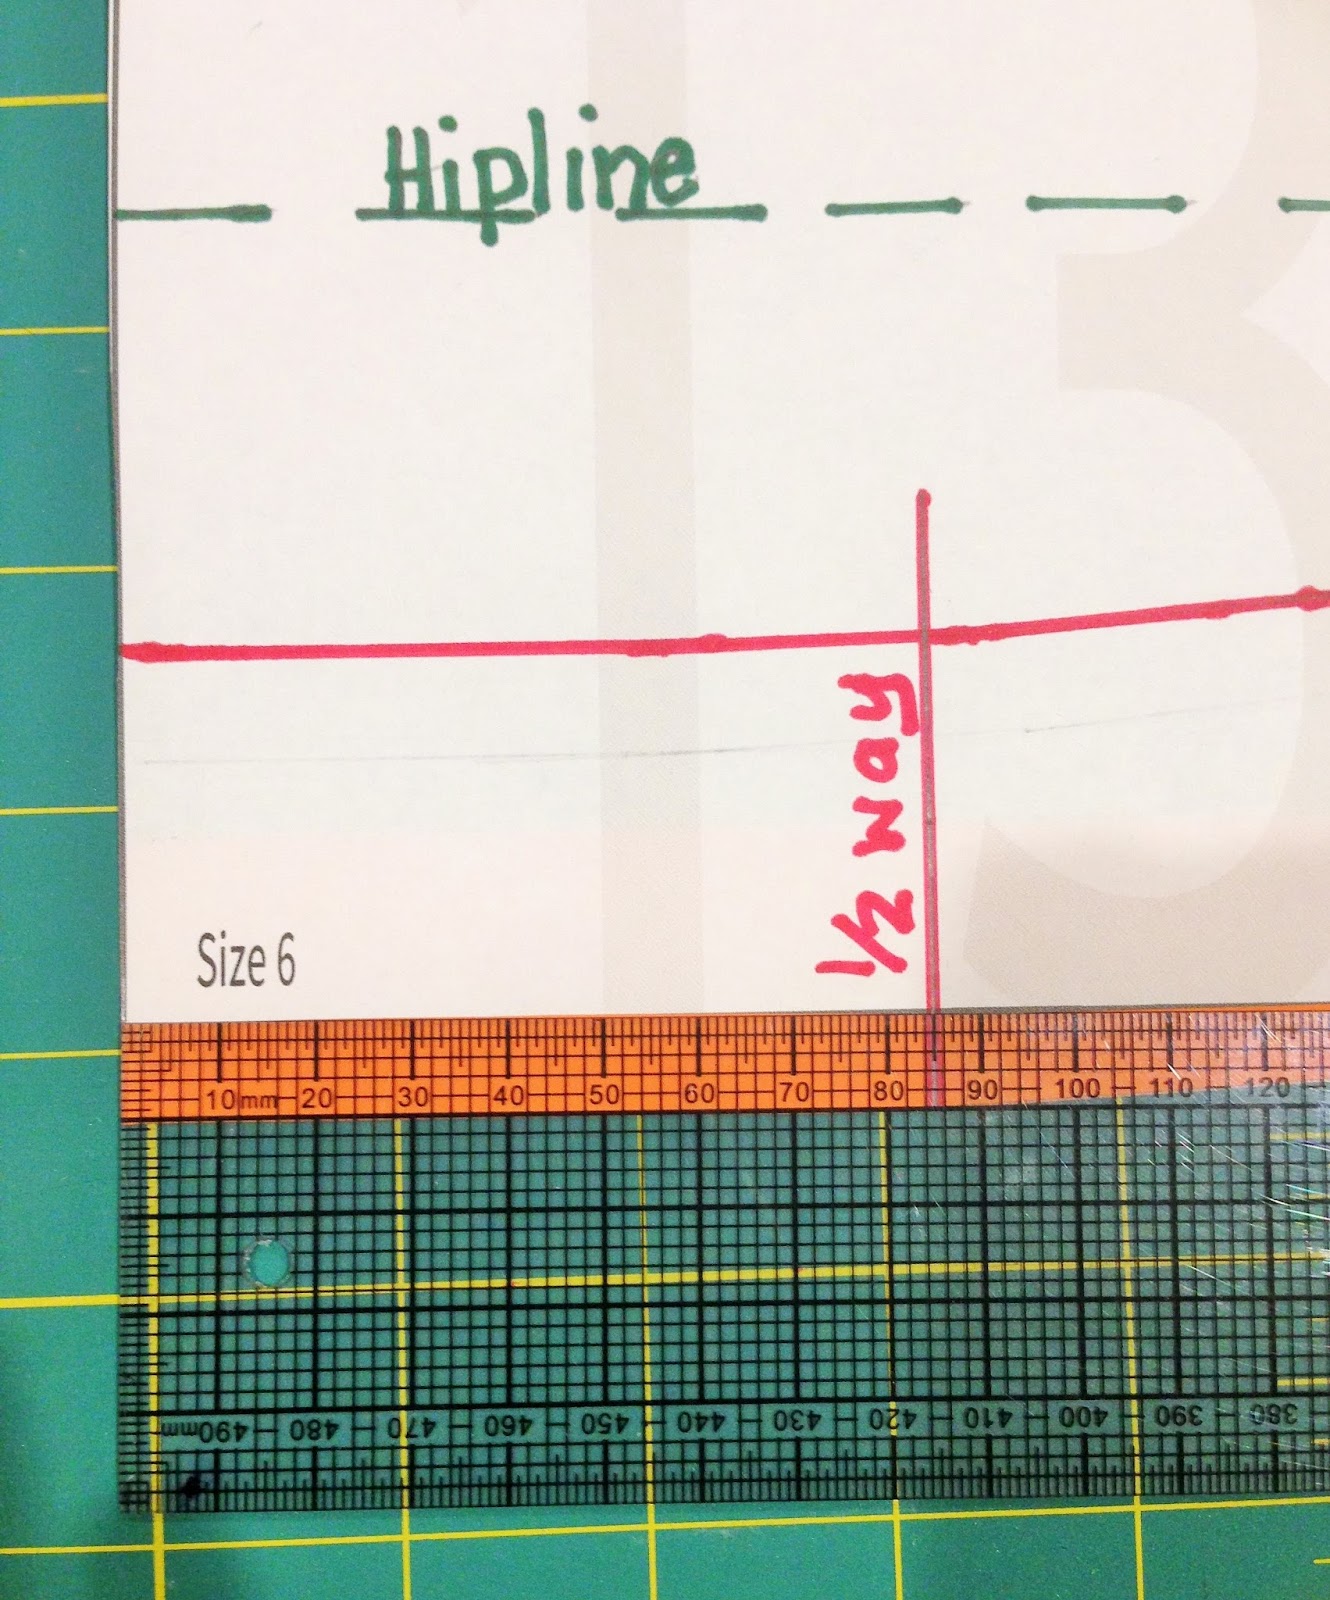
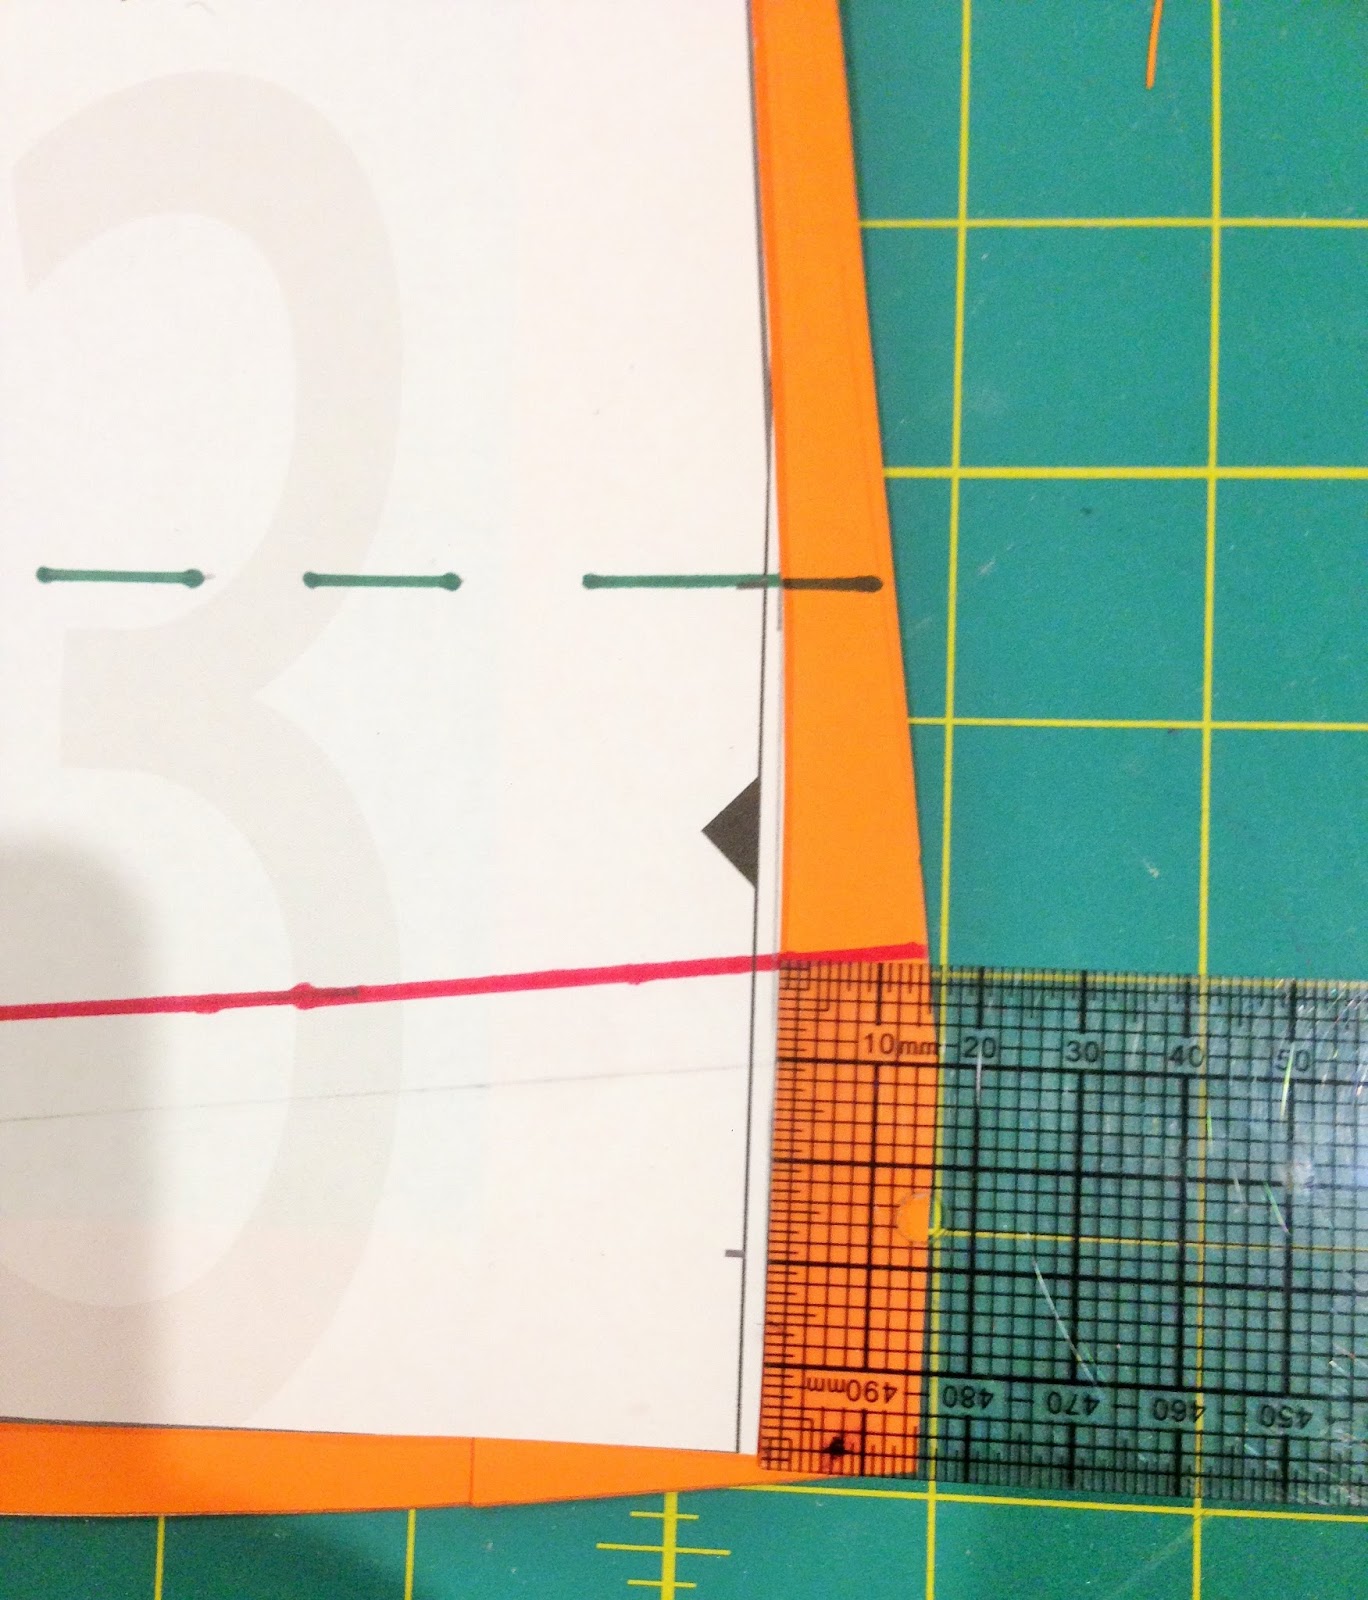
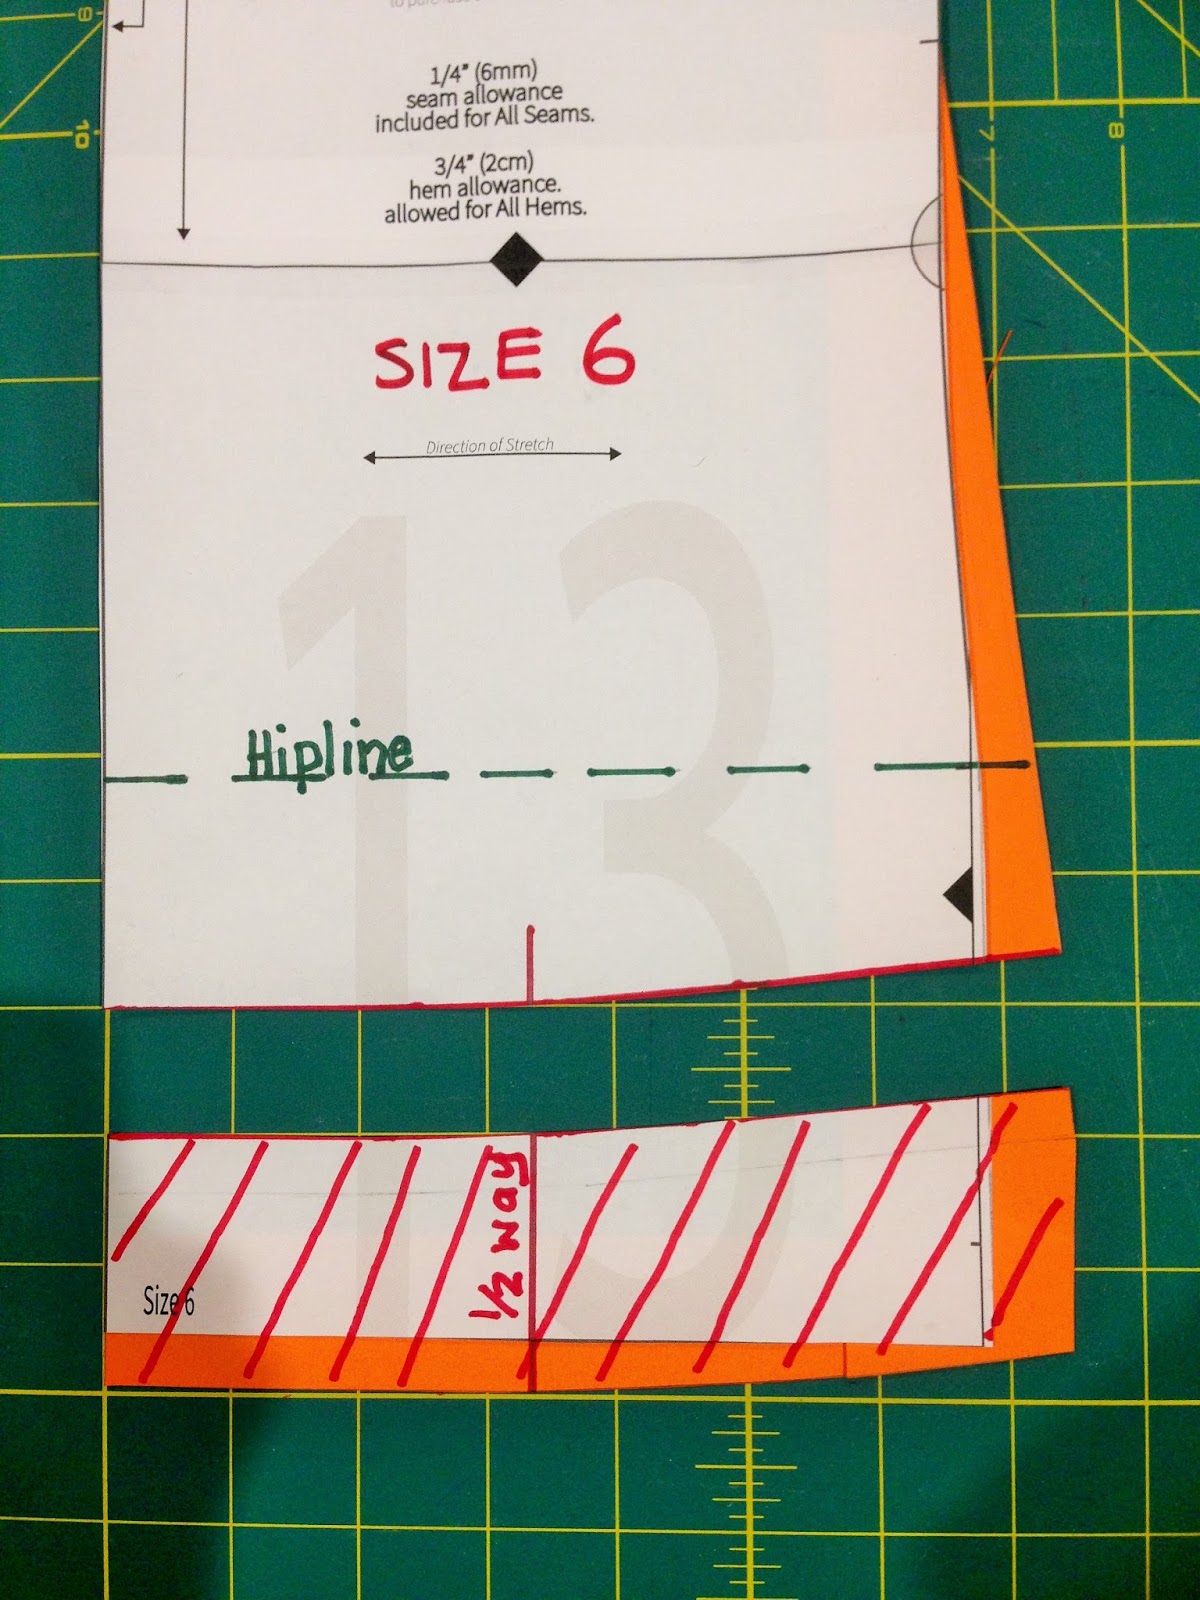
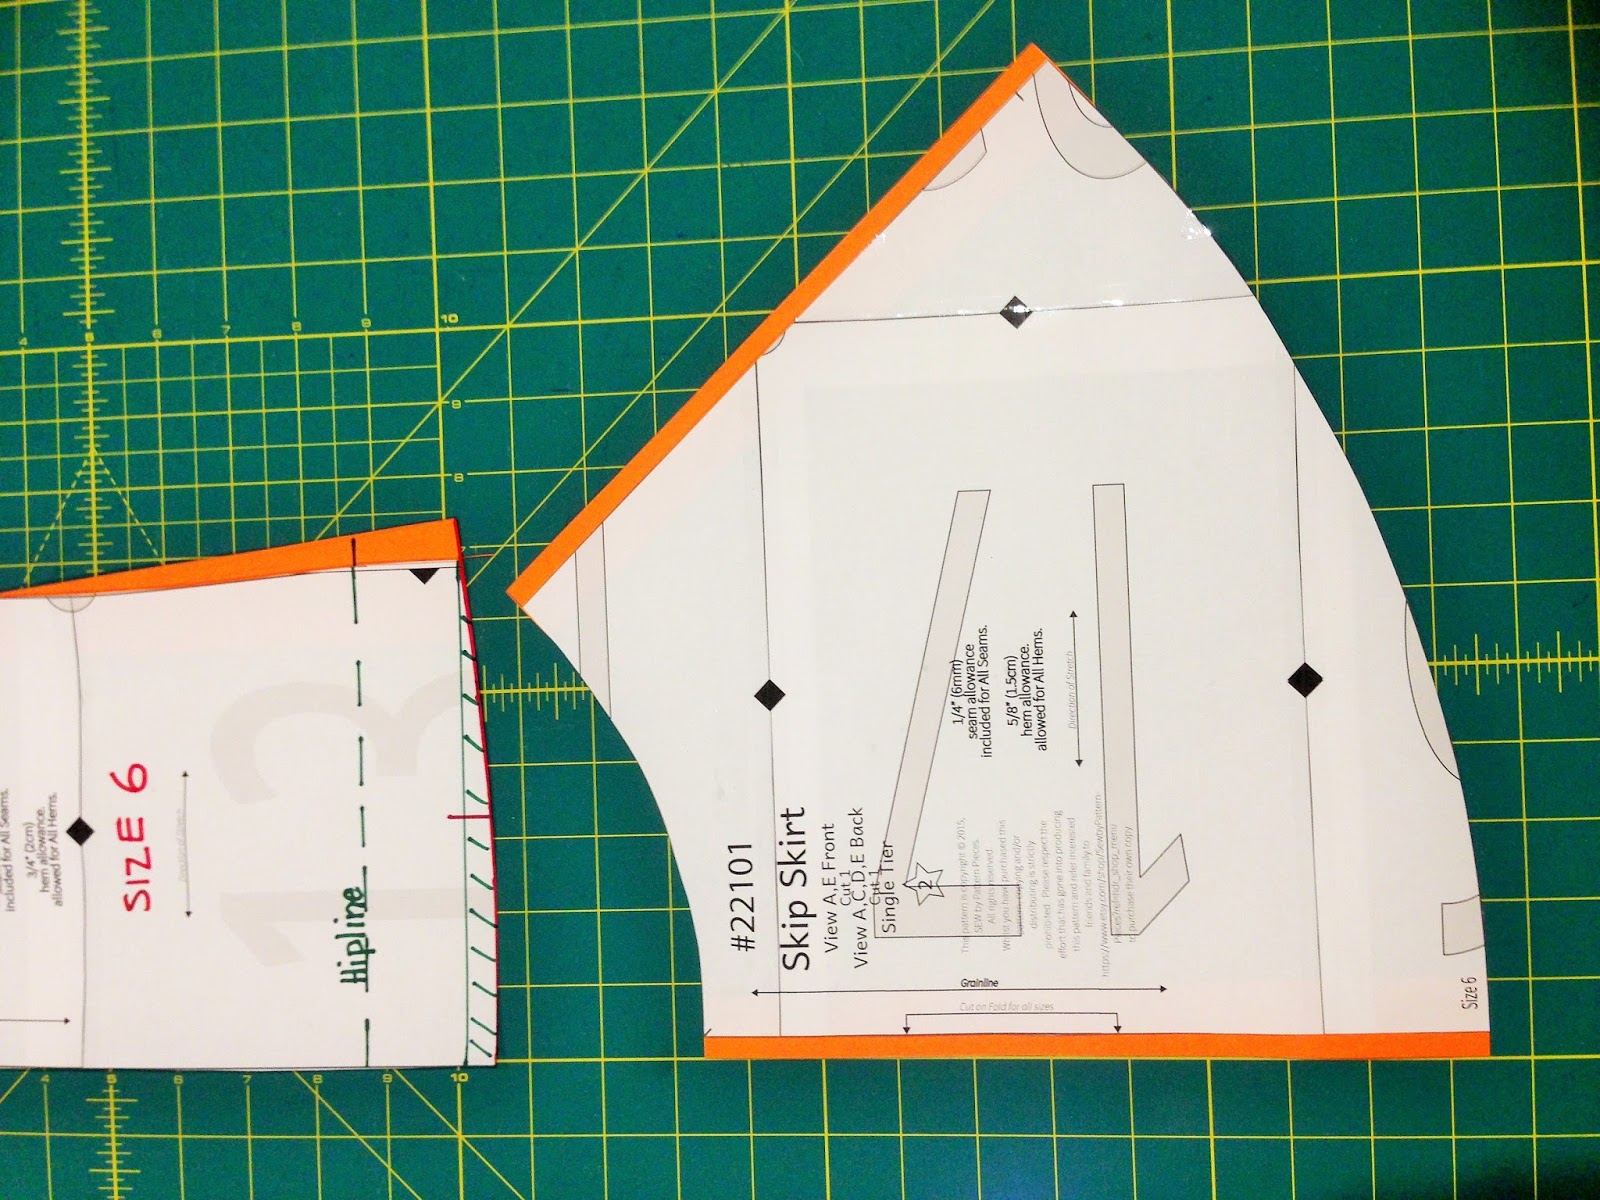
So to give you an overview of what we are going to achieve. Below is the Fun Tee front pattern piece. The areas in orange are what I have added to the pattern piece.
To begin, go to the centre front hem of the pattern and add 3/8″ or 1cm and square out to the halfway line.
On the side seam square up from the hem 2″ or 5cm and mark out 5/8″ or 1.5cm.
Going back to this image, as shown in orange, join the markings on the hip with the waist notch on the side seam and draw the curve from the hip to the centre front.
Next, shorten the length of the Tee as specified in the pattern by 2″ or 5cm and trim this off as shown.
Next, divide the amount added onto the hip of the Fun Tee. Add the 1/4″ or .75cm onto the centre front of the skirt and 1/4″ or .75cm onto the side seam as shown below.
Those are all the changes you will need to make to the front pattern pieces. Next, you will need to replicate these changes and add them to the back.
Now your little models’ dresses will have a little more swing and a little more flare.
The complete Fun Tee and Skip Skirt can be made by following the instructions that come with the patterns.
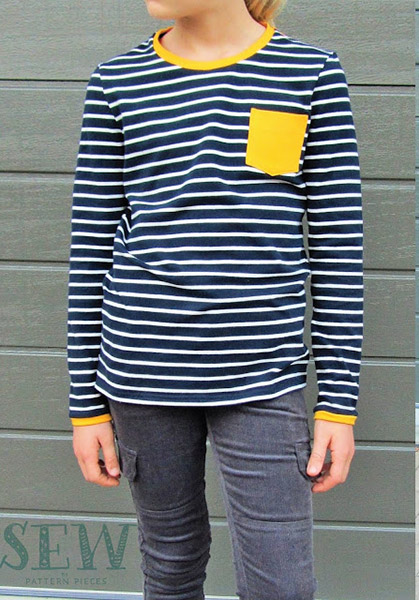
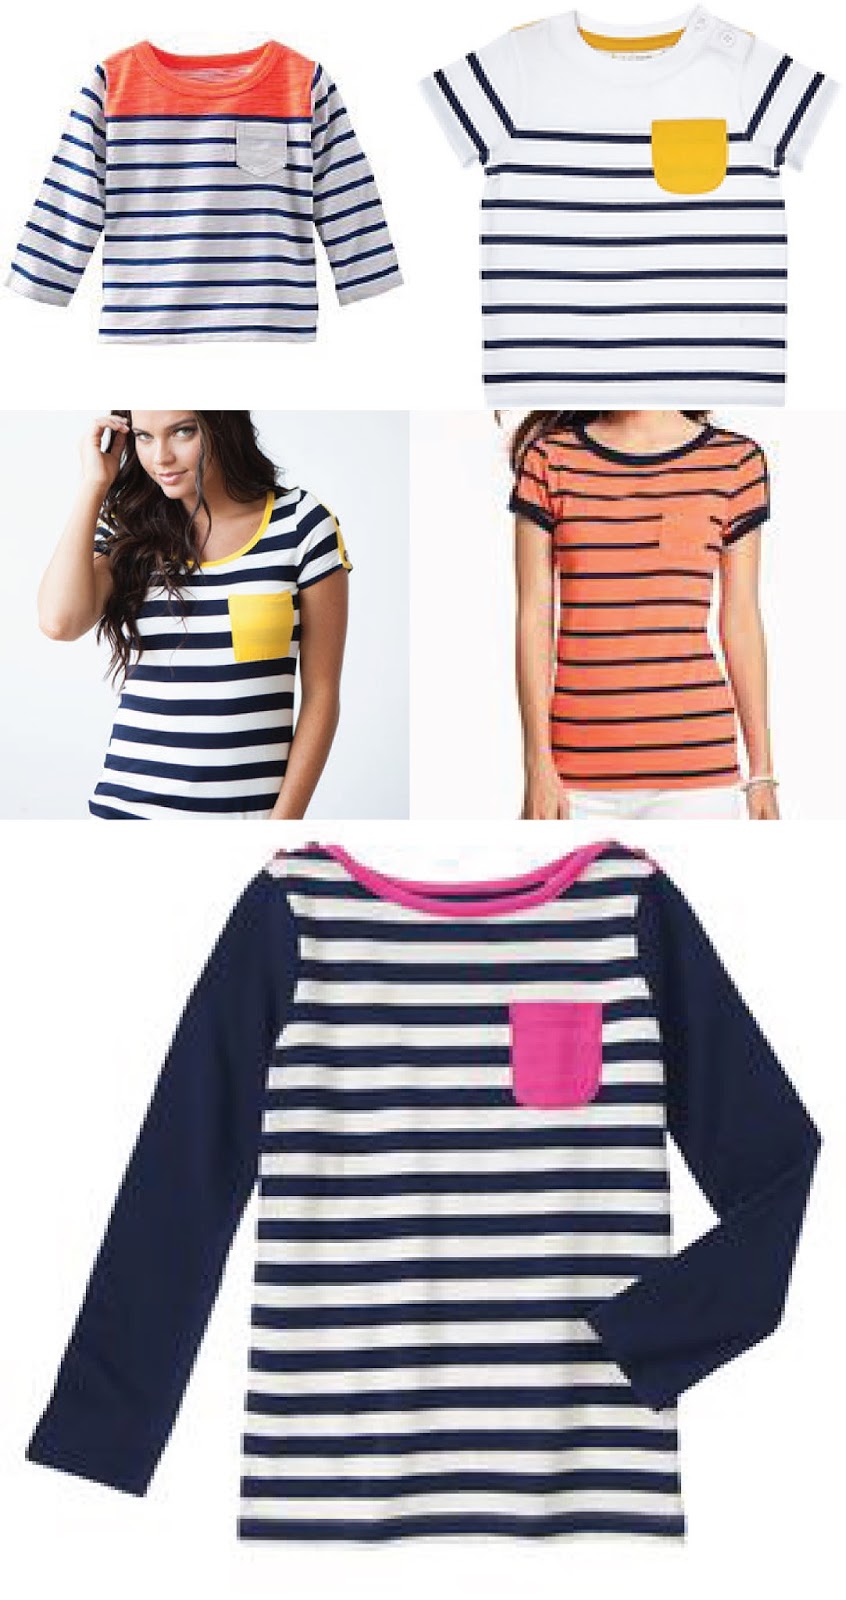
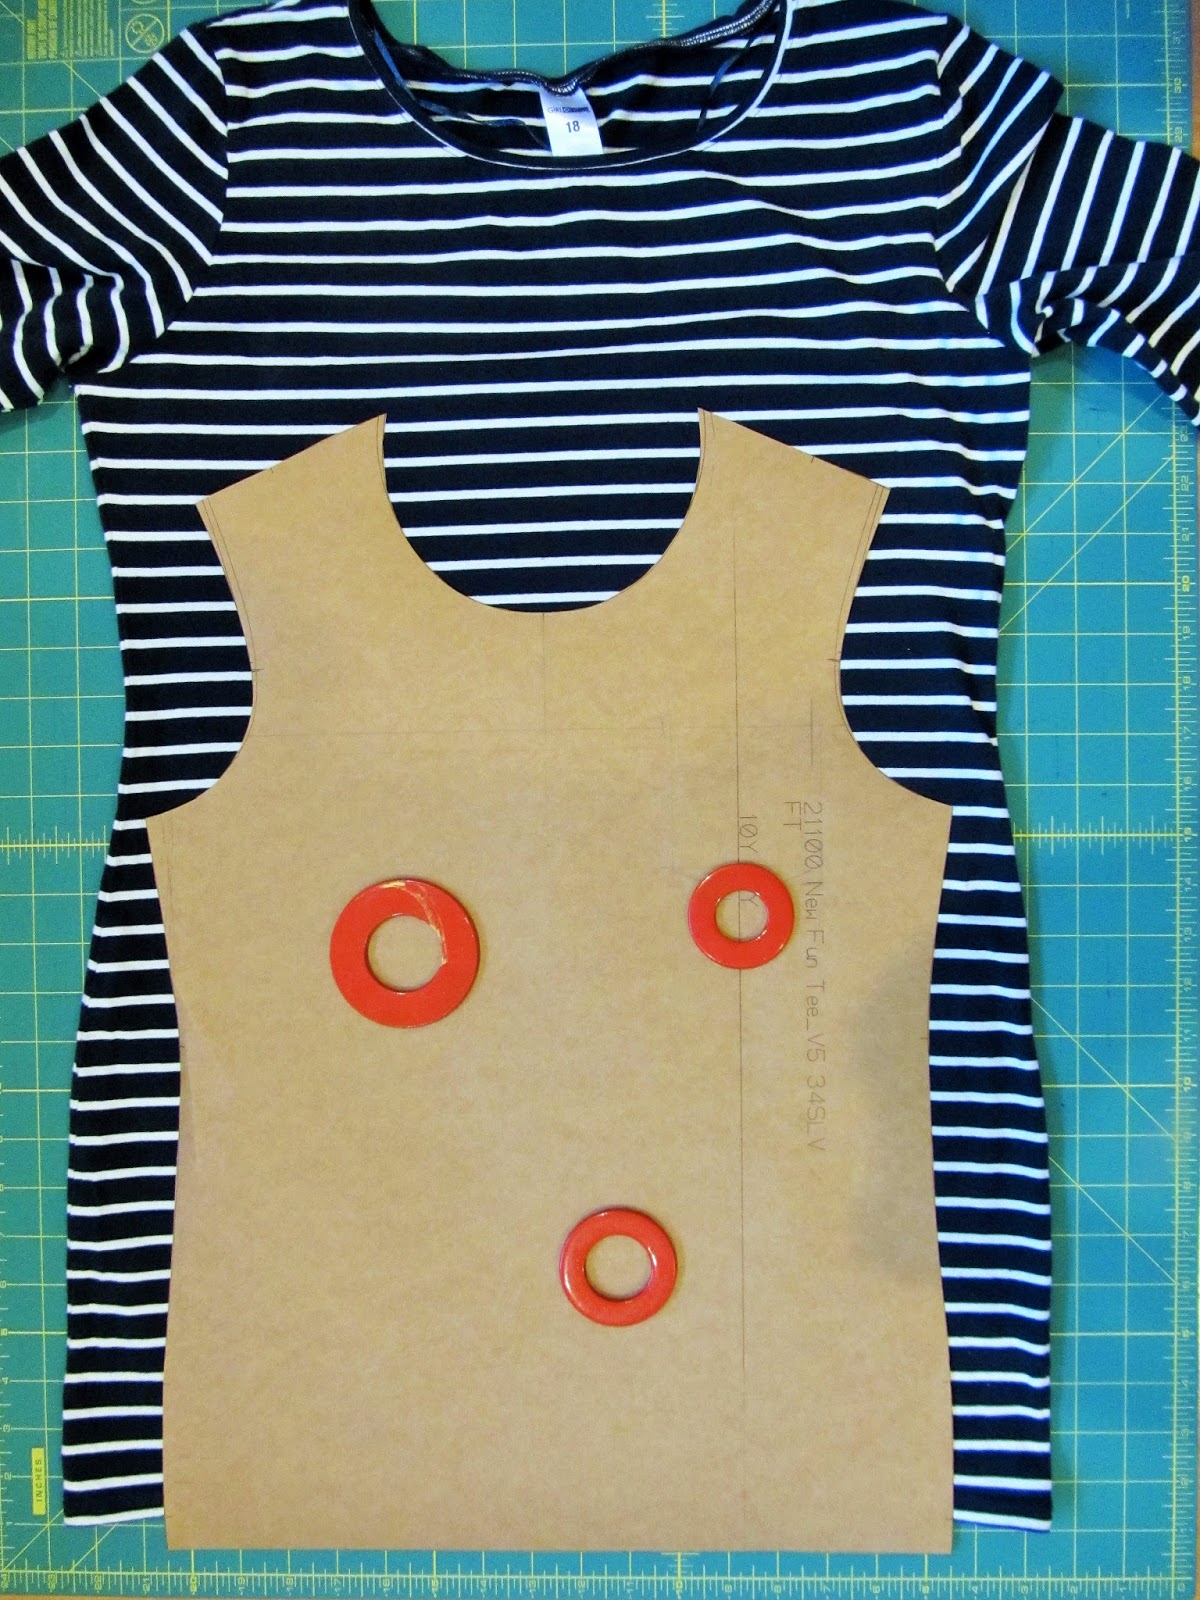
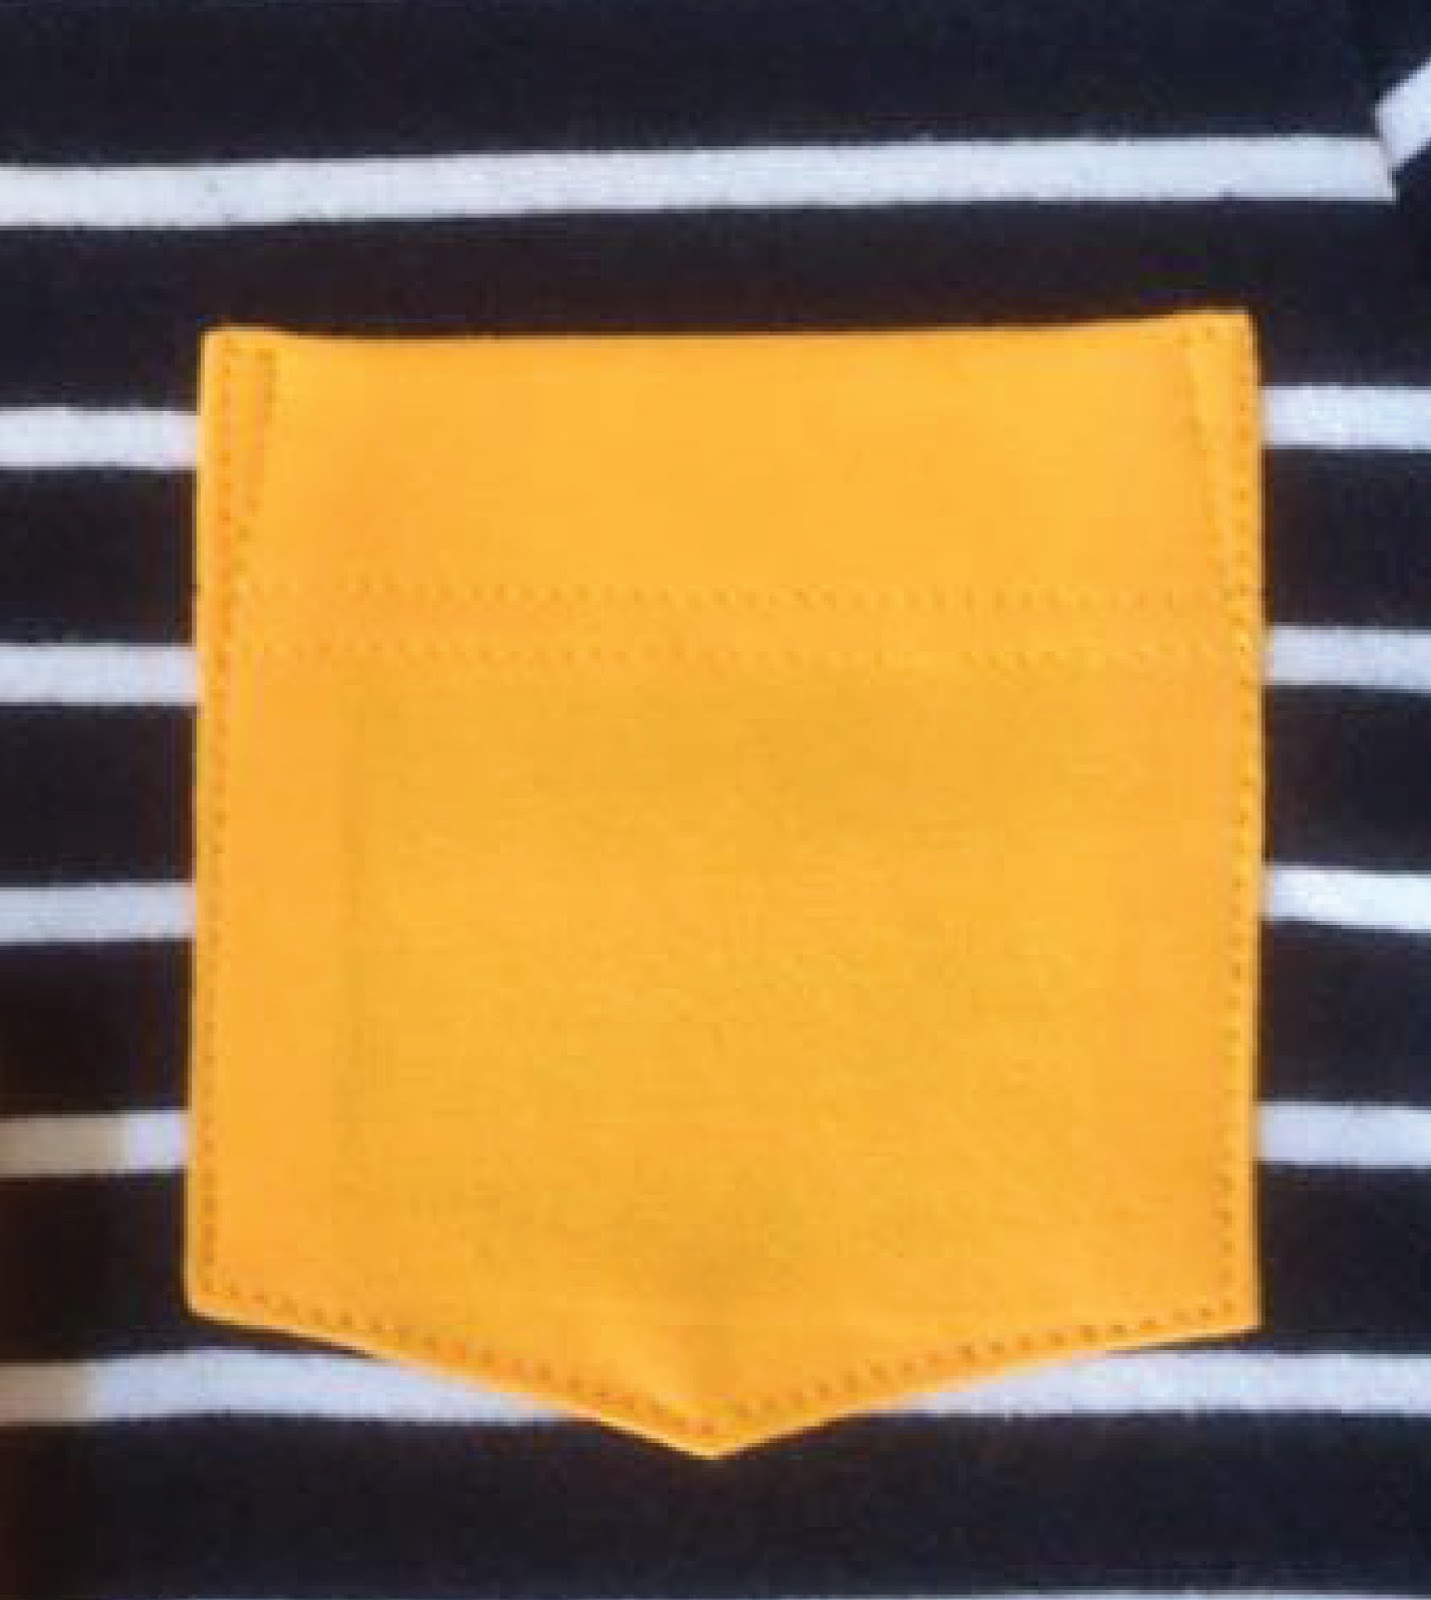
Pockets are all the rage on T-Shirts. We are going to show you our Fun Tee Pocket Hack It is a quick and easy way to add a bit of fun and add a splash of colour onto a garment. I wanted to make up a garment using this feature and keep it youthful, so I started by doing a little research online.
This is what my research came up with:
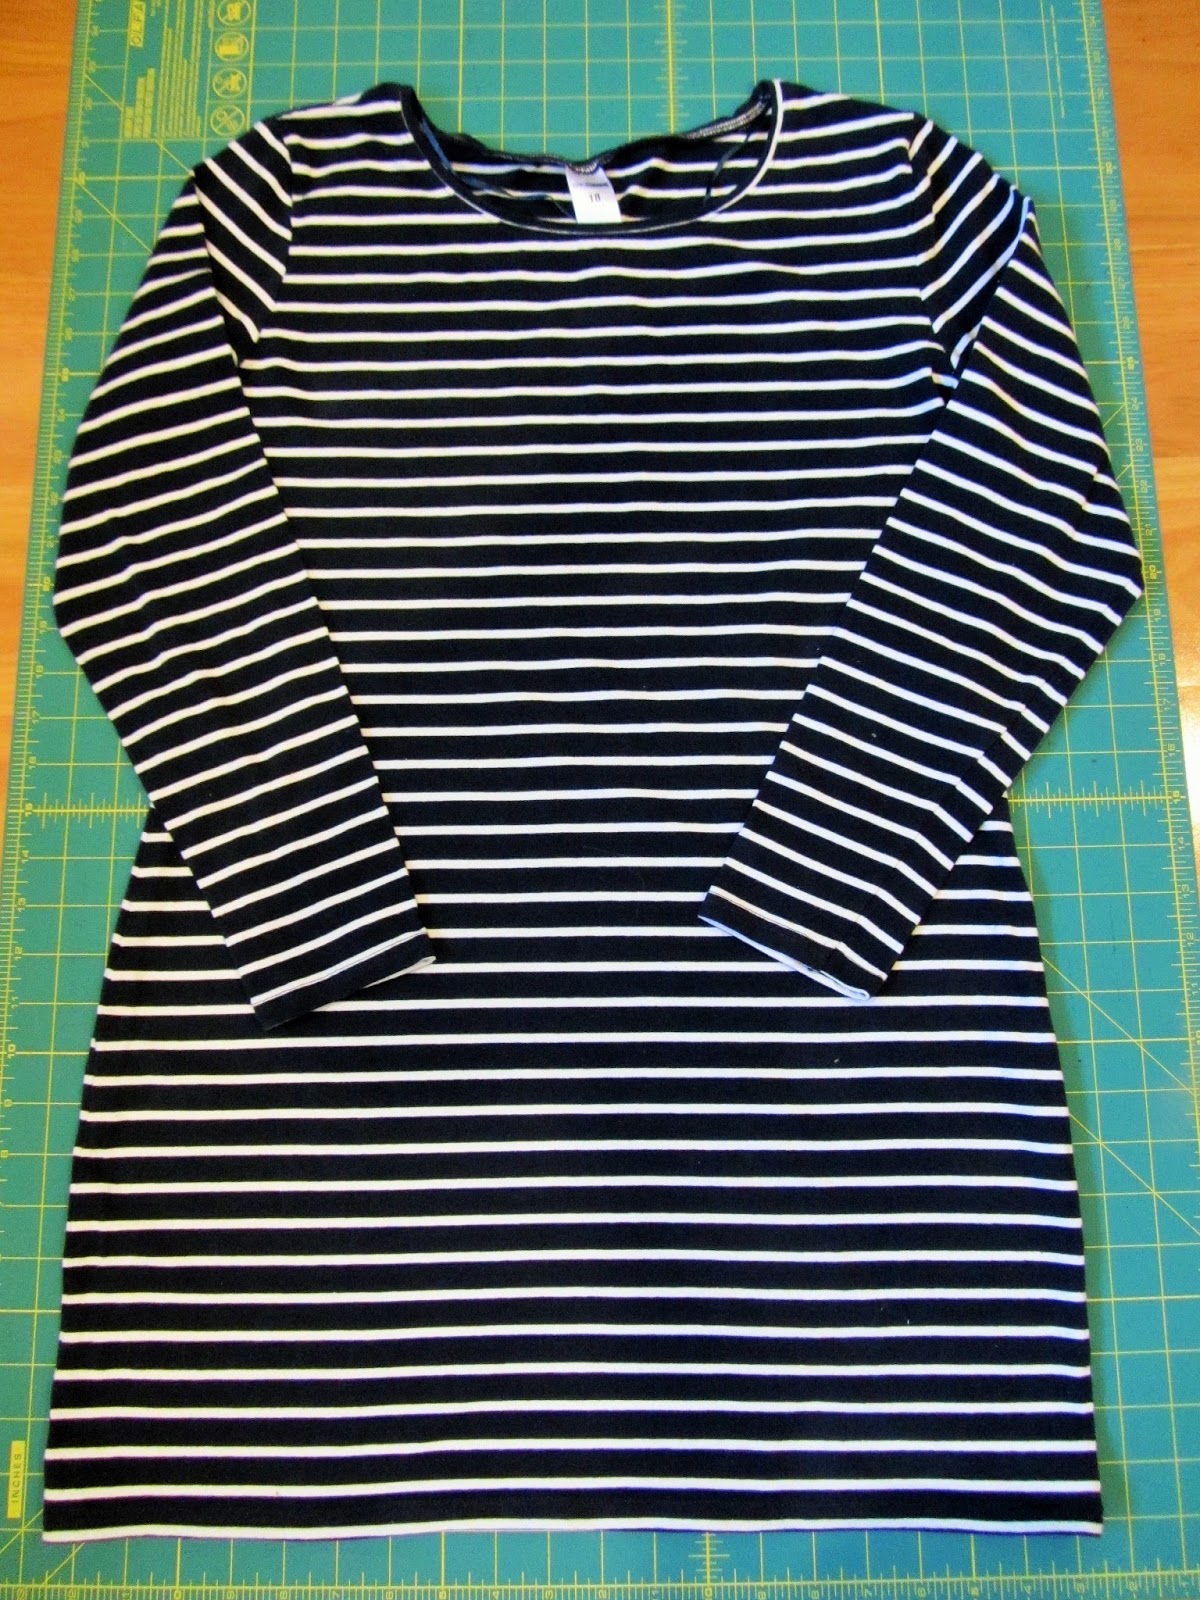
Next, I did not want to spend the earth on fabric, so I headed to the nearest 2nd hand shop with a vision of stripes in my head. Quite excited by my $4 au purchase, this is what I came home with and popped straight into the washing machine.
When making children’s wear, it is amazing the number of pattern pieces you can fit onto the fabric of an Adults shirt. The cardboard pattern piece shown below has been directly printed from my work computer. It is a front pattern piece of a Size 10 Fun Tee. Another point to make here is, when using ready-made clothing to create a new garment, there is NO hemming required, as you can utilise the existing hem, now that saves setting up the cover-stitch machine or finding that twin needle and two spools of matching thread.
Cut out your preferred choice of the two pocket types. The Fun Tee Pocket Hack instructions are available for download. Join our group for your FREE copy today.
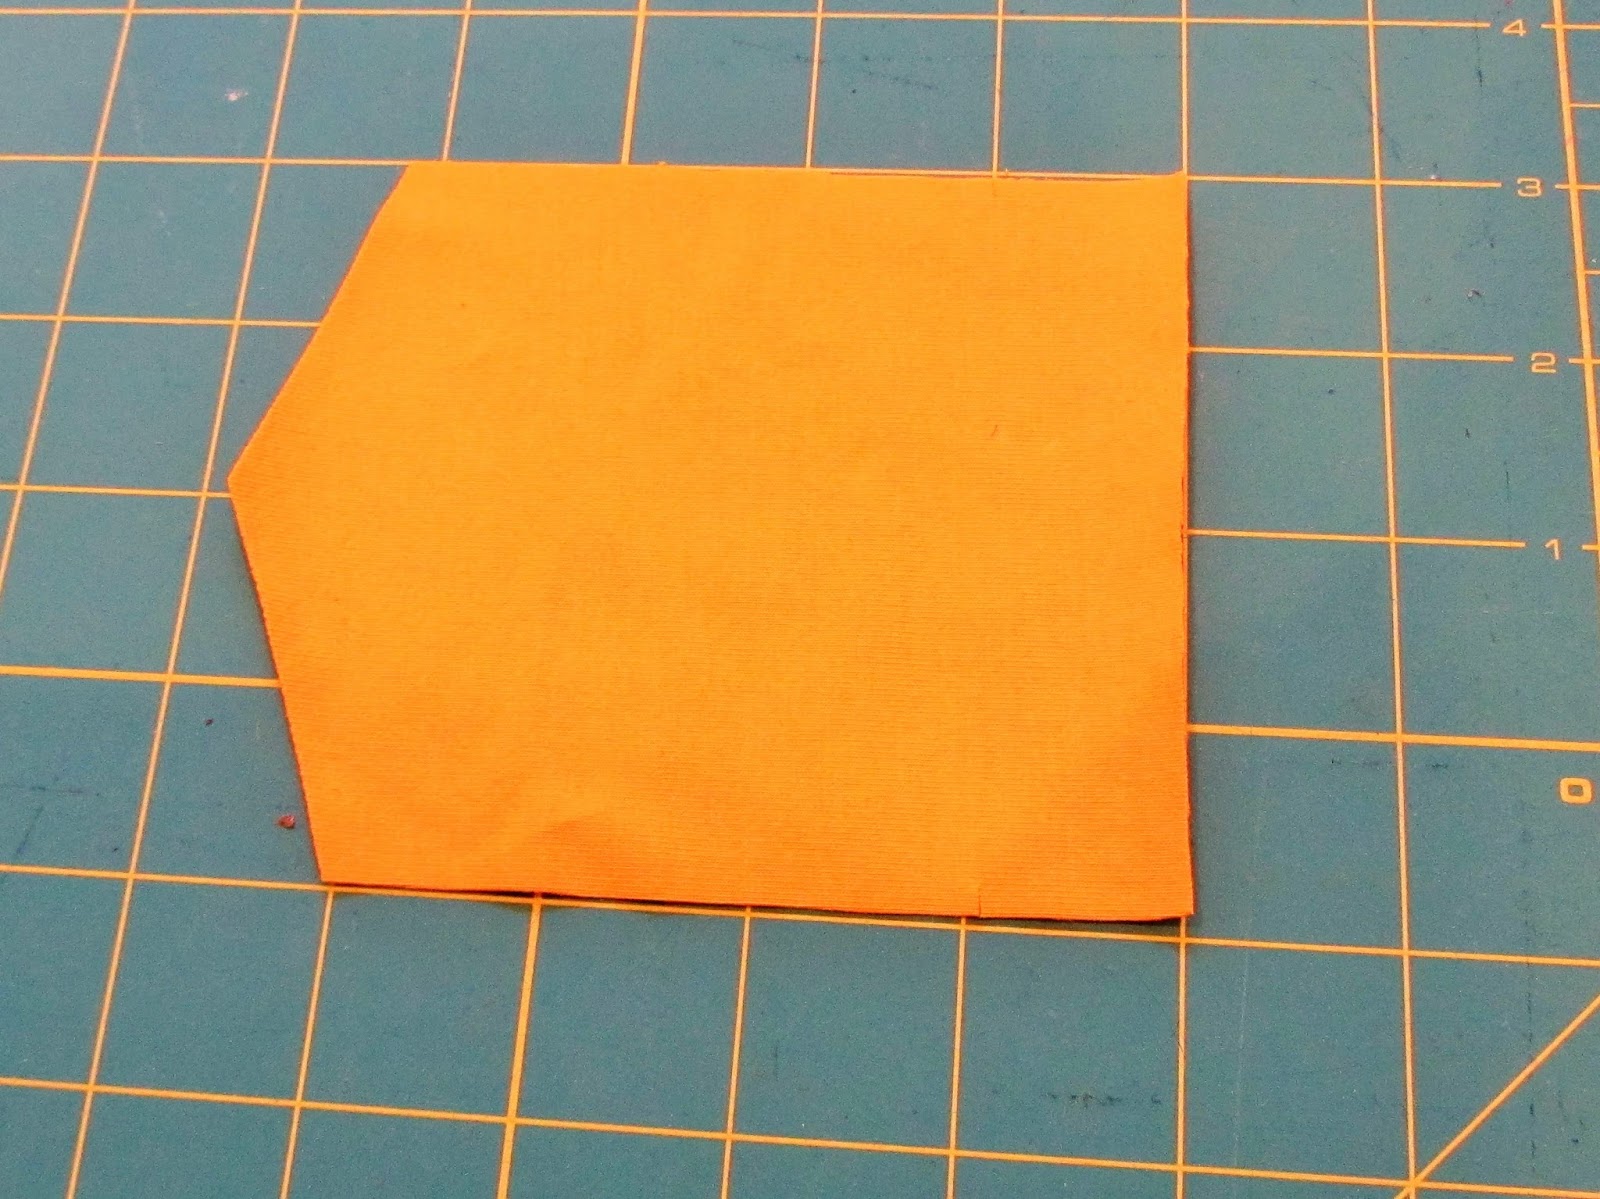
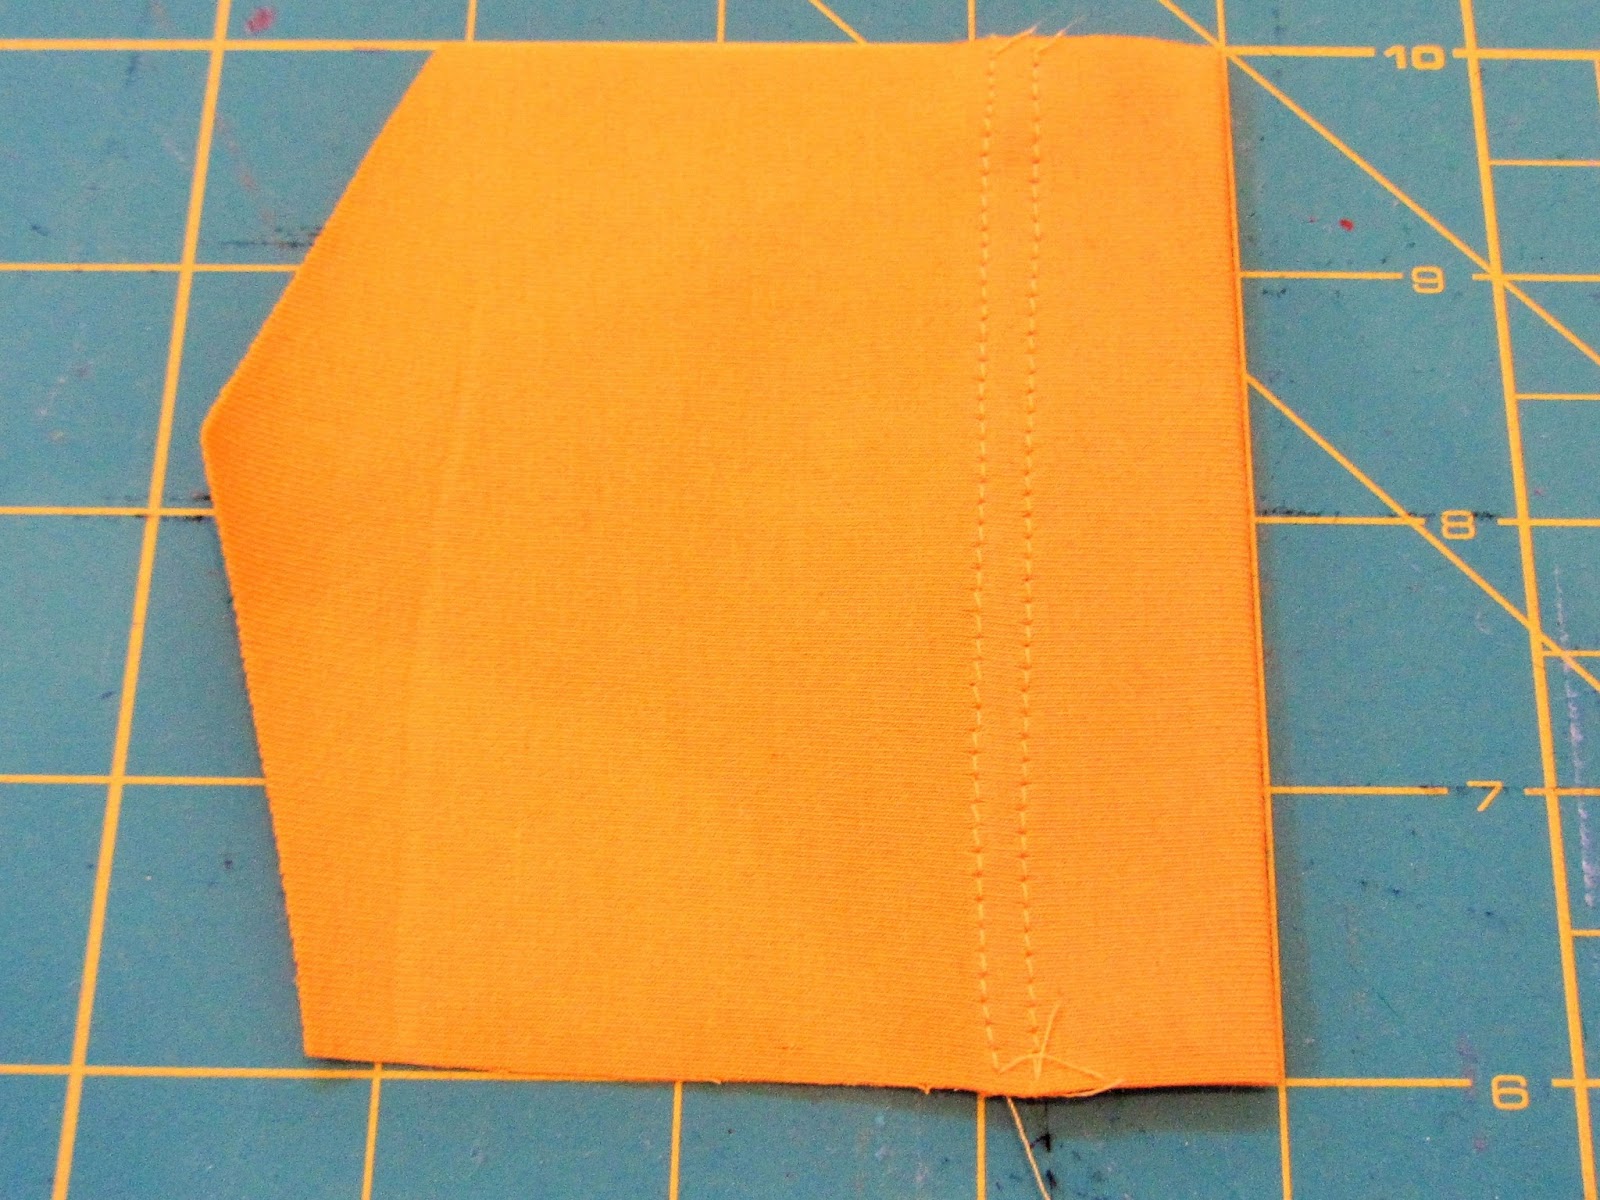
Use a single fold hem on the top edge of the pocket, press, pin, and sew in place with the desired stitch.
For a more professional finish, use the same stitch for the top edge and the circumference of the pocket.
Press the seam allowance for the sides and bottom edges of the pocket toward the wrong side of the fabric.
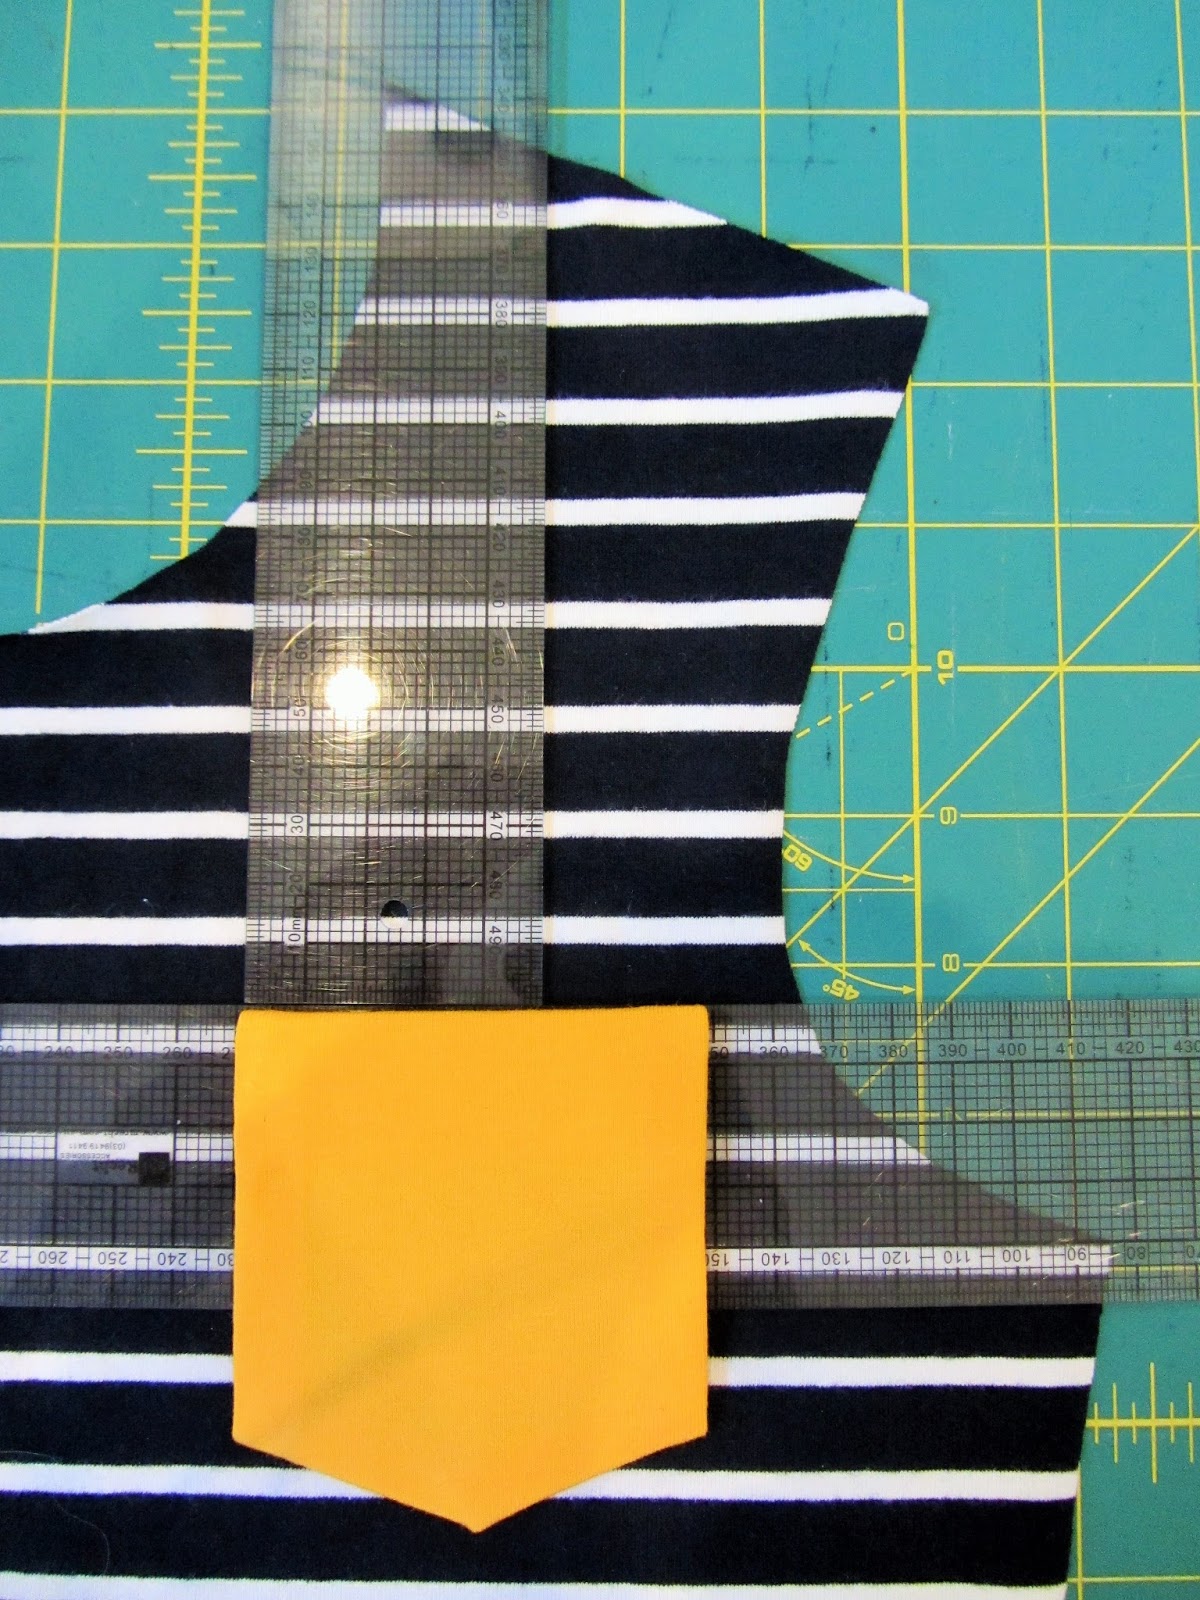
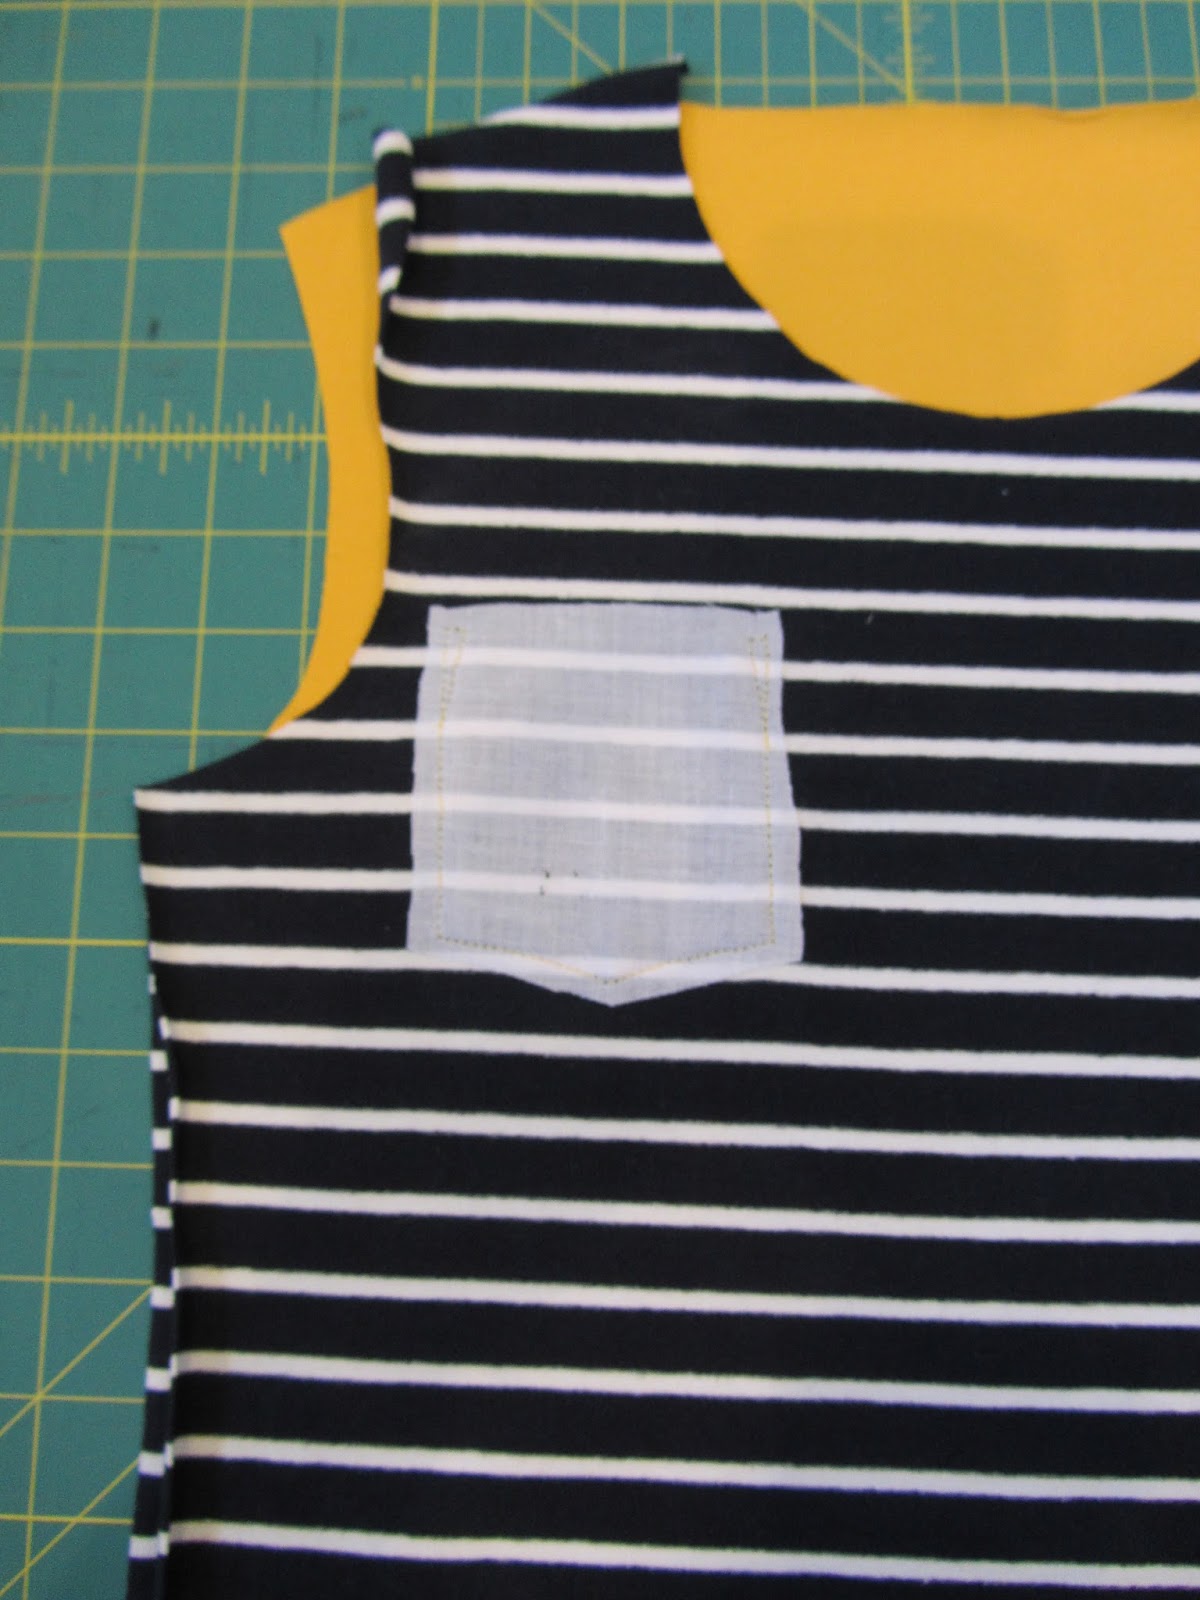
It is always easier to attach a pocket to a garment before assembling. This will ensure the fabric is not distorted. Before attaching your pocket to the garment, work out its general placement, and stabilize the wrong side with iron-on interfacing or tear-away stabilizer. Use a piece that is approximately 1” bigger in width and length than your pocket.
Using the information provided in your FREE pattern, regarding the placement for the size you are making, measure, and pin the pocket in place.
If you feel the pocket will still move whilst sewing with the pins in place, you could opt to use wonder tape to hold the pocket in place.
To start begin near the lowermost point of the hem, on the upper right-hand side of the pocket. Here you will form a triangle to reinforce the pocket on the garment. Straight stitch towards the upper fold of the hem of the pocket, then pivot and sew two stitches towards the corner and then pivot once again, forming a complete triangle. Continue down the right side, along the bottom and up the left edge of the pocket. Complete attachment of the pocket with a second triangle, on the upper left side of the pocket,
back-tack to secure.
Trim threads and either trim away the excess interfacing or carefully remove the tear-away stabilizer on the back of the garment. If you used wonder tape this will dissolve away when washed.
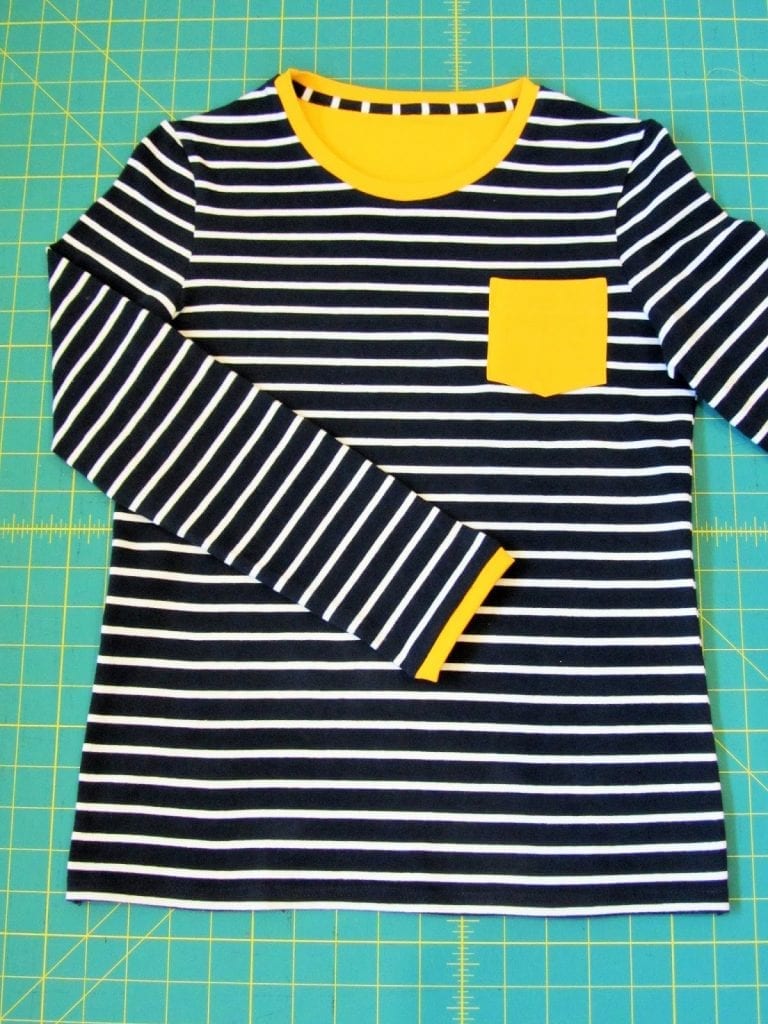
Finally, continue sewing the remainder of the garment using the #21100 Fun Tee Pattern Instructions. (Link for store below)
Now you have an up to the minute fashionable shirt that your child will be happy to hang about in.
Thank you for viewing. We hope this has inspired you to put some pockets on your tees when you sew them. Are you in need of a great fitting Fun Tee PDF Pattern for your little ones?
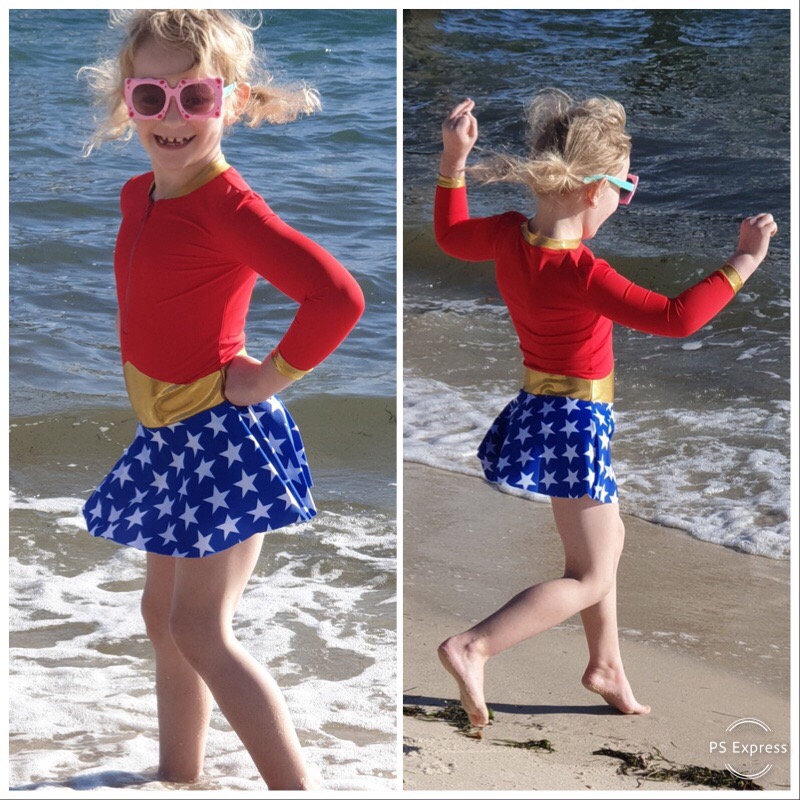
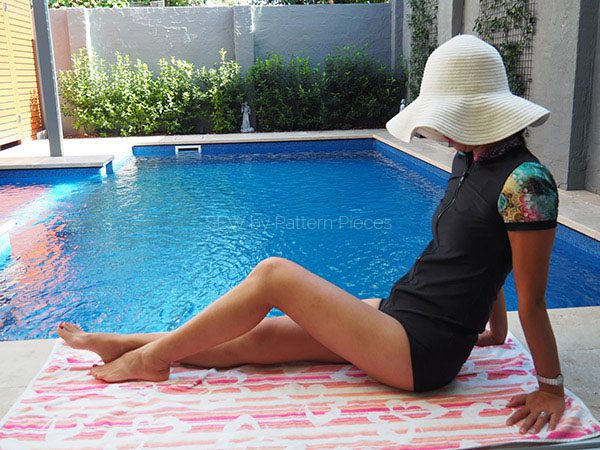
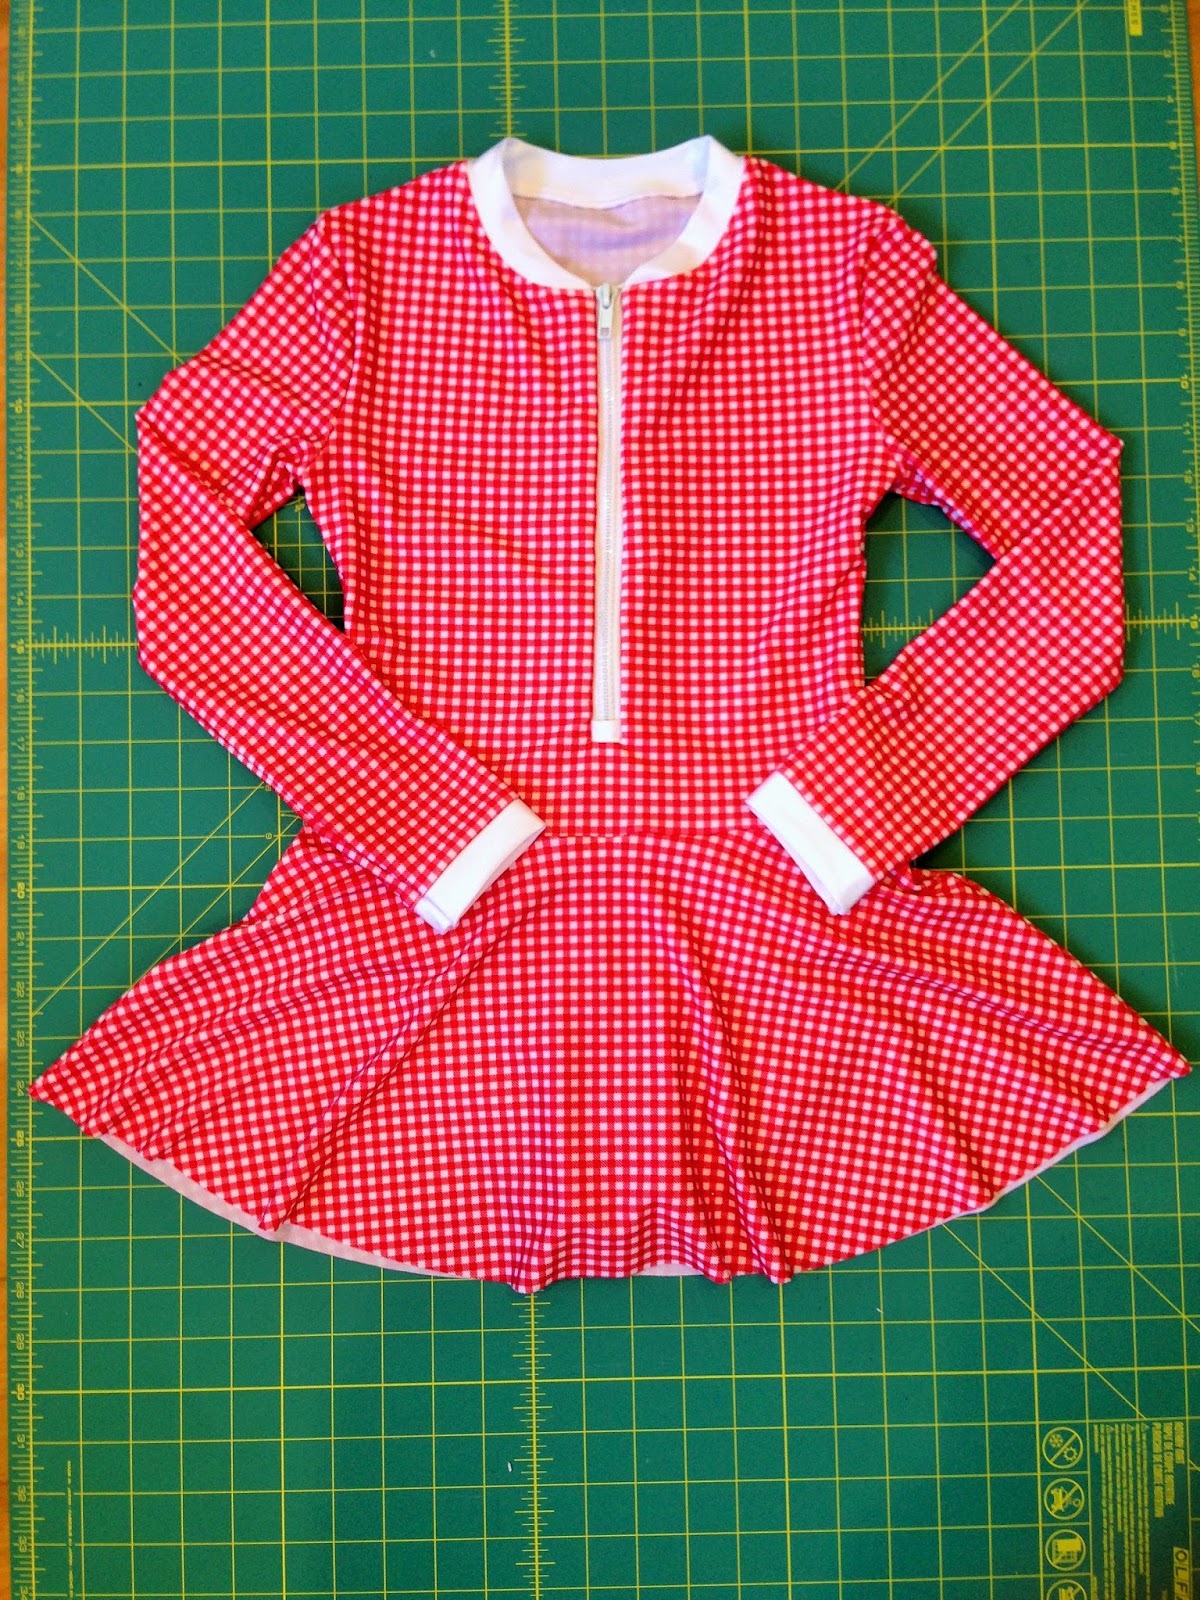
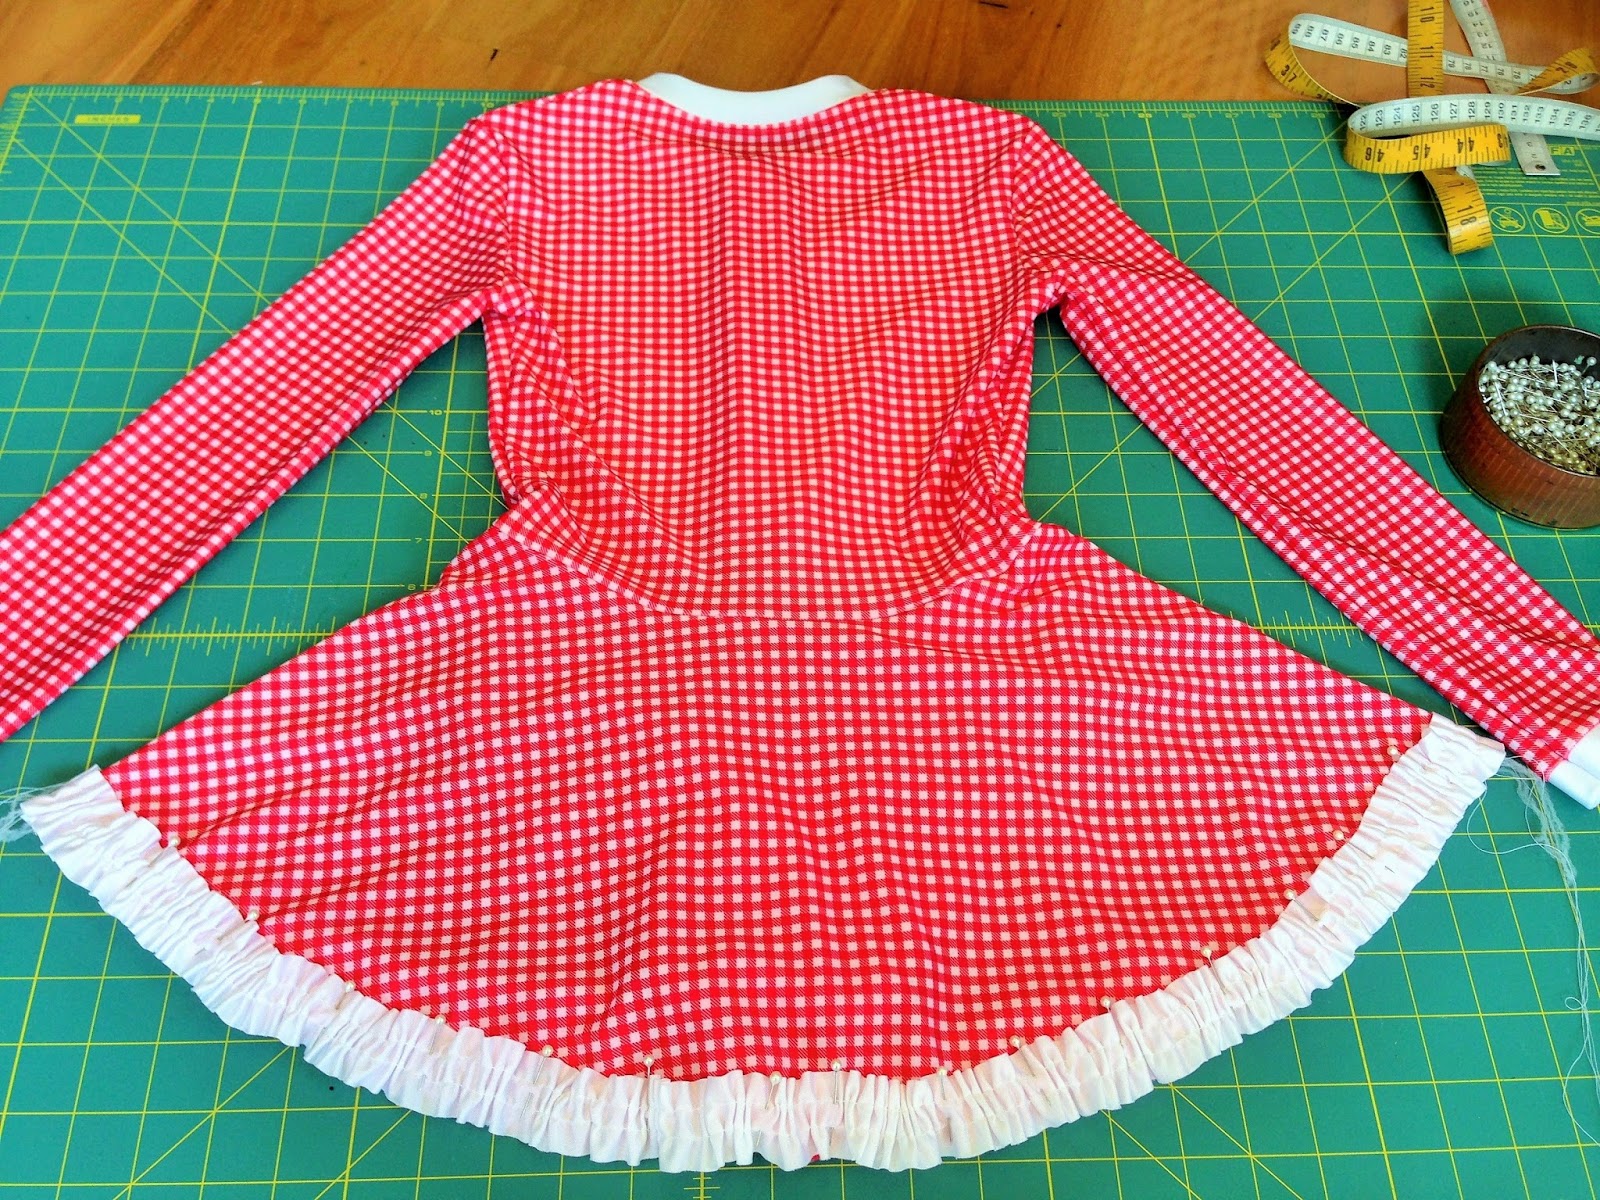
Today I am very excited to show you my latest sewing project. Stinger bodysuit vintage ruffle hack. From the time that I created this pattern, my daughter’s friends have quite vocally let me know they wanted one as well. Slowly the whole group of them are getting one to wear, this is the 10th Stinger Suit that I have had the pleasure to sew.
The image above shows the finished swimsuit, however, it does look like it needs a little more to complete the look in this fabric and we have decided it needs a ruffle on the hem. So today I am going to show you how to add a ruffle to the Stinger Bodysuit, which can be utilized on any project made from Lycra.
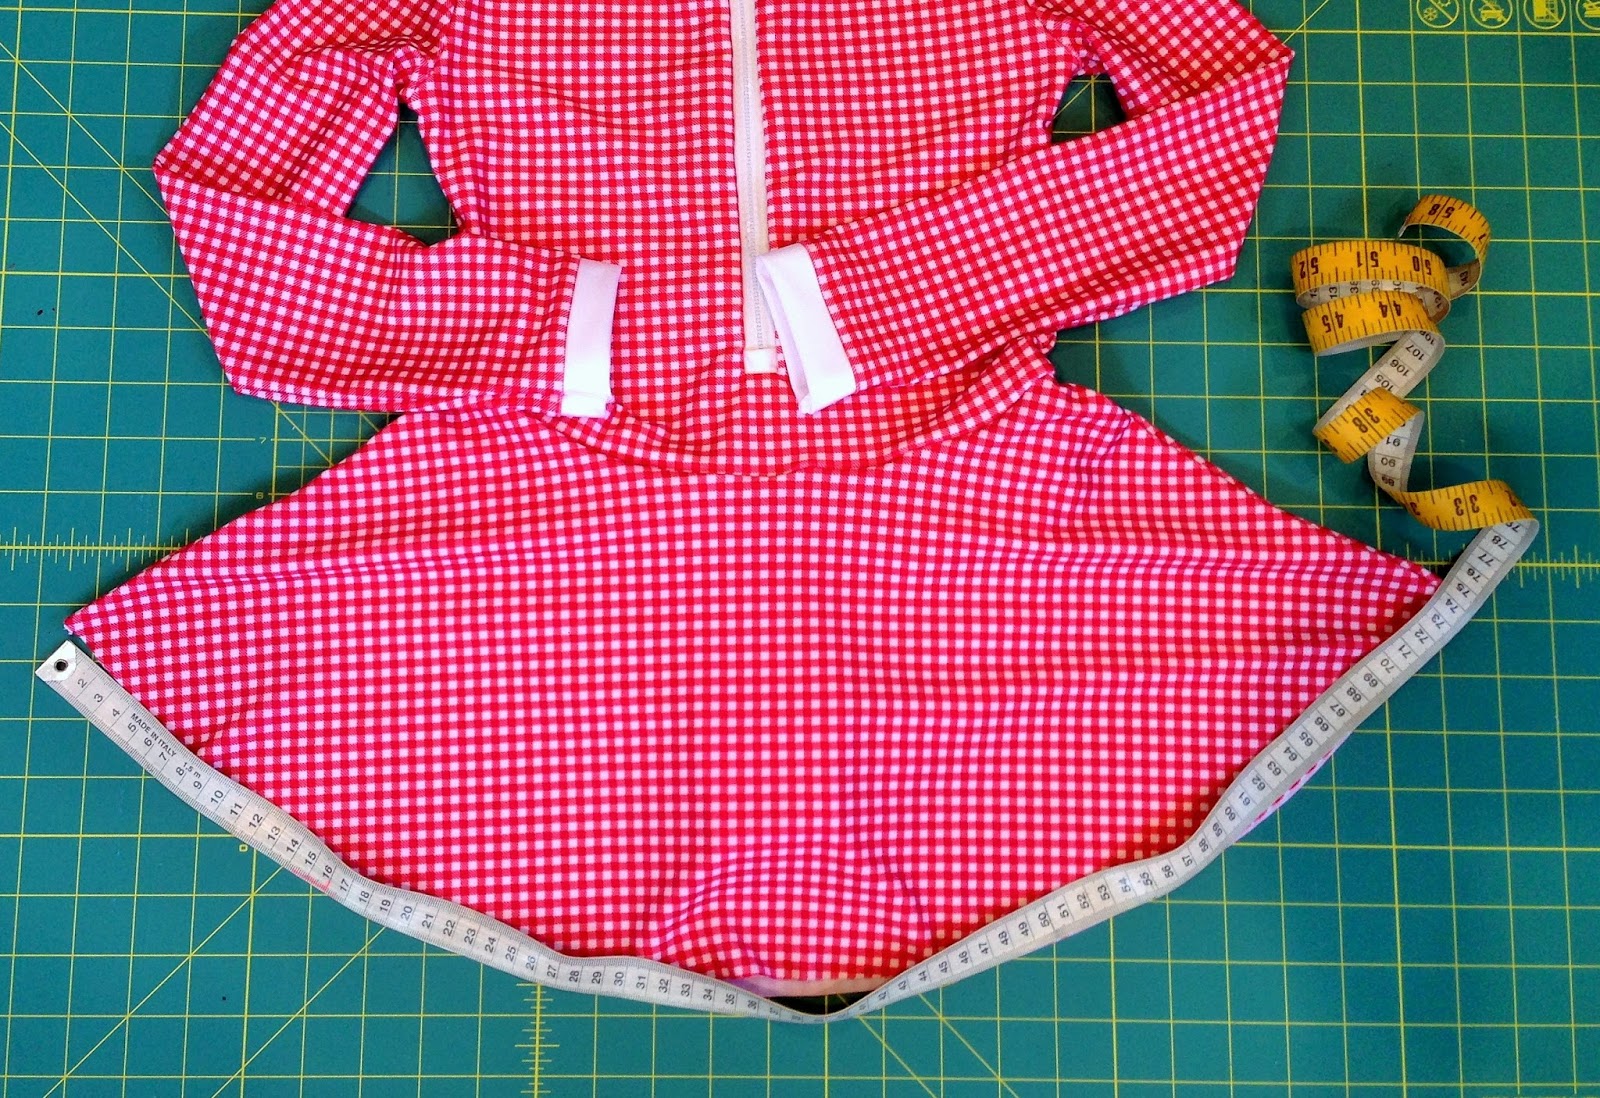
1. Firstly, measure the hem of the area you will be adding the ruffle to.
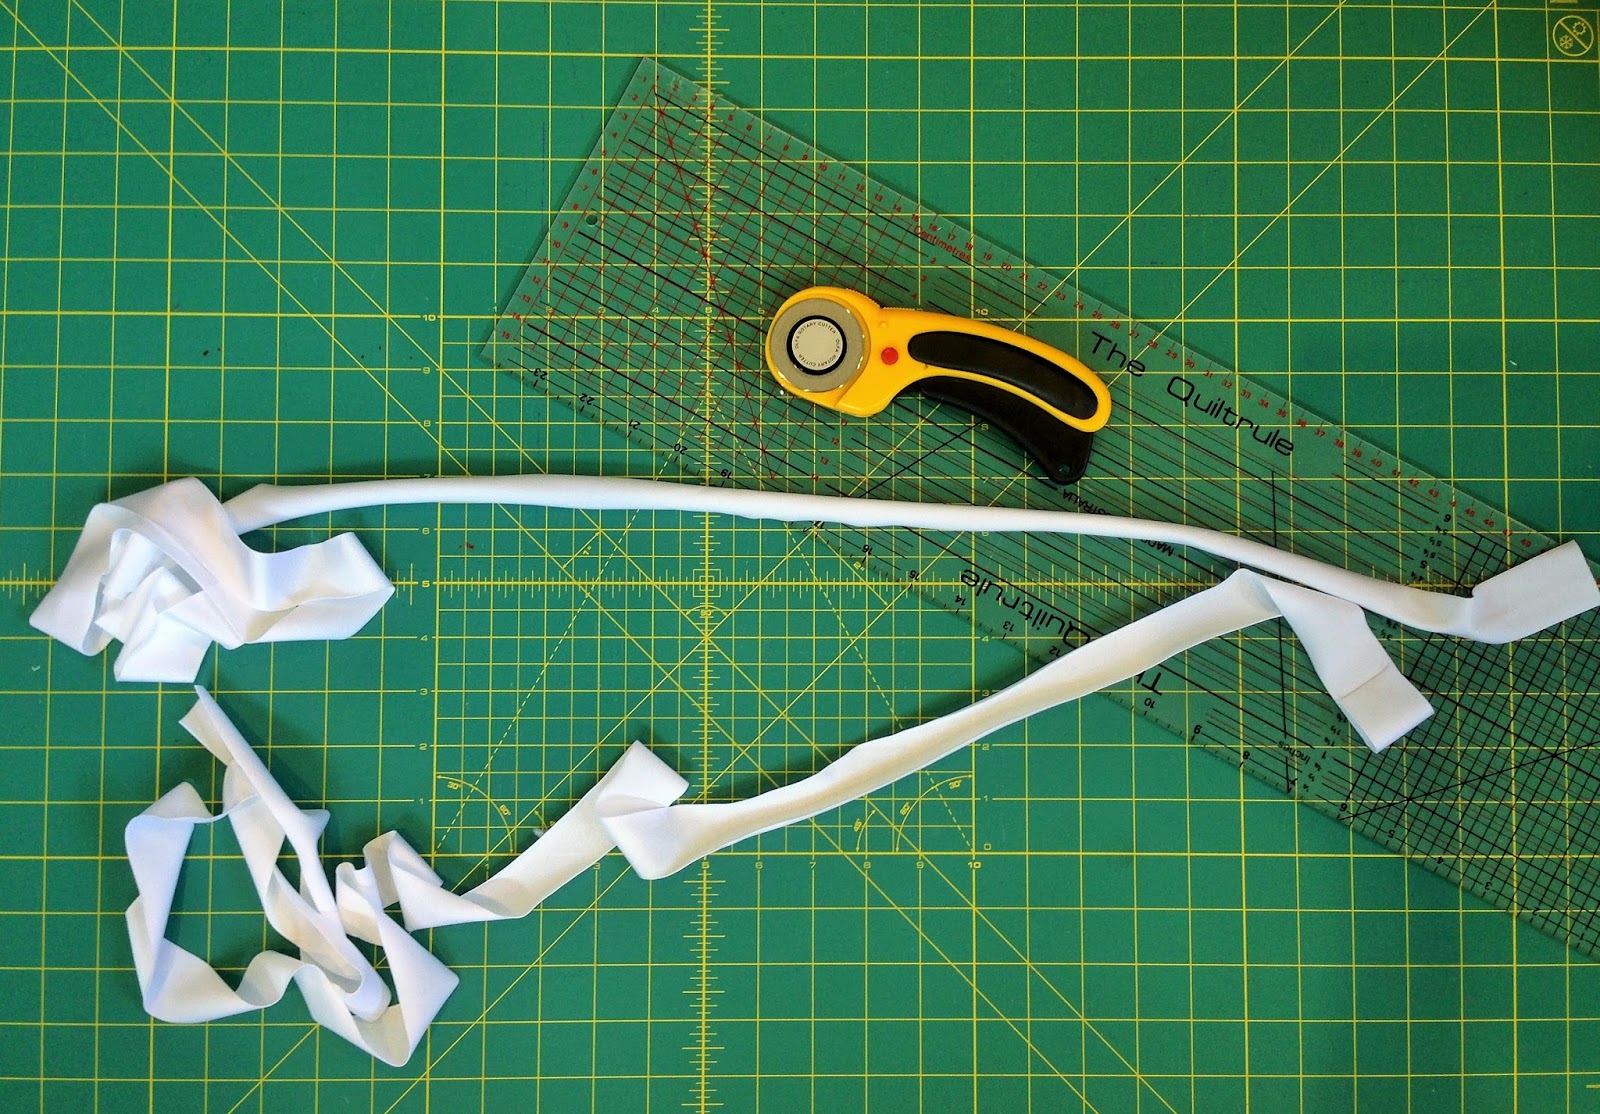
2. Next cut the strips to be ruffled at 1 1/4″ or 3cm wide. These strips need to be cut with the longest measurement going from selvage to selvage 2 1/2 times the garment length measured. The total circumference of fabric required was too long for the width of fabric, so I cut 2 1/2 times the front for the front strip and 2 1/2 times the back for the back strip.
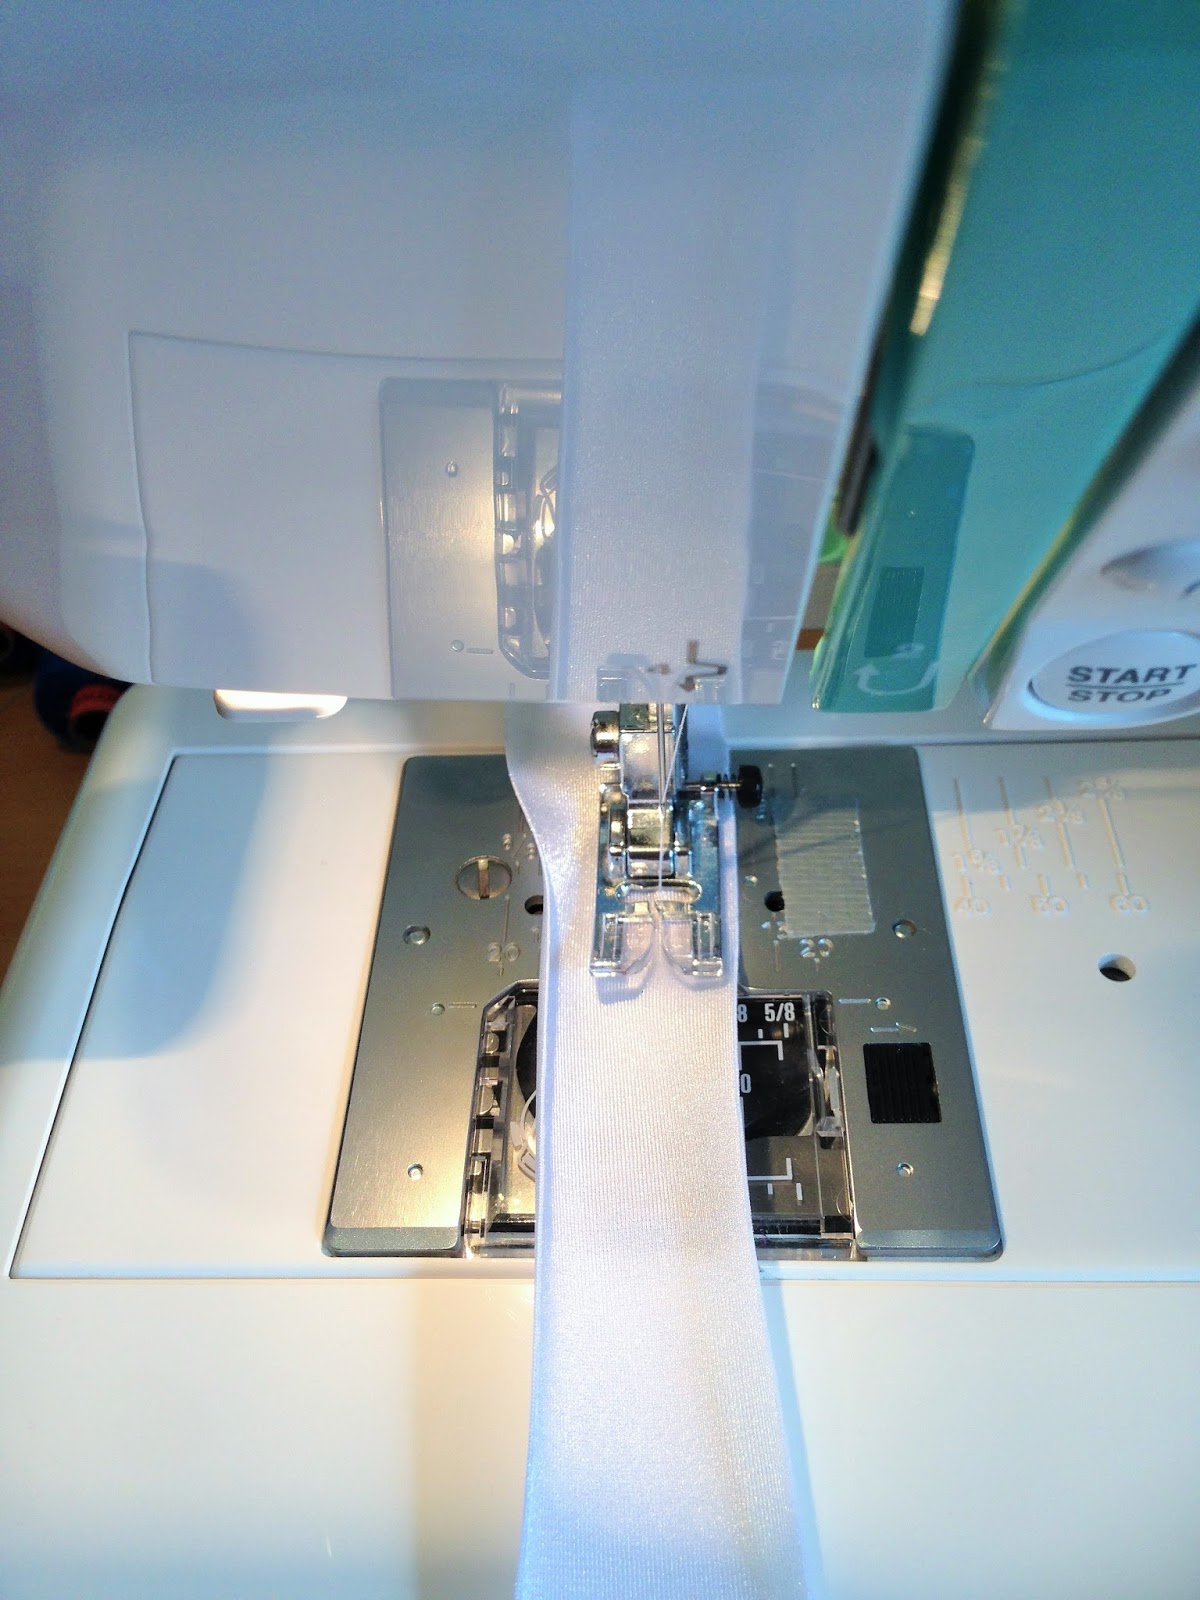
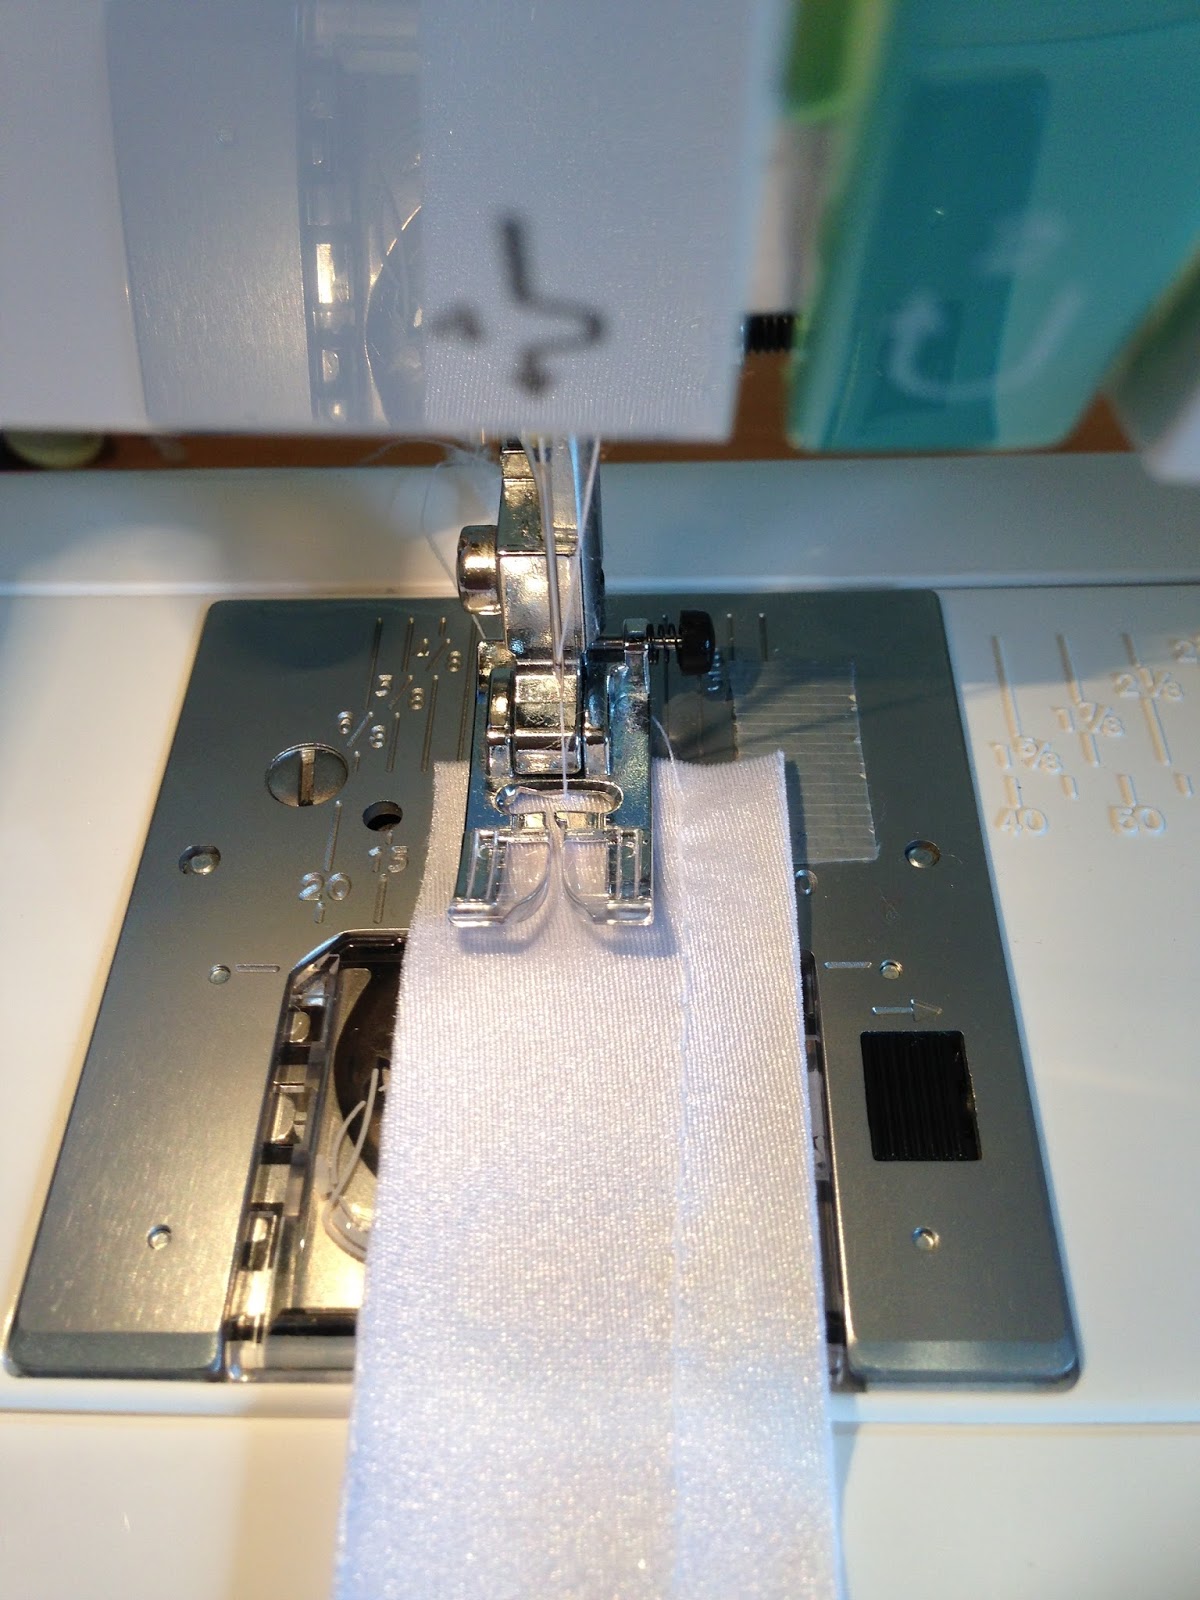
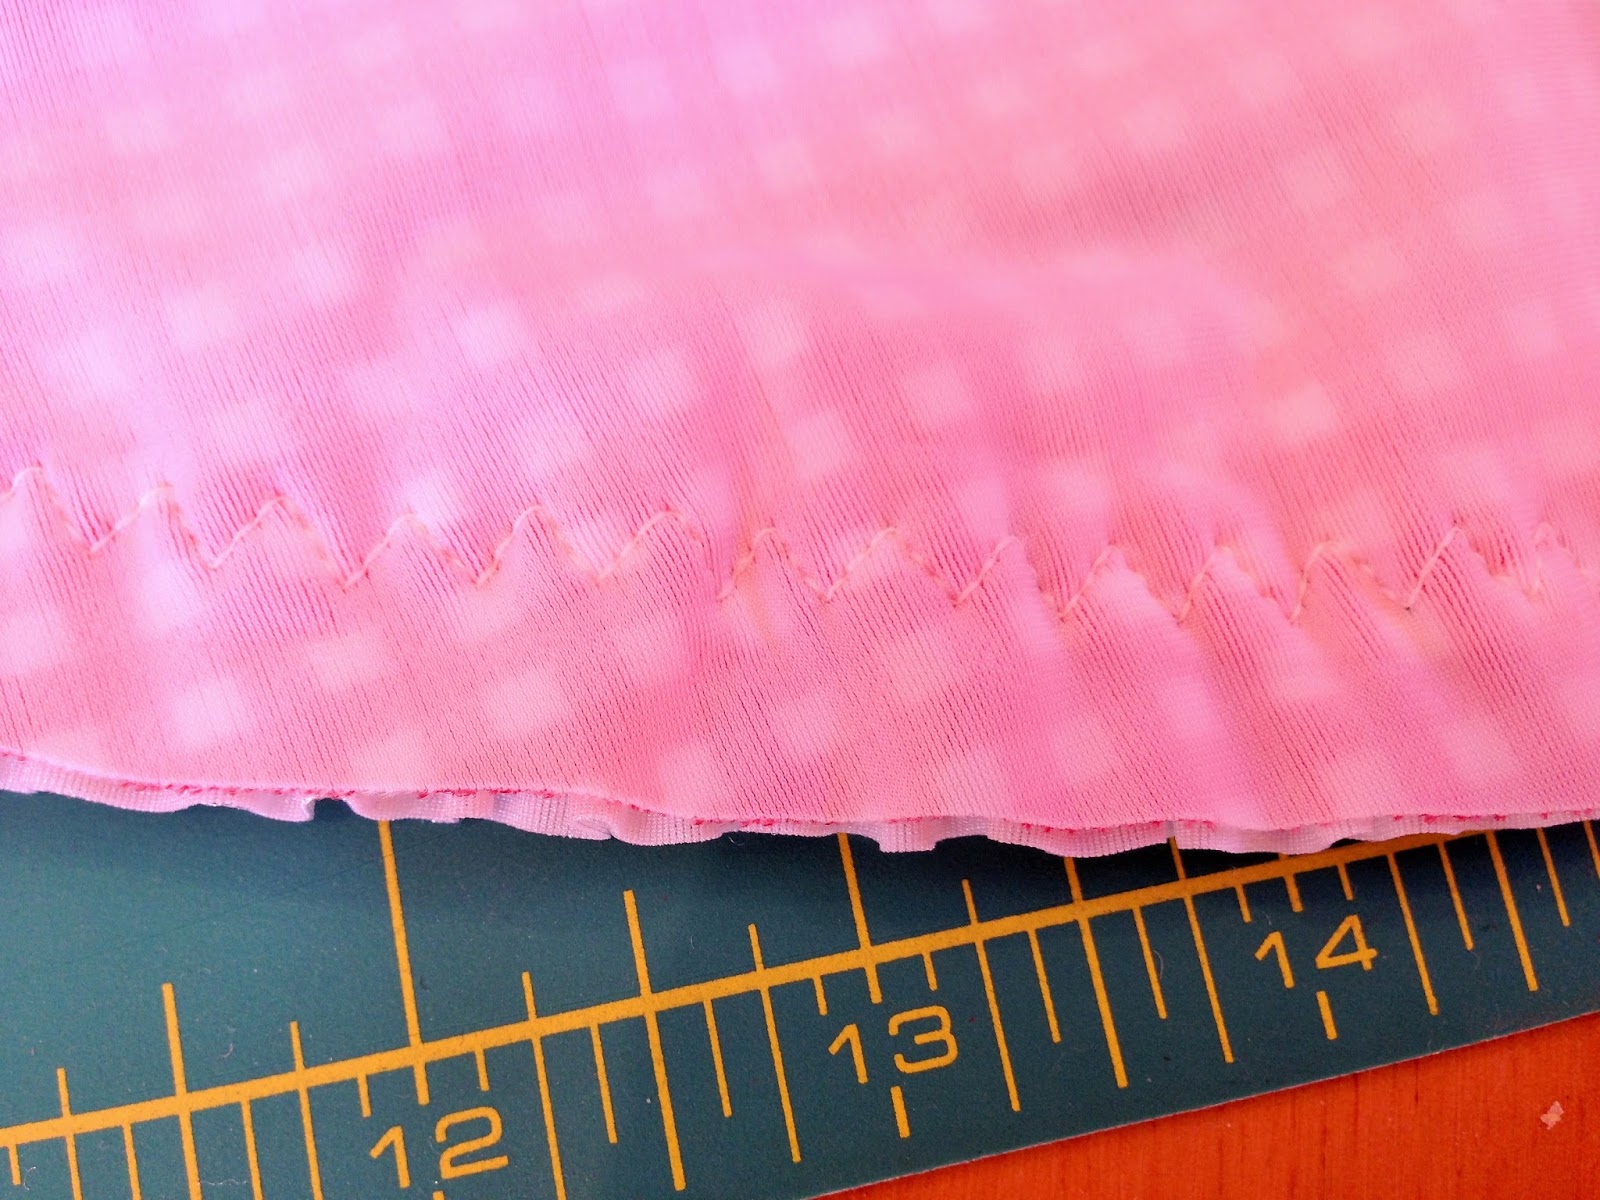
3. Now run a gathering stitch along the left and right edge of our strips of fabric. Start by putting your machine on the longest straight stitch possible. Then line up the right edge and sew 3/8″ or 1cm in from the edge, as shown below.
4. Next with the left side under the pressure foot sew the second row of gathering, again this is done 3/8″ or 1cm in from the edge, as shown below.
5. Now pull up the gathering stitches on your strips of fabric, pulling on the bobbin threads only. Pull the threads so that they gather evenly along the length and check that they now measure the correct length to fit onto the area you wish for them to attach to.
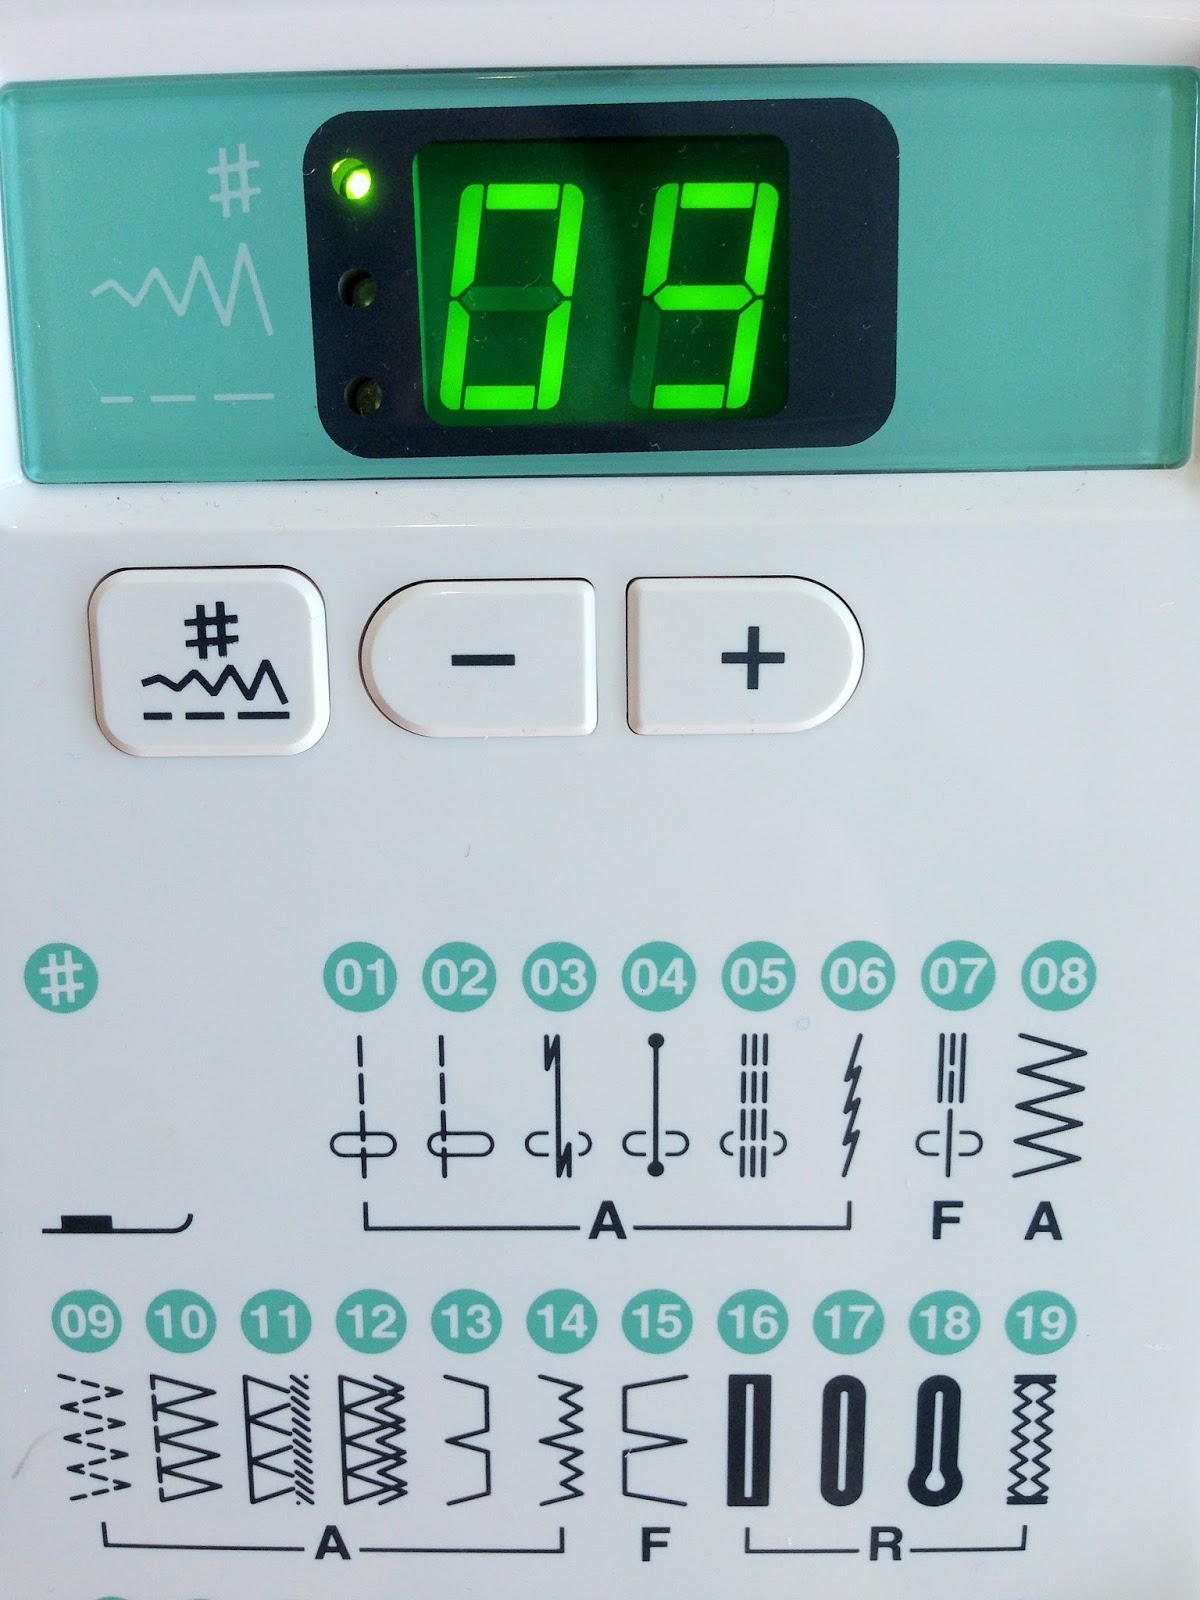
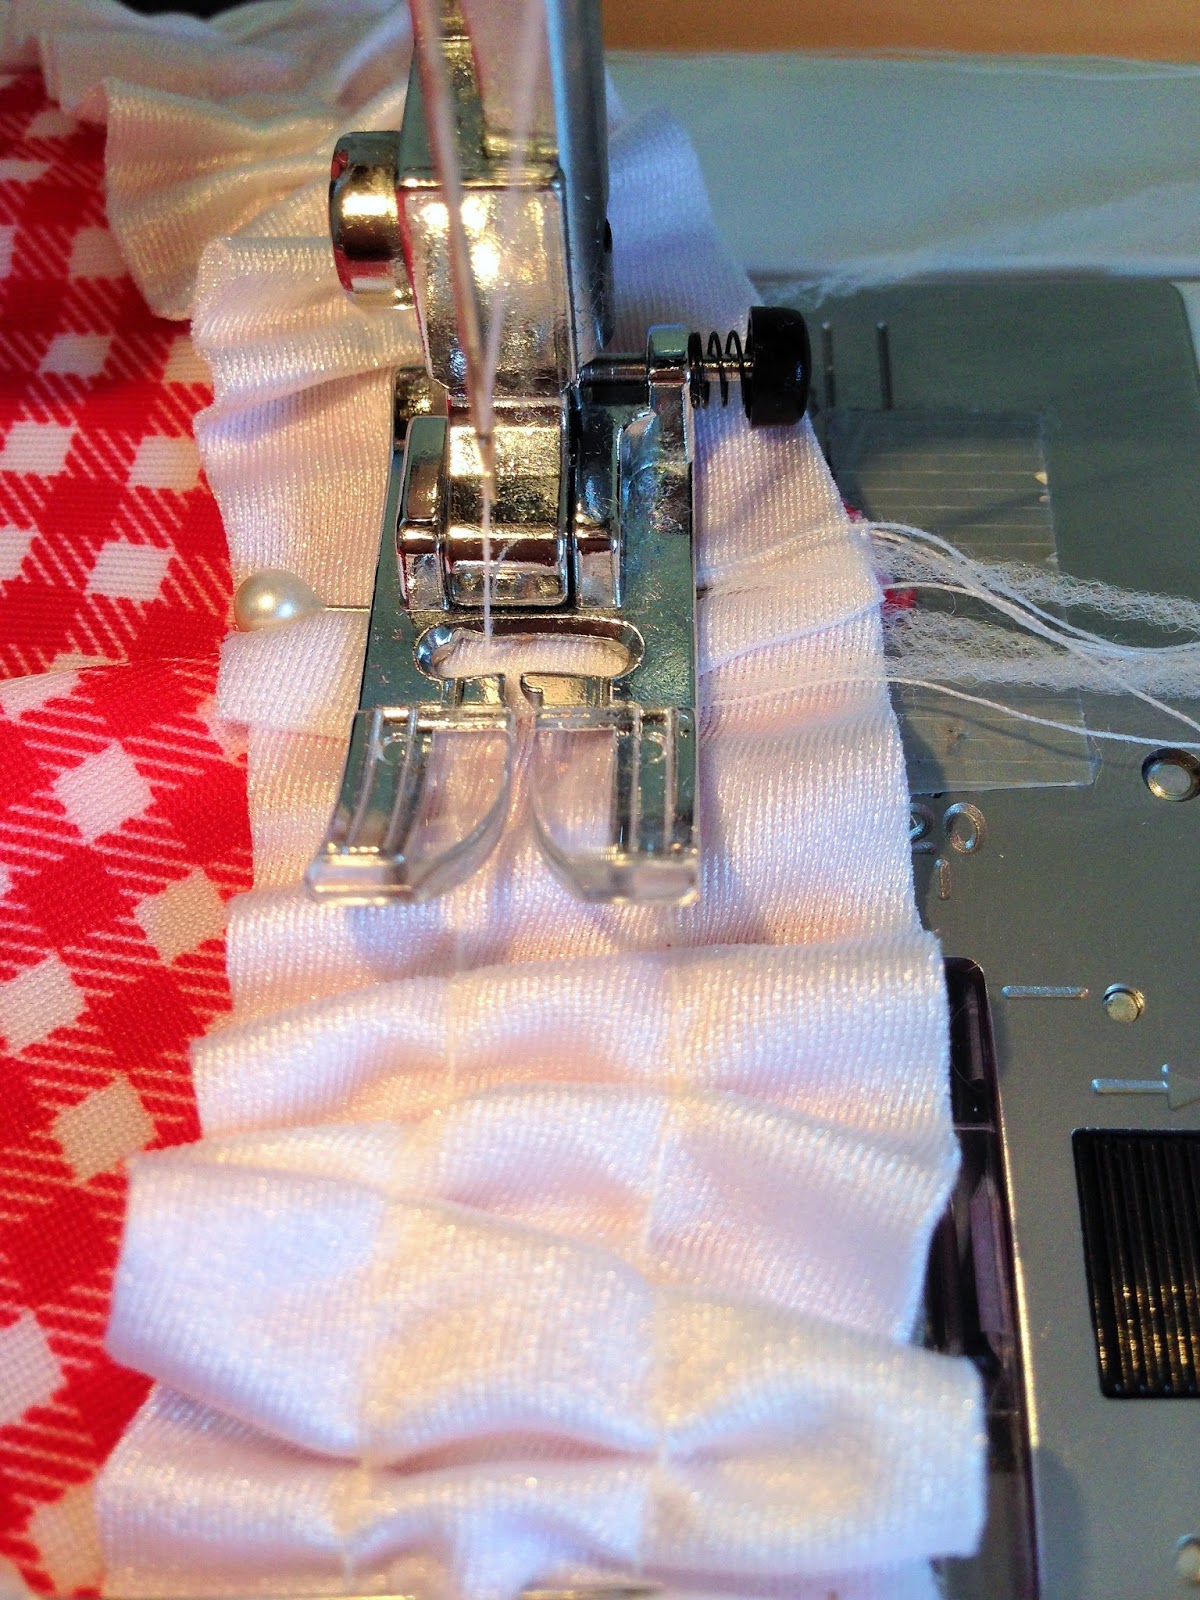
6. Next, change your machine to a wide zig-zag stitch, or in this case I used a 3 step zig zag. The reason you will use a zig-zag is because the ruffle is being added onto stretch fabric and if we use a straight stitch it will be more prone to cracking or getting damaged if the area is pulled whilst being worn.
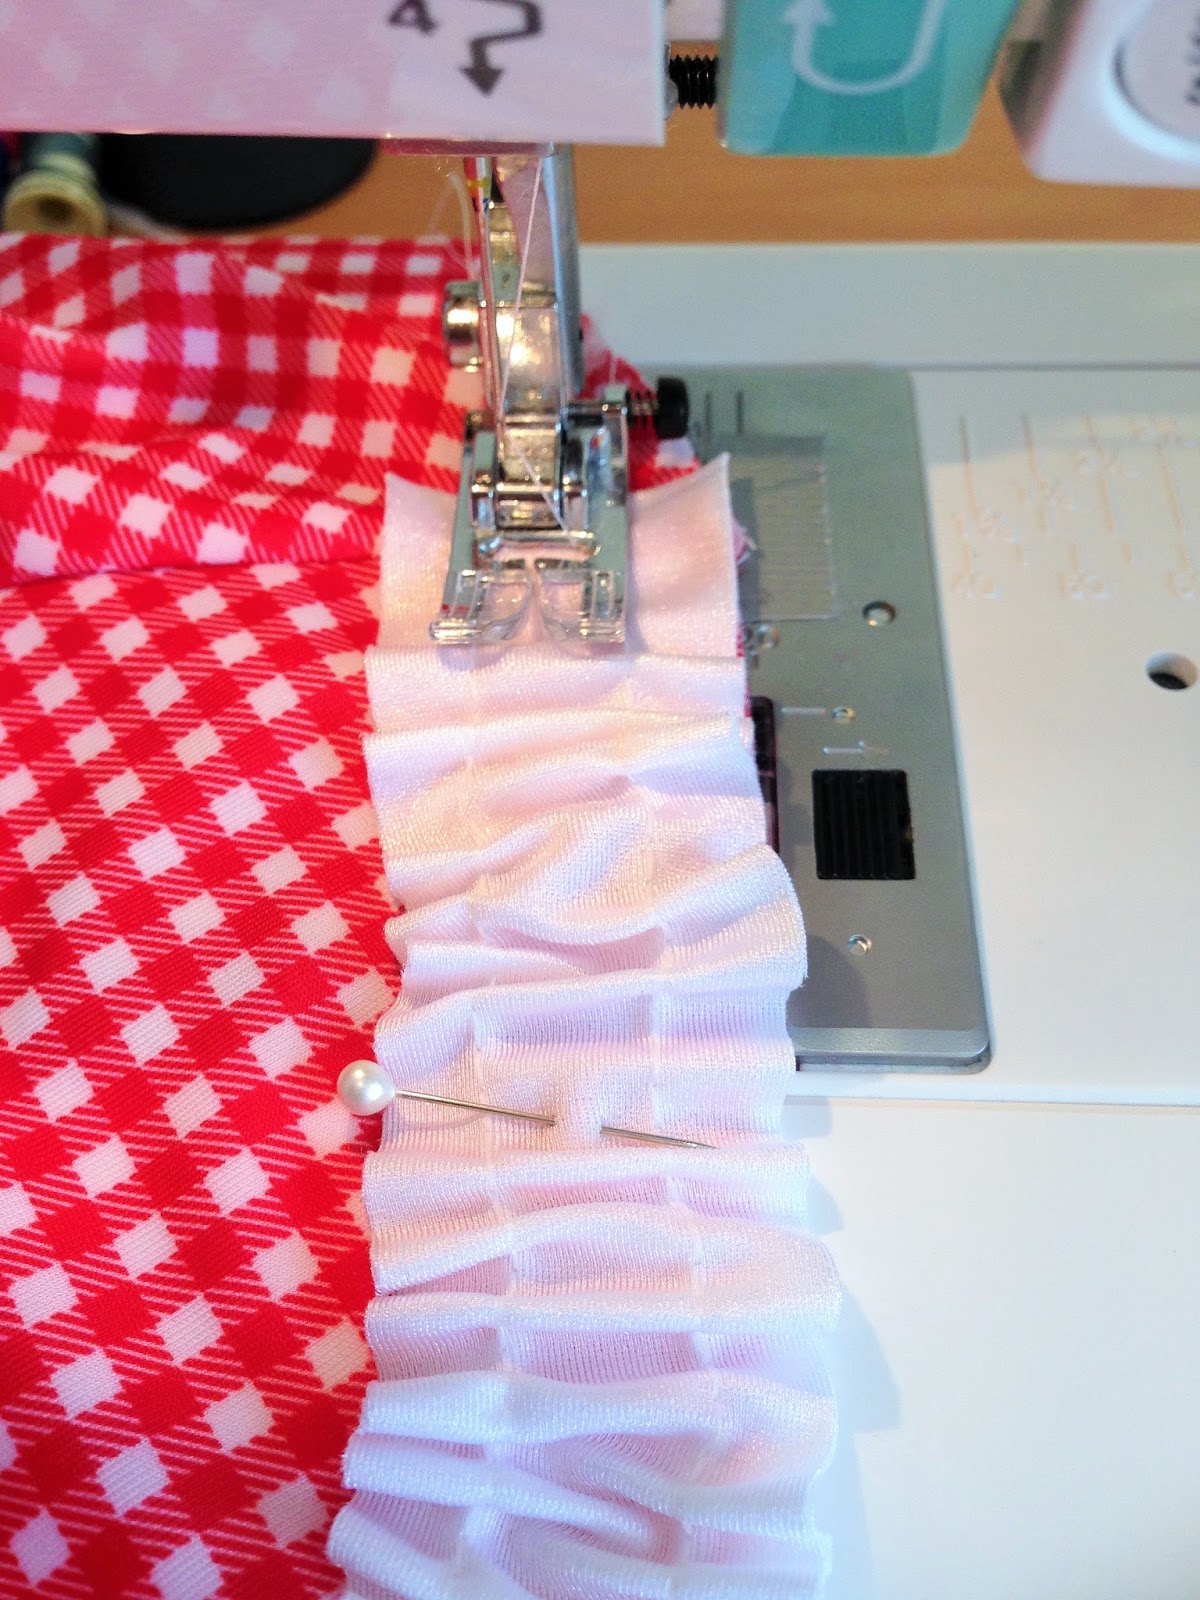
7. Pin your ruffle to the area that you are attaching it to. To begin sewing place the ruffle under the foot of the machine and let 3/8″ or 1cm overlap the side seam of the skirt. Start your sewing 3/8″ or 1cm in from the strip of edge.
Ensure you are sewing your row of zig-zag in the centre of the ruffle strip and do not stretch the skirt as you sew.
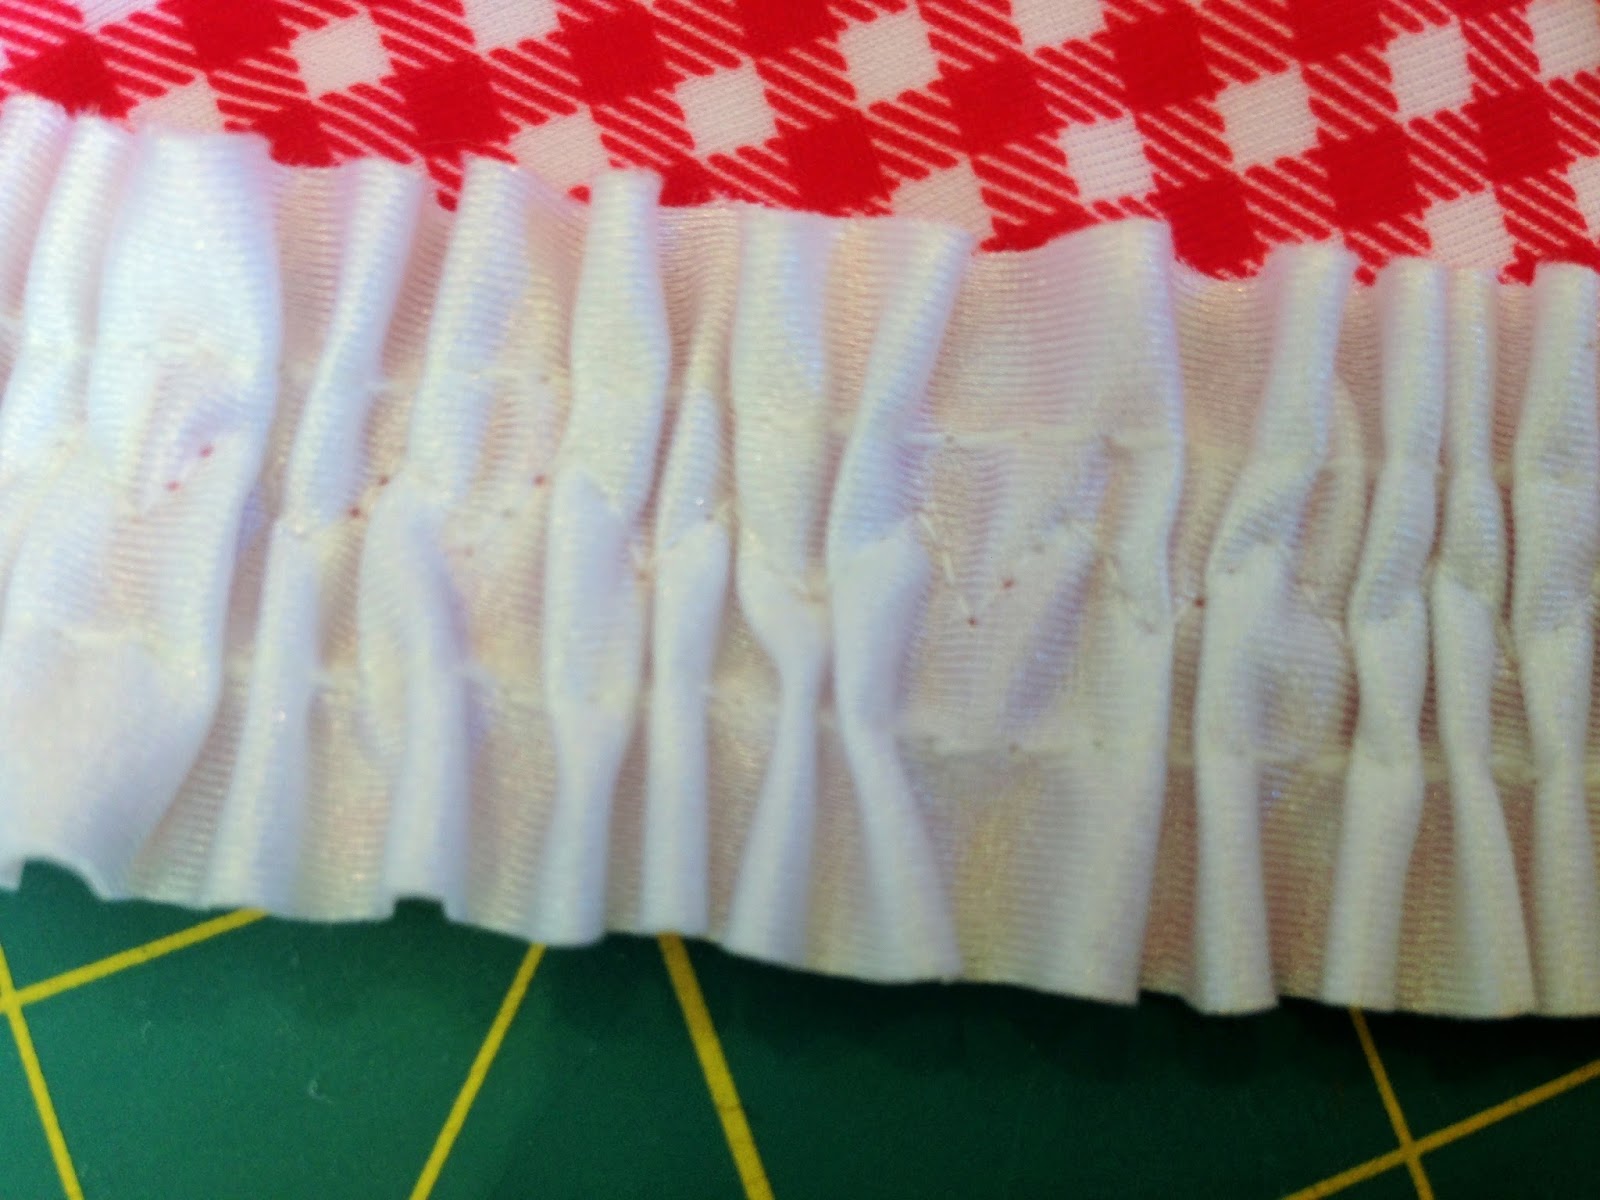
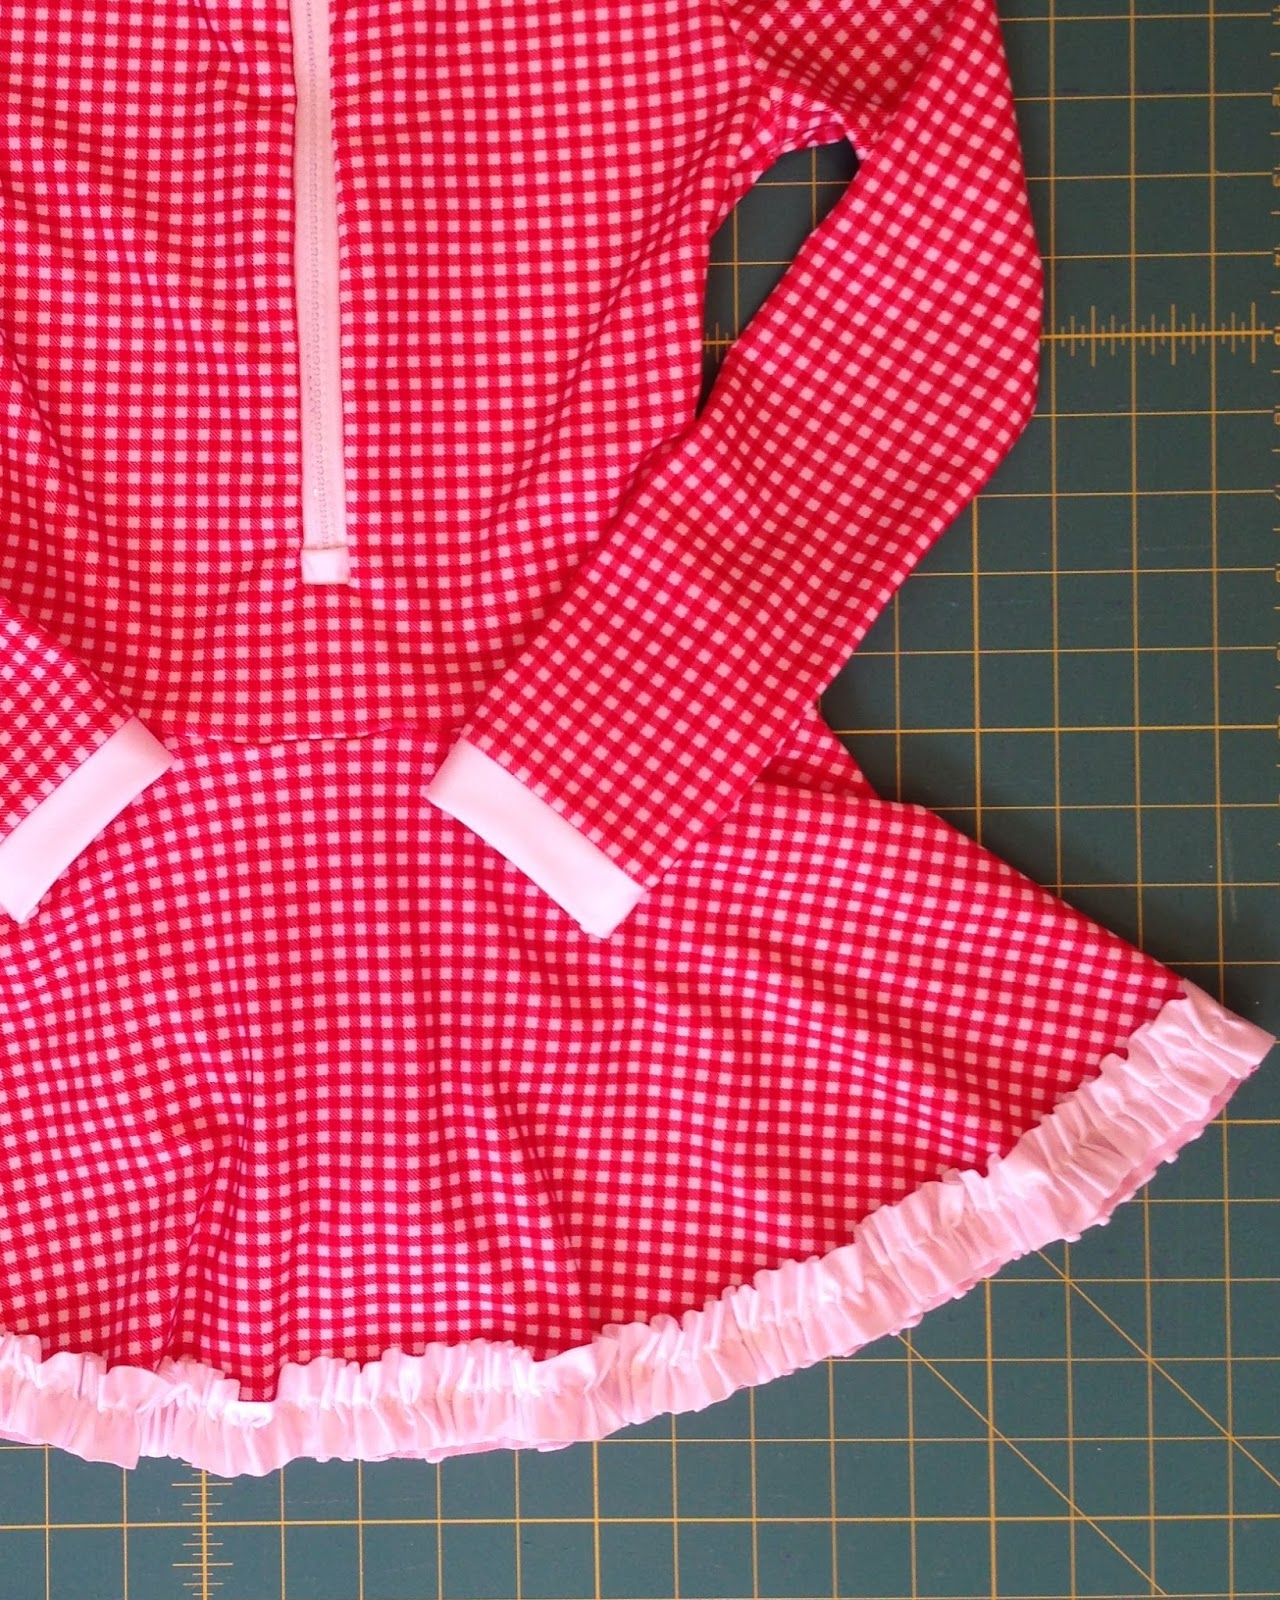
8. This how it should look once sewn.
9. This is what the reverse side of the skirt looks like. With the ruffle slightly showing as it covers the raw edge of the skirt.
10. Next place and pin the ruffle to the back of the skirt.
11. To begin sewing the ruffle onto the back tuck the back ruffle under the front 3/8″ or 1cm overlap and continue using your zig-zag to attach.
12. Remove all your gathering stitches and yippee you are done! Easy as that! Now you will want to start ruffling everything in sight.
The complete Stinger Suit can be made by following the instructions that come with the pattern. If you would like to make this suit without a skirt, instructions to eliminate it also come with the pattern. How cute is this fabric?
You can also visit the Sew by Pattern Pieces Sewing Circle to ask questions or gather more sewing inspiration. Thank you for your time today and happy sewing!
Ready to make your own?
Shop for Pattern: Girls Pattern HERE Ladies Pattern HERE


